nikon speedlight sb 700 user manual

The Nikon Speedlight SB-700 is a versatile and advanced flash unit designed for enthusiasts and professionals‚ offering superior lighting control and compatibility with Nikon cameras.

1.1 Overview of the SB-700 Speedlight

The Nikon Speedlight SB-700 is a high-performance flash unit designed for enthusiasts and professionals‚ offering advanced lighting control and compatibility with Nikon cameras. It integrates seamlessly with Nikon’s Creative Lighting System (CLS)‚ enabling wireless flash operation and creative lighting techniques. With its intuitive interface and robust features‚ the SB-700 delivers reliable results in various shooting conditions. Whether for portraits‚ events‚ or studio work‚ this flash unit provides exceptional versatility and ease of use‚ making it an essential tool for photographers aiming to enhance their lighting capabilities.

1.2 Key Features and Benefits

The Nikon Speedlight SB-700 offers advanced flash capabilities‚ including i-TTL for precise exposures and wireless operation for off-camera lighting. Its Manual Flash mode provides custom control‚ while the Creative Lighting System (CLS) enables complex lighting setups. Compatible with Nikon DSLR and mirrorless cameras‚ the SB-700 ensures seamless integration. The unit is lightweight‚ portable‚ and designed for durability‚ making it ideal for professional and enthusiast photographers. Its intuitive interface and customizable settings allow for tailored results. The SB-700 also supports repeating flash for creative effects and features a user-friendly manual available for download‚ ensuring optimal performance in various shooting scenarios.

1.3 Importance of Reading the User Manual

Reading the Nikon Speedlight SB-700 user manual is essential to unlock its full potential. It provides detailed insights into advanced features‚ modes‚ and customization options‚ ensuring proper usage and troubleshooting. The manual covers compatibility‚ firmware updates‚ and maintenance tips‚ helping users maximize the flash unit’s performance. By understanding the guide‚ photographers can avoid common issues and optimize their lighting setup for professional results.

Additionally‚ the manual offers step-by-step instructions for setting up wireless flash modes‚ adjusting settings‚ and resolving communication errors. It serves as a comprehensive resource for mastering the SB-700‚ making it indispensable for both enthusiasts and professionals seeking to enhance their photography skills with precise lighting control.

Design and Components of the SB-700

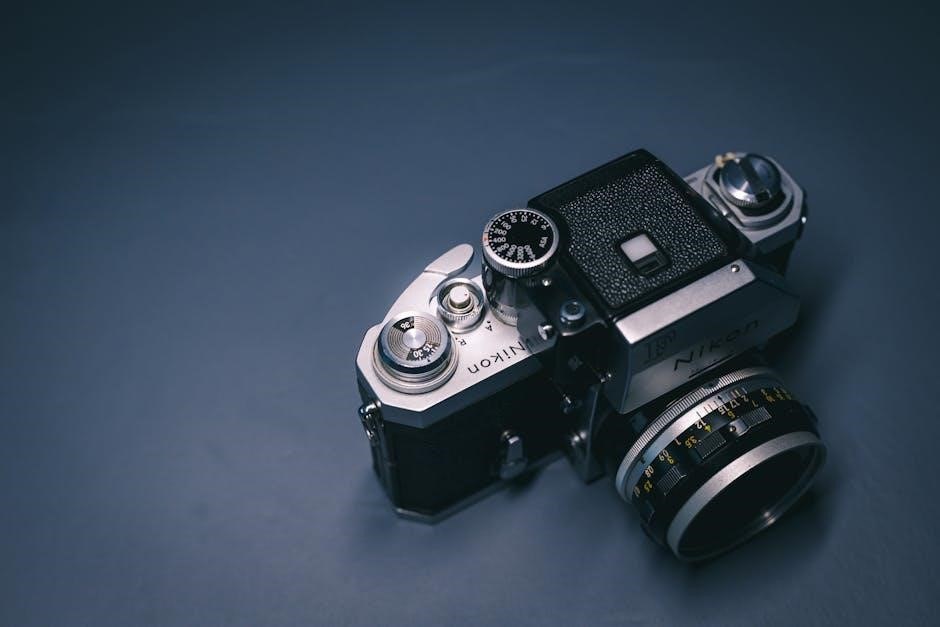
The SB-700 features a compact‚ rugged design with intuitive controls‚ including a rear LCD panel‚ mode buttons‚ and a bounce head for versatile lighting options.

2.1 External Components and Controls

The Nikon Speedlight SB-700 features a sleek and intuitive design with essential external components. The flash head is adjustable‚ allowing for rotation and tilt to achieve desired lighting effects. A power button and mode button are located on the rear for easy operation. The LCD screen displays settings and status information‚ while navigation buttons enable quick adjustments. The mounting foot ensures secure attachment to the camera’s hot shoe. Additional features include a ready light‚ test button‚ and a diffusion panel for softening light. These components provide seamless control and versatility for photographers of all skill levels.

2.2 Internal Components and Technology

The Nikon Speedlight SB-700 houses advanced internal components‚ including a precision flash tube‚ a high-voltage circuit‚ and a microprocessor for efficient flash control. Its internal technology features i-TTL flash exposure control‚ ensuring accurate lighting by communicating with Nikon cameras. The unit also includes a thermal cut-off sensor to prevent overheating during extended use. These components work together to deliver consistent and reliable flash performance‚ making it a versatile tool for photographers. The SB-700’s internal design supports wireless flash capabilities and compatibility with Nikon’s Creative Lighting System (CLS)‚ enhancing creative control and functionality.

Setting Up the SB-700 Speedlight

Setting up the SB-700 involves unboxing‚ attaching the flash to your Nikon camera‚ and installing batteries. Follow the manual for proper installation and initial configuration.

3.1 Unboxing and Initial Setup

Upon unboxing the Nikon Speedlight SB-700‚ you’ll find the flash unit‚ a stand‚ and protective caps. Inspect all components for damage. Read the user manual thoroughly before proceeding. Begin by mounting the flash on your camera’s hot shoe‚ ensuring it clicks securely into place. Turn on the camera and flash‚ then navigate to the camera’s flash settings to confirm synchronization. Perform a basic test shot to ensure proper functionality. Familiarize yourself with the controls and settings to prepare for advanced use.

3.2 Attaching the Speedlight to the Camera

To attach the Nikon Speedlight SB-700 to your camera‚ start by ensuring the camera’s hot shoe is clean and free of debris. Align the Speedlight’s mounting foot with the hot shoe‚ sliding it onto the connector until it clicks securely into place. Gently tighten the locking screw to ensure stability. For TTL functionality‚ ensure the Speedlight is fully seated and the camera is set to the correct flash mode. If using wireless operation‚ confirm the camera and Speedlight are set to the same channel. Always test the connection by firing a test flash to ensure proper communication.

3.3 Battery Installation and Management

Proper battery management is crucial for optimal performance of the Nikon Speedlight SB-700. To install batteries‚ ensure the flash unit is turned off. Use four AA-sized batteries‚ preferably alkaline or nickel-based‚ for reliable power. Insert the batteries into the compartment‚ aligning them correctly to avoid misconnection. Avoid mixing old and new batteries or different types. Clean the terminals periodically to prevent corrosion. Turn off the Speedlight when not in use to conserve battery life. Replace batteries when performance diminishes or if they show signs of wear. Always store spare batteries in a cool‚ dry place for extended shelf life.

Basic Operating Modes of the SB-700

The SB-700 offers three primary operating modes: i-TTL for automatic flash exposure‚ Manual for custom control‚ and Repeating Flash for creative effects in photography.

  • i-TTL Mode: Automatically adjusts flash output for precise exposure.
  • Manual Mode: Allows users to set flash power manually for tailored results;
  • Repeating Flash: Fires multiple flashes at set intervals for dynamic effects.

4.1 i-TTL Mode for Automatic Flash

The i-TTL (Intelligent Through-The-Lens) mode on the Nikon Speedlight SB-700 offers automatic flash exposure control‚ ensuring precise lighting in various shooting conditions. This mode leverages the camera’s metering system to calculate the optimal flash output‚ simplifying photography for users. It automatically adjusts flash power based on the scene‚ delivering consistent results without manual adjustments. Compatible with Nikon DSLR cameras‚ i-TTL mode is ideal for beginners and professionals alike‚ providing seamless integration with Nikon’s Creative Lighting System (CLS) for advanced wireless lighting setups. It minimizes overexposure and underexposure‚ making it a reliable choice for dynamic lighting environments.

4.2 Manual Flash Mode for Custom Control

The Manual Flash Mode on the Nikon Speedlight SB-700 offers full control over flash output‚ allowing photographers to set the power manually between 1/1 to 1/128. This mode is ideal for creative lighting setups‚ enabling precise adjustment of light intensity to match specific scenes. Users can bypass automatic settings and define exact flash levels‚ ensuring consistent results. The SB-700’s manual mode is compatible with both Nikon DSLR and mirrorless cameras‚ supporting wireless operation through the Creative Lighting System (CLS). For detailed guidance‚ the user manual provides step-by-step instructions on configuring and troubleshooting manual flash settings.

4.3 Repeating Flash Mode for Creative Effects

The Repeating Flash Mode on the Nikon Speedlight SB-700 allows for multiple flash firings during a single exposure‚ creating unique stroboscopic effects. This mode is ideal for capturing motion trails or adding dynamic elements to images. Users can customize the number of flashes and frequency to achieve desired results. The mode is compatible with Nikon’s Creative Lighting System (CLS) and works seamlessly with both digital and 35mm SLR cameras. It’s a powerful tool for experimenting with light and creativity in various photography scenarios‚ offering precise control over flash output for artistic expression.

Advanced Flash Modes and Techniques

The SB-700 offers wireless flash‚ multi-flash unit control‚ and advanced sync speed options‚ enabling creative lighting setups and precise control over illumination in various photography scenarios.

5.1 Wireless Flash Mode for Remote Shooting

The Nikon Speedlight SB-700’s Wireless Flash Mode enables remote shooting‚ offering greater creative flexibility. It uses radio frequencies for reliable communication‚ eliminating line-of-sight restrictions. Photographers can control multiple flash units‚ synchronizing lighting across setups. This mode is ideal for complex lighting configurations‚ allowing precise control over flash power and timing. The SB-700 supports up to three groups‚ enhancing versatility. When paired with Nikon’s Creative Lighting System (CLS)‚ wireless operation becomes seamless. Ensure proper setup by consulting the user manual for optimal performance in various environments. This feature is a cornerstone of advanced lighting techniques‚ making it indispensable for professionals and enthusiasts alike.

5.2 Multi Flash Unit Control

The Nikon Speedlight SB-700 supports multi-flash unit control‚ enabling photographers to manage multiple flash units wirelessly. This feature is part of Nikon’s Creative Lighting System (CLS)‚ allowing for precise control over remote flashes. Users can assign flashes to different groups (A‚ B‚ C‚ D) and adjust their power levels individually or uniformly. The SB-700 can function as a master or remote unit‚ offering flexibility in complex lighting setups. Wireless communication via infrared ensures reliable synchronization and eliminates the need for cables. This capability enhances creativity‚ enabling photographers to achieve dynamic lighting effects in various environments.

Multi-flash control also allows for advanced lighting ratios‚ ensuring balanced illumination in scenes. Photographers can customize settings to suit their creative vision‚ making the SB-700 a powerful tool for professional and enthusiast photographers alike.

5.3 Sync Speed and Shutter Considerations

Understanding sync speed and shutter considerations is crucial for optimizing flash photography with the Nikon Speedlight SB-700. The sync speed refers to the maximum shutter speed at which the flash can fully illuminate the image without causing partial exposure. For the SB-700‚ the default sync speed is typically 1/250th of a second‚ but this can vary depending on the camera model. When using faster shutter speeds‚ photographers may encounter issues like ghosting or banding. To address this‚ the SB-700 supports High-Speed Sync (HSS)‚ allowing flash use at speeds beyond the sync limit. Properly setting the shutter speed and enabling HSS ensures balanced exposures in bright lighting conditions.

Customizing the SB-700 Settings

Customize the SB-700 by adjusting flash compensation‚ setting custom functions‚ and updating firmware for enhanced performance and personalized control over your flash photography experience effortlessly.

6.1 Adjusting Flash Compensation

Flash compensation on the Nikon Speedlight SB-700 allows precise control over the flash output‚ enabling photographers to balance lighting in various environments. Users can adjust the compensation in increments of +/-3 EV to achieve the desired exposure. This feature is particularly useful for enhancing or reducing the flash intensity to match the scene. Compensation settings can be accessed through the camera’s menu or directly on the Speedlight unit. When using wireless flash setups‚ flash compensation ensures consistent lighting across multiple units. Refer to the user manual for detailed steps on adjusting flash compensation for optimal results in your photography.

6.2 Setting Up Custom Functions

The Nikon Speedlight SB-700 allows users to customize functions to suit their photography needs. Access the custom functions menu via the Speedlight’s control panel. Here‚ you can adjust settings like flash compensation‚ sync modes‚ and wireless flash options. Custom functions enable precise control over lighting output‚ ensuring consistent results. Users can also save preferred settings for quick access during shoots. The SB-700’s compatibility with Nikon’s Creative Lighting System (CLS) further enhances customization‚ enabling advanced wireless flash control. Regular firmware updates may add new custom functions‚ improving performance and versatility for professional and enthusiast photographers alike.

6.3 Updating Firmware for Enhanced Performance

Regularly updating the firmware of your Nikon Speedlight SB-700 ensures optimal performance‚ compatibility‚ and access to the latest features. To update the firmware‚ visit the official Nikon website and download the most recent version. Connect the SB-700 to a compatible Nikon camera via the hot shoe‚ ensuring both devices have sufficient battery power. Access the camera’s menu to initiate the firmware update process‚ following on-screen instructions carefully to avoid interruptions. After completion‚ test the Speedlight to confirm functionality. Periodically checking for updates and backing up custom settings before updating is recommended for uninterrupted operation.

Nikon Creative Lighting System (CLS)

The Nikon Creative Lighting System (CLS) enhances flash photography by enabling wireless control of multiple Speedlights‚ offering advanced lighting options for creative and professional results.

7.1 Overview of CLS and Its Benefits

The Nikon Creative Lighting System (CLS) is a groundbreaking technology that enables advanced wireless flash control‚ offering unparalleled creativity and precision in lighting. Designed for both enthusiasts and professionals‚ CLS allows seamless communication between the Speedlight SB-700 and compatible Nikon cameras‚ enabling multiple flash units to be controlled remotely. This system enhances flexibility‚ allowing photographers to achieve complex lighting setups with ease. CLS also supports features like i-TTL flash control and wireless lighting‚ ensuring consistent and professional results; By simplifying the process of setting up and controlling external flash units‚ CLS empowers photographers to focus on their creative vision without technical limitations.

7.2 Setting Up Wireless Lighting with CLS

The Nikon Speedlight SB-700 seamlessly integrates with the Nikon Creative Lighting System (CLS)‚ enabling wireless flash control for enhanced creativity. To set up wireless lighting‚ designate the SB-700 as a master or remote unit. On the camera‚ navigate to the flash control menu and select the desired wireless mode. Assign channels and groups to ensure proper communication between units. Ensure line-of-sight between the master and remote flashes for reliable operation. Refer to the user manual for detailed steps on configuring channels‚ groups‚ and custom settings to optimize wireless lighting performance.

7.3 Advanced Wireless Flash Techniques

Advanced wireless flash techniques with the Nikon Speedlight SB-700 enable photographers to create sophisticated lighting setups. Using Nikon’s Creative Lighting System (CLS)‚ users can control multiple flash units wirelessly‚ ensuring precise illumination. Techniques include multi-flash synchronization‚ creative lighting patterns‚ and advanced light ratio control. The SB-700 can function as a commander or remote unit‚ allowing for complex lighting configurations. These methods enhance depth‚ dimension‚ and dynamic range in images‚ offering professional-grade results. By mastering these techniques‚ photographers can achieve stunning‚ customized lighting effects tailored to their creative vision.

Compatibility with Nikon Cameras

The Nikon Speedlight SB-700 is compatible with both Nikon DSLR and mirrorless cameras‚ including the Z series‚ ensuring seamless integration and optimal performance across various Nikon bodies.

8.1 Compatibility with Nikon DSLR Cameras

The Nikon Speedlight SB-700 is fully compatible with a wide range of Nikon DSLR cameras‚ ensuring seamless integration and advanced flash functionality. It supports Nikon’s i-TTL (Intelligent Through-The-Lens) flash control‚ providing precise and automatic flash exposure. The SB-700 works effortlessly with popular DSLR models such as the D850‚ D500‚ and D750‚ offering consistent performance. Its wireless capabilities also allow it to function as a remote or commander unit in multi-flash setups. This compatibility ensures photographers can leverage the SB-700’s advanced features across various DSLR bodies‚ making it a versatile tool for creative and professional applications.

8.2 Compatibility with Nikon Mirrorless Cameras

The Nikon Speedlight SB-700 is fully compatible with Nikon mirrorless cameras‚ ensuring seamless integration and advanced lighting control. It works effortlessly with Nikon’s Z-series mirrorless models‚ leveraging the Nikon Creative Lighting System (CLS) for wireless flash operation. The SB-700 supports unified flash control‚ allowing users to adjust settings directly from the camera menu. This compatibility enhances creativity and convenience‚ making it an ideal choice for mirrorless photographers seeking professional-grade lighting solutions. Proper communication between the SB-700 and mirrorless cameras is ensured through Nikon’s reliable i-TTL flash system.

8.3 Ensuring Proper Camera-Speedlight Communication

To ensure proper communication between the Nikon Speedlight SB-700 and your camera‚ always use compatible modes and settings. Update the firmware on both devices for optimal performance. Enable flash control on the camera and set the Speedlight to the correct wireless or wired mode. Clean the contacts on the Speedlight and camera to maintain a stable connection. For wireless operation‚ use the Nikon Creative Lighting System (CLS) and avoid physical obstructions. Regularly check for firmware updates and refer to the user manual for specific compatibility guidelines. Proper setup ensures seamless operation and reliable results.

Maintenance and Care of the SB-700

Regularly clean the SB-700 with a soft cloth and store it in a dry‚ cool place to maintain performance. Inspect for damage and wear to ensure longevity.

9.1 Cleaning the Speedlight and Its Components

Regular cleaning of the Nikon Speedlight SB-700 ensures optimal performance and longevity. Use a soft‚ dry cloth to wipe the exterior‚ avoiding harsh chemicals or abrasive materials. For the light emitter and battery compartment‚ gently remove dust with a cotton swab or compressed air. Never touch the flash surface with bare hands‚ as oils can damage the coating. If necessary‚ lightly dampen the cloth with water for stubborn marks‚ but ensure all components are dry before use. Proper maintenance prevents dust buildup and maintains the unit’s reliability.

  • Use a soft‚ dry cloth for exterior cleaning.
  • Gently clean the light emitter and battery area with a cotton swab.
  • Avoid touching sensitive surfaces to prevent oil residue.
  • Ensure all parts are dry before operation.

9.2 Storing the SB-700 Properly

To maintain the performance and longevity of the Nikon Speedlight SB-700‚ proper storage is essential. Always store the unit in its original packaging or a protective case to prevent scratches and damage. Keep it in a cool‚ dry place‚ avoiding extreme temperatures and humidity. Before storage‚ ensure the flash is turned off and batteries are removed to prevent corrosion. Clean the unit thoroughly and inspect for any damage. For extended storage‚ consider using silica gel packets to absorb moisture. Avoid stacking heavy objects on top of the Speedlight to preserve its structural integrity.

9.3 Checking for Damage and Wear

Regularly inspect the Nikon Speedlight SB-700 for signs of damage or wear to ensure optimal performance. Check the flash head for misalignment or physical damage‚ and examine the mounting foot for secure attachment. Verify that all buttons and dials function smoothly without sticking. Look for heat damage‚ such as discoloration or warped components‚ which may indicate overheating issues. Also‚ inspect the battery compartment for corrosion and ensure the electrical contacts are clean. Finally‚ check the LCD screen for cracks or faded displays. Addressing these issues promptly can prevent further damage and maintain reliability.

Troubleshooting Common Issues

Troubleshooting the Nikon Speedlight SB-700 involves addressing issues like flash misfires‚ battery drain‚ or communication errors. Refer to the user manual for solutions or contact Nikon support.

10.1 Flash Not Firing or Misfiring

If the SB-700 flash fails to fire or misfires‚ check the power source first. Ensure batteries are installed correctly and have sufficient charge. Verify that the flash is turned on and properly attached to the camera hot shoe. Loose connections or incorrect settings may cause issues. Review the camera and flash settings to ensure they are in sync. If problems persist‚ reset the flash or update its firmware. Consult the user manual for troubleshooting steps or contact Nikon support for assistance. Regular maintenance and proper storage can prevent such issues. Always refer to the manual for detailed diagnostics.

10.2 Battery Life and Charging Problems

Battery life and charging issues with the Nikon Speedlight SB-700 can arise due to improper handling or wear. Monitor battery levels via the LCD panel and replace or recharge them when low. Ensure the battery compartment is clean and free of dirt or corrosion. If charging problems occur‚ check the charger’s functionality and verify that batteries are compatible. Avoid overcharging‚ as it can reduce battery lifespan. For prolonged storage‚ remove batteries to prevent leakage; If issues persist‚ consult the user manual or contact Nikon support for assistance.

10.3 Communication Issues with the Camera

Communication issues between the Nikon Speedlight SB-700 and the camera can occur due to improper connections or outdated firmware. Ensure the flash is securely attached to the hot shoe and the camera is set to the correct flash mode. If problems persist‚ check the firmware version on both the Speedlight and camera‚ updating if necessary. Clean the hot shoe contacts and battery terminals to eliminate dirt or corrosion. Refer to the user manual for troubleshooting steps or contact Nikon support for assistance. Regular maintenance and updates help maintain reliable communication between devices.

Resources for Further Learning

Visit the Nikon Download Center for the official SB-700 user manual and firmware updates. Explore online tutorials‚ community forums‚ and Nikon support for enhanced learning and troubleshooting.

11.1 Official Nikon SB-700 User Manual Download

The official Nikon Speedlight SB-700 user manual is available for download on Nikon’s website and other trusted sources. This comprehensive guide provides detailed instructions for setup‚ operation‚ and troubleshooting. It covers advanced features like wireless flash modes and custom functions. The manual is free to download in PDF format‚ making it easily accessible for users. By referring to the official manual‚ photographers can unlock the full potential of the SB-700‚ ensuring optimal performance and creative control in various lighting scenarios. Downloading the manual is highly recommended for both beginners and experienced users.

11.2 Nikon Support and Customer Service

Nikon provides comprehensive support and customer service for the Speedlight SB-700‚ ensuring users can resolve issues and maximize their flash unit’s potential. The Nikon Support website offers dedicated resources‚ including troubleshooting guides‚ FAQs‚ and contact options. Users can reach Nikon’s customer service team via phone‚ email‚ or live chat for personalized assistance. Additionally‚ Nikon’s global network includes regional support centers‚ providing localized help. The support team is equipped to address technical queries‚ repair requests‚ and general inquiries‚ ensuring a seamless experience for SB-700 owners. This robust support system underscores Nikon’s commitment to customer satisfaction and product reliability.

11.3 Online Tutorials and Community Forums

Online tutorials and community forums provide invaluable resources for mastering the Nikon Speedlight SB-700; Platforms like YouTube and Nikon’s official website offer step-by-step guides and video tutorials. Community forums such as Nikonians and DPReview allow photographers to share tips‚ ask questions‚ and learn from experts. These resources are especially useful for troubleshooting and exploring advanced techniques. Additionally‚ Nikon’s support page provides access to firmware updates and user manuals‚ ensuring users stay informed and up-to-date with the latest features and improvements for the SB-700.

hm size guide

Welcome to the HM Size Guide, your ultimate resource for finding the perfect fit. This comprehensive guide offers detailed measurements and tips to ensure accuracy, helping you shop confidently across all collections, from women’s, men’s, and kids’ apparel to accessories and more.

Overview of HM Size Charts

H&M provides a comprehensive sizing system to help customers find their perfect fit. The size charts are divided into categories for women, men, kids, and babies, offering detailed measurements in both centimeters and inches. Each category includes specific charts for tops, bottoms, outerwear, and accessories, ensuring accuracy across different garment types. The charts cater to a wide range of body types, including plus sizes, petite options, and maternity wear. Measurements are based on standard body dimensions, and some products include additional fit details on their product pages. H&M also offers a size guide link on each product page, making it easy to compare sizes and find the best fit. This system ensures a seamless shopping experience for all customers.

Importance of Accurate Sizing

Accurate sizing is crucial for ensuring a comfortable and confident shopping experience. Proper fit enhances both style and comfort, while incorrect sizes can lead to dissatisfaction or the need for returns. H&M’s size guide helps you make informed decisions by providing precise measurements tailored to different body types. By using the size charts, you can avoid the hassle of exchanges and find garments that flatter your figure. Correct sizing also reduces the environmental impact of returns and ensures you enjoy your purchases immediately. Whether shopping for everyday essentials or special occasions, accurate sizing is key to making the most of your wardrobe. H&M’s detailed measurements cater to diverse needs, ensuring everyone can find their perfect fit effortlessly.

How to Use the HM Size Guide

To use the HM Size Guide effectively, start by accessing it on the H&M website or via the product page of your chosen item. Measure your body accurately, focusing on key areas like chest, waist, and hips for women, and chest and waist for men. Compare these measurements to the size charts provided, ensuring alignment with your preferred fit—whether slim, regular, or loose. For the best results, consider the specific garment type, as sizing may vary slightly between categories like tops, bottoms, or outerwear. Regularly updated to reflect current collections, the guide also caters to diverse needs, including plus sizes, petite options, and maternity wear, ensuring everyone can find their perfect fit with ease and confidence.

Women’s Size Guide

Explore H&M’s Women’s Size Guide for detailed measurements across tops, dresses, bottoms, outerwear, and accessories. Find your perfect fit with specific guides for bras, plus sizes, petite options, and maternity wear.

Understanding Women’s Measurements

Accurate body measurements are key to finding your perfect fit. For women, measurements typically include chest, waist, and hips. The chest is measured around the fullest part of the bust, while the waist is measured just below the bust. Hips are measured around the widest point, usually 20-25 cm below the waistline. These measurements help determine your size across tops, dresses, bottoms, and outerwear. H&M provides detailed size charts to match your body measurements with the correct size. Use a flexible tape measure and ensure it’s level and not too tight for the most accurate results. Refer to the size guide on the H&M website for specific measurements and tips to ensure the best fit for your body type.

Tops and Dresses Size Chart

Tops and Dresses Size Chart

The H&M size chart for women’s tops and dresses offers a detailed guide to ensure the perfect fit. Measurements are provided in both centimeters and inches, covering sizes from XS to 5XL. To determine your size, measure your chest around the fullest part of your bust and your waist just below it. These measurements will help you find the ideal fit for various styles, from fitted blouses to flowy dresses. The chart also includes information on garment lengths to cater to different preferences. Use a flexible tape measure and ensure it’s level for accurate results. For the best fit, refer to the size guide on the H&M website, which provides specific measurements for each size. This ensures you can shop confidently and find the perfect piece for your wardrobe.

Bottoms and Jeans Size Chart

Bottoms and Jeans Size Chart

H&M’s bottoms and jeans size chart provides precise measurements to help you find the perfect fit. Sizes range from XS to 5XL, with measurements in both centimeters and inches. To determine your size, measure your natural waistline and the fullest part of your hips. Jeans sizes include waist and hip measurements, while other bottoms offer waist and inseam lengths. The chart caters to various fits, such as slim, regular, and loose, ensuring comfort and style. Use a flexible tape measure for accuracy, keeping it level around your body. For jeans, consider stretch fabrics for flexibility. Refer to the size guide on H&M’s website for detailed measurements, ensuring the best fit for your wardrobe preferences.

Outerwear and Accessories Size Chart

H&M’s outerwear and accessories size chart offers a detailed guide to finding the perfect fit for coats, jackets, hats, scarves, and more. Sizes range from XS to 5XL, with measurements in centimeters and inches for accuracy. To determine your size, measure your chest, waist, and sleeve length for outerwear, ensuring comfort and mobility. Accessories like belts and hats are sized based on standard measurements, with adjustable options available. Use a flexible tape measure for precise results, keeping it level around your body. Consider the fit—whether slim, regular, or oversized—based on your preference. Check the size guide on H&M’s website for specific product measurements, ensuring the best fit for your outerwear and accessory needs.

Bra Size Guide

H&M’s Bra Size Guide helps you find the perfect fit with sizes ranging from 32A to 42G. To determine your size, measure around the fullest part of your bust while wearing a well-fitting bra for cup size. For the band size, measure tightly under your bust and round to the nearest number. Use the chart to match your measurements to the corresponding size. If the band feels loose, try a smaller size; if the cup feels tight, opt for a larger cup size. H&M offers various styles, from push-up to sports bras, ensuring comfort and support. Check individual product pages for specific fit tips, and refer to the size guide for accurate measurements to ensure the best fit for your needs.

Plus Sizes for Women

H&M offers an inclusive range of plus sizes for women, ensuring every body type can enjoy stylish and comfortable clothing. The plus size collection starts from size 16-18 and goes up to 28-30, providing a wide range of options. These sizes are designed to offer the same fashionable designs as standard sizes but with a focus on fit and comfort for curvier figures. The measurements are tailored to ensure a flattering silhouette, and the fabrics are chosen for both style and comfort. H&M’s plus size line includes everything from trendy tops and jeans to elegant dresses and outerwear. Use the size guide to find your perfect fit and explore the collection with confidence, knowing H&M is committed to inclusivity and diversity in fashion;

Petite Sizes for Women

H&M’s petite sizes are tailored for women with a shorter height, offering a flattering fit for those 5’3″ and under. These sizes are designed to proportionally match the body measurements of petite women, ensuring a perfect fit without compromising on style. The petite collection includes a variety of options, from trendy tops and dresses to chic outerwear and jeans. Sizes range from 4-14, catering to diverse body types. Use the size guide to determine your ideal fit by referencing waist measurements from the regular size chart. H&M’s petite line combines fashion and comfort, allowing petite women to enjoy the latest trends with confidence and ease.

Maternity Wear Sizes

H&M’s maternity wear sizes are designed to provide comfort and style during pregnancy. The collection offers a range of sizes from 4 to 18, ensuring a perfect fit for every stage. The sizing is based on regular women’s sizes, allowing for a seamless transition from pre-pregnancy to maternity wear. Each garment is crafted with stretchy fabrics and adjustable features to accommodate a growing belly. Use the size guide to find your ideal fit by comparing your pre-pregnancy measurements. H&M’s maternity line combines practicality and fashion, ensuring that expectant mothers can enjoy both comfort and contemporary styles throughout their journey.

Men’s Size Guide

H&M’s Men’s Size Guide offers a detailed chart for tops, bottoms, outerwear, and accessories. It ensures a perfect fit by providing measurements in both inches and centimeters, catering to all body types, including plus and tall sizes, to help men find their ideal size effortlessly;

Understanding Men’s Measurements

Accurate measurements are key to finding the perfect fit. For men, essential measurements include chest, waist, and hip. The chest measurement is taken around the fullest part of the chest, ensuring the tape measure is level and not too tight. The waist is measured naturally around the narrowest point, and hips are measured around the widest part, usually 7-9 inches below the waistline. H&M’s size guide provides detailed charts in both inches and centimeters, catering to various body types, including regular, tall, and plus sizes. Understanding these measurements helps in selecting the right size for tops, bottoms, and outerwear. Always use a flexible tape measure and stand upright for precise results. Refer to the size chart to match your measurements and ensure a comfortable, tailored fit.

Tops and Shirts Size Chart

Tops and Shirts Size Chart

H&M’s men’s tops and shirts size chart provides a clear guide to finding the perfect fit. Sizes range from XS to 5XL, with measurements based on chest circumference. For example, a size S typically corresponds to a chest measurement of 34-36 inches (86-91 cm), while a size L fits chests measuring 39-41 inches (99-104 cm). The chart includes details like neckline types, sleeve lengths, and fit styles (slim, regular, or loose). To ensure accuracy, measure your chest by wrapping a tape measure around the fullest part, keeping it level and relaxed. Compare your measurement to the chart to select the ideal size for a comfortable and flattering fit. This ensures your chosen shirt fits well, whether it’s for casual wear or formal occasions.

H&M’s bottoms and jeans size chart offers a detailed guide to help you find the perfect fit. Sizes range from 24-34 in jeans and 26-36 in other bottoms, with measurements based on waist and hip circumference. For jeans, a size 28 typically corresponds to a waist of 28 inches (71 cm) and hips of 37 inches (94 cm), while a size 32 fits waists of 32 inches (81 cm) and hips of 41 inches (104 cm). The chart includes regular, slim, and loose fits to cater to different body types. To measure accurately, wrap a tape measure around your natural waistline and the fullest part of your hips. Use these measurements to match your size in the chart, ensuring a comfortable and flattering fit whether you prefer slim jeans or relaxed-fit trousers.

H&M’s outerwear and accessories size chart provides detailed measurements for jackets, coats, hats, scarves, gloves, bags, and belts. Sizes are categorized by numerical and alphabetical labels, ensuring a perfect fit for everyone. For outerwear, measurements are based on chest circumference, with sizes ranging from XXS to 5XL. Accessories like hats and gloves are sized according to head or hand measurements. To ensure accuracy, measure your chest for jackets or head for hats, and compare with the chart. H&M offers a wide range of styles and sizes, including petite and plus options, to accommodate different body types and preferences. Use the guide to find your ideal fit and enjoy a comfortable, flattering look in all seasons.

Men’s Underwear Size Guide

H&M’s Men’s Underwear Size Guide ensures a comfortable and precise fit for all body types. Sizes range from S to 4XL, catering to a variety of preferences. To determine your size, measure your natural waistline with a flexible tape measure. Compare this measurement to H&M’s chart, which provides waist sizes in both centimeters and inches. The guide also offers fit options, such as slim, regular, or relaxed, to suit different styles like boxer briefs, briefs, or trunks. Fabric stretch and comfort are considered in each design, ensuring optimal fit. Use the size guide to find your perfect match, whether you prefer snug support or a looser fit. This ensures a seamless shopping experience for men’s underwear across all collections.

Plus Sizes for Men

H&M offers an inclusive range of plus sizes for men, ensuring comfort and style for all body types. Sizes extend from 2XL to 6XL, providing a wide fit range. The size guide includes detailed measurements for tops, bottoms, and outerwear, with both cm and inches for accuracy. To find your perfect fit, measure your chest, waist, and hips. Compare these measurements to H&M’s chart to select the ideal size. The plus-size collection includes everything from casual wear to formal attire, ensuring versatility. Fabric stretch and fit tips are also provided to enhance your shopping experience. Use the size guide to explore H&M’s plus-size options and enjoy a seamless fit tailored to your needs.

Tall and Petite Sizes for Men

H&M offers tailored fits for men with tall and petite sizes, ensuring everyone can enjoy stylish and comfortable clothing. Tall sizes are designed for men over 6’1″ with proportionally longer sleeves and pant legs, while petite sizes cater to men under 5’7″ with adjusted proportions. Use the size guide to measure your chest, waist, and inseam to find your perfect fit. Tall sizes add 5 cm to sleeve and pant lengths, while petite sizes reduce them by 4-5 cm. Ensure accuracy by comparing your measurements to H&M’s chart; Check individual product pages for specific size details, as fits may vary slightly. Use the size guide to explore H&M’s tall and petite collections and enjoy a seamless fit tailored to your needs.

Kids’ and Baby Size Guide

H&M’s Kids’ and Baby Size Guide provides detailed measurements for newborns to 14-year-olds. It includes sizes for tops, bottoms, outerwear, and shoes, ensuring a perfect fit for every child.

Understanding Kids’ and Baby Measurements

H&M’s size guide for kids and babies is designed to help you find the perfect fit. Measurements are categorized by age, ranging from newborn to 14 years. For kids, sizes are based on chest, waist, and hip measurements, while baby sizes focus on weight and height. For example, a 7-8 years size corresponds to a chest measurement of 65-68 cm and a waist of 58-60 cm. Shoe sizes are also included, with options ranging from infant sizes to junior sizes. H&M provides detailed charts with measurements in both centimeters and inches, ensuring accuracy. To measure your child, use a flexible tape measure and take measurements directly on the body. This guide ensures you can find the right fit for every stage of growth.

H&M’s Tops and Dresses Size Chart provides a detailed guide to help you find the perfect fit. Measurements are based on chest size, with options ranging from XS to 4XL. For women, sizes correspond to chest measurements in centimeters, such as 34 (XS), 36 (S), 38 (M), and so on. Dresses follow a similar sizing structure, ensuring a flattering fit for all body types. The chart also includes petite and plus sizes, catering to diverse needs. To measure accurately, wrap a flexible tape measure around the fullest part of your bust while wearing a well-fitting bra. Use the size chart to match your measurements with the corresponding size. This ensures a comfortable and stylish fit for tops and dresses across H&M’s collections.

H&M’s Bottoms and Jeans Size Chart offers a detailed guide to finding your perfect fit. Measurements are based on waist and hip sizes, with options ranging from XS to 4XL. Waist measurements are taken at the natural waistline, while hip measurements are taken 21 cm (8.25 inches) below the waist. Jeans and bottoms are categorized into fits like slim, regular, and loose, ensuring comfort and style for all body types. The chart includes petite and plus sizes, catering to diverse needs. To measure accurately, stand upright and use a flexible tape measure. Match your measurements to the size chart to find your ideal fit. This ensures a comfortable and flattering look for all H&M bottoms and jeans.

H&M’s Outerwear and Accessories Size Chart provides essential measurements for jackets, coats, hats, scarves, and bags. Outerwear sizes correspond to body measurements, ensuring a flattering fit. Chest and shoulder measurements are key for jackets and coats, while accessories like hats and scarves are one-size-fits-all. Bag sizes are noted in dimensions for clarity. The chart includes petite and plus sizes for outerwear, offering options for all body types. To ensure accuracy, measure your chest and shoulders when selecting outerwear. Accessories are designed to complement various outfits without size restrictions. Use this guide to find the perfect piece that enhances your look while ensuring comfort and style. H&M’s size chart ensures a seamless shopping experience for outerwear and accessories.

Shoes Size Chart

H&M’s Shoes Size Chart offers a detailed guide for selecting the perfect footwear fit. Sizes are available for kids, babies, and adults, with measurements in both US and EU standards. For kids’ shoes, sizes range from newborn to 14 years, with specific length measurements in centimeters. Adults’ shoe sizes are categorized by numeric and alphabetic labels, ensuring a precise fit. Tips for measuring foot length are provided to help determine the correct size. The chart also includes information on width options for comfort and support. H&M’s shoe collection caters to various needs, from casual sneakers to formal styles; Use this guide to find your ideal shoe size and enjoy a comfortable, stylish fit for every occasion. Accurate measurements ensure the best fit, making shopping for shoes effortless and enjoyable.

General Tips for Accurate Sizing

For accurate sizing, use H&M’s size guide, measure your body directly, check product descriptions for specific fits, and consider fabric stretch for the best fit.

How to Measure Your Body

To measure your body accurately for the HM size guide, start by using a flexible tape measure. For women, measure the bust over the fullest part while wearing a bra, keeping the tape level. The waist is measured at the narrowest point, and hips are measured around the widest part, about 7-9 inches below the waist. For men, measure the chest around the fullest part under the armpits and the waist at the natural waistline. For kids, measure the chest, waist, and inseam while they stand straight. Ensure the tape is snug but not tight, and take measurements regularly to account for body changes. Consider fabric stretch and ensure the tape is level for accurate results.

Choosing the Right Fit

Choosing the right fit involves understanding your body measurements and matching them to the HM size chart. Start by identifying your size based on your measurements, then consider the style and fabric of the garment. For example, stretchy fabrics may allow for a snug fit, while non-stretch fabrics should fit more loosely. Pay attention to product descriptions for specific fit details, such as “relaxed” or “slim,” to ensure the garment aligns with your preferences. If you’re between sizes, consider your body type and how you prefer your clothes to feel—looser for comfort or fitted for a tailored look. Always check the size guide for each product, as fits may vary slightly between collections.

Understanding Fabric and Stretch

Understanding fabric and stretch is crucial for ensuring the best fit. Different fabrics have varying levels of elasticity, which can affect how garments fit. Stretchy fabrics, like cotton blends with elastane, provide flexibility and can accommodate movement without feeling restrictive. Non-stretch fabrics, such as linen or silk, require precise measurements for a comfortable fit. When shopping, check the product description for fabric details and whether the garment is designed to be snug or loose-fitting. Consider your personal preference for tightness or looseness, as this will influence how well the fabric works for you. Fabric stretch can also impact sizing, so comparing your measurements to the size chart ensures the right fit for your body and the garment’s material.

Frequently Asked Questions

Explore common queries about HM sizing, including comparisons with other brands, return policies, and how to access size guides on the HM website for accurate fits.

How Do HM Sizes Compare to Other Brands?

HM sizes may differ from other brands, as they follow specific measurement standards. For instance, a UK 12 in HM often corresponds to a European 38, which might be smaller than expected. This variation can make sizing inconsistent across brands. To ensure accuracy, HM provides detailed size charts on their website, allowing customers to compare their measurements directly. Additionally, HM offers size guides tailored to different product categories, such as tops, bottoms, and outerwear, to help shoppers find their perfect fit. By referencing these charts, customers can better understand how HM sizes align with their usual sizes from other brands, ensuring a more accurate purchase. Always check the specific size guide for the item you’re interested in to avoid sizing mismatches.

Can I Return or Exchange Items That Don’t Fit?

Yes, HM offers a flexible return and exchange policy for items that don’t fit. Customers can return or exchange products within 30 days of purchase, provided the items are in their original condition with tags attached. To initiate the process, visit the HM website, log into your account, and select the order containing the item(s) you wish to return or exchange. Follow the prompts to complete the request. Items can also be returned or exchanged in-store for added convenience. Refunds are typically processed within 3-5 business days, and exchanges are subject to stock availability. This policy ensures a hassle-free shopping experience, allowing you to find the perfect fit without worry.

How Do I Access the Size Guide on the HM Website?

Accessing the size guide on the HM website is straightforward. Simply visit the product page of the item you’re interested in. Below the product description, you’ll find a “Size Guide” link. Clicking this link will open a detailed chart with measurements in both inches and centimeters, tailored to the specific product category, such as tops, bottoms, or outerwear. This guide helps you determine your perfect fit by comparing your body measurements to the chart. Additionally, HM provides fit and fabric information for each item to ensure accuracy. Use this tool to shop confidently and find the right size for your needs, ensuring a seamless and enjoyable shopping experience.

anne frank diary extract pdf

Anne Frank’s diary is a poignant historical document capturing her life in hiding during WWII. PDF extracts and study guides are widely available for educational purposes, offering insights into her experiences and thoughts.

1.1 Historical Context of Anne Frank’s Life

Anne Frank was born in 1929 in Frankfurt, Germany, during a time of rising Nazi influence. Her family moved to Amsterdam in 1933 to escape persecution, but the Netherlands was invaded by Germany in 1940. Anne received her diary on her 13th birthday in 1942, just before her family went into hiding to avoid deportation. The diary chronicles their life in the Secret Annex from June 1942 to August 1944, offering a personal perspective on the Holocaust. Anne’s writings provide a vivid account of daily life under Nazi occupation, highlighting the struggles and fears of those in hiding. The diary became a crucial historical document after the war, revealing the human cost of WWII and the resilience of the human spirit.

1.2 The Significance of the Diary as a Historical Document

Anne Frank’s diary is a profound historical document that captures the personal and emotional journey of a young girl during WWII. It serves as a firsthand account of life under Nazi occupation, detailing the daily struggles, fears, and hopes of those in hiding. The diary’s significance lies in its ability to humanize the Holocaust, offering a unique perspective on the impact of war on ordinary lives. As a historical resource, it provides invaluable insights into the experiences of Jewish families during this period, making it a crucial tool for education and remembrance. The diary’s authenticity and emotional depth have made it a cornerstone of Holocaust studies, ensuring its relevance for future generations.

1.3 Overview of the Diary’s Content and Structure

Anne Frank’s diary spans from June 12, 1942, to August 1, 1944, documenting her life in hiding during WWII. The diary, a gift for her 13th birthday, is structured as a series of dated entries addressed to an imaginary friend named Kitty. Initially, Anne wrote for herself, but over time, she revised entries with the intention of publishing her story. The diary captures the daily struggles of living in hiding, the dynamics among the people sharing the secret annex, and Anne’s personal growth. It blends candid reflections on hope, identity, and human relationships with observations on the war’s impact. The diary’s chronological structure and intimate tone provide a compelling narrative of resilience and vulnerability, making it both a historical document and a deeply personal account of adolescence under extraordinary circumstances.

Key Themes and Messages in the Diary

Anne Frank’s diary explores themes of hope, resilience, and identity, while highlighting the human cost of war and the struggles of adolescence under extraordinary circumstances.

2.1 Hope and Resilience in the Face of Adversity

Anne Frank’s diary is a testament to her unwavering hope and resilience amidst immense suffering. Despite the confinement and fear, she consistently expressed optimism about the future. In one notable entry, she writes about the beauty of nature as a source of comfort, reflecting her ability to find light in darkness. Her belief in humanity’s goodness and her determination to survive inspired those around her. The diary extracts reveal her inner strength, as she often focused on the possibility of a better world after the war. This theme resonates deeply, making her story a powerful symbol of hope in the face of adversity.

2.2 The Struggle for Identity and Self-Discovery

Anne Frank’s diary vividly captures her journey of self-discovery and identity formation during adolescence. Amidst the confines of hiding, she grappled with her Jewish heritage, familial relationships, and personal ambitions. Her entries reveal a deep exploration of her character, as she navigated the challenges of growing up in extraordinary circumstances. Anne often expressed contradictions within herself, showcasing her intellectual and emotional growth. Her diary became a mirror of her soul, where she questioned her beliefs, desires, and place in the world. This intimate portrayal of self-reflection makes her story relatable, offering readers a profound understanding of adolescent struggles and the universal quest for identity.

2.3 The Impact of War on Daily Life and Human Relationships

Anne Frank’s diary profoundly illustrates the devastating effects of war on daily life and interpersonal relationships. Living in hiding, she documented the constant fear, scarcity of resources, and the strain on familial bonds. The confined living conditions exacerbated tensions among the inhabitants, revealing the psychological toll of war. Yet, amidst the chaos, Anne also noted moments of solidarity and resilience, highlighting the strength of human connections. Her entries provide a vivid glimpse into how war disrupts ordinary life, testing relationships and forcing individuals to adapt to extraordinary circumstances. This aspect of her diary underscores the universal human experience of survival and hope during times of conflict.

The Diary as a Literary Work

Anne Frank’s diary is celebrated for its literary depth, revealing her evolving writing style and emotional maturity. PDF extracts showcase her vivid storytelling and introspective reflections, making it a timeless literary masterpiece.

3.1 Literary Devices and Style in the Diary Entries

Anne Frank’s diary entries are rich in literary devices, showcasing her unique voice and style. She employs vivid imagery, metaphors, and emotional language to convey her experiences. PDF extracts reveal her ability to blend introspection with descriptive narratives, creating a deeply personal yet universally relatable account. Her writing evolves from youthful simplicity to profound reflections, demonstrating her growth as a writer. The diary’s literary merit lies in its authenticity, capturing the complexities of adolescence amidst war. Frank’s use of dialogue, even in solitude, adds a layer of immediacy, making readers feel connected to her journey. These stylistic elements highlight her talent and contribute to the diary’s enduring impact as a literary work.

3.2 The Evolution of Anne’s Writing Over Time

Anne Frank’s writing in her diary undergoes significant development, reflecting her growth from a young girl to a mature thinker. Early entries reveal a lively, curious voice, while later entries show deeper introspection and emotional complexity. PDF extracts highlight this evolution, as Anne’s language becomes more sophisticated, and her reflections on hope, identity, and humanity deepen. Her writing transitions from simple, diary-like observations to profound philosophical musings, showcasing her intellectual and emotional maturation. This transformation underscores her unique talent and the diary’s literary significance, offering readers a poignant glimpse into her inner world during the tumultuous years in hiding.

3.3 The Diary’s Place in World Literature

Anne Frank’s diary is widely regarded as one of the most important and influential works of the 20th century. Its universal themes of hope, resilience, and humanity have resonated with readers globally, transcending cultural and generational boundaries. The diary is not only a historical document but also a literary masterpiece, praised for its raw honesty and emotional depth. It has been translated into over 70 languages and remains a cornerstone of Holocaust literature. Its impact extends beyond historical education, as it continues to inspire writers and thinkers, solidifying its place as a timeless classic in world literature. The diary’s ability to connect with readers on a deeply personal level ensures its enduring relevance and significance.

Extracts from the Diary

PDF extracts from Anne Frank’s diary offer poignant glimpses into her life in hiding, revealing her hopes, fears, and reflections during WWII. These entries provide historical insight.

4.1 Selected Entries That Highlight Key Themes

Select entries from Anne Frank’s diary reveal profound themes, such as hope amidst despair and the struggle for identity. The entry from June 14, 1942, marks the start of her diary, capturing her initial emotions and the onset of hiding. Another significant entry from July 8, 1942, details her family’s move to the Secret Annex, showcasing her adaptability and resilience. The July 15, 1944, entry reflects on youth’s challenges, emphasizing her belief in a better future. These extracts illustrate her emotional depth, offering insights into her personal growth and the harsh realities of war. They are invaluable for understanding her perspective and the historical context she endured.

4.2 Analysis of Specific Extracts for Educational Purposes

Specific extracts from Anne Frank’s diary are widely used in education to explore themes like hope, identity, and resilience. The entry from July 15, 1944, where Anne reflects on the loneliness of youth, is often analyzed to discuss her emotional depth. Another key extract, from June 14, 1942, introduces her voice and the onset of hiding, providing historical context. These passages are accompanied by study guides and PDF resources, enabling students to dissect her writing style and the broader implications of her experiences. Such analyses help students connect with Anne’s humanity and understand the Holocaust’s impact on individuals, fostering empathy and historical awareness through her poignant words.

4.3 The Emotional and Psychological Depth of the Extracts

Anne Frank’s diary extracts reveal profound emotional and psychological depth, offering a window into her inner world. Entries like the one from July 8, 1942, express her fear and adjustment to hiding, while later entries, such as August 1, 1944, show her maturity and reflection on life. Her writings convey the struggle of adolescence amidst war, highlighting her resilience and vulnerability. The emotional complexity of her words resonates deeply, making her experiences relatable and human. These extracts provide valuable insights into the psychological impact of trauma and the strength of the human spirit, ensuring her legacy as a voice of hope and understanding for future generations.

The Diary’s Publication and Legacy

Anne Frank’s diary was first published in 1947 by her father, Otto Frank, becoming a global bestseller. Its emotional depth and historical significance have made it a timeless classic.

5.1 The Process of Publishing the Diary After the War

After WWII, Miep Gies recovered Anne Frank’s diary and returned it to Otto Frank, Anne’s father. He decided to fulfill Anne’s dream of publishing it. The diary was edited by Otto and Mirjam Pressler, removing some private passages. It was first published in 1947 in the Netherlands. The book gained international acclaim, shedding light on the Holocaust’s personal toll. The diary’s authenticity and emotional impact resonated globally, making it a vital historical document. Its publication marked the beginning of its legacy, ensuring Anne’s voice and story endured for future generations to learn from and reflect on.

5.2 The Diary’s Reception and Impact Worldwide

Anne Frank’s diary received widespread acclaim globally, resonating with readers from diverse backgrounds. Its raw, emotional narrative provided a personal perspective on the Holocaust, making it relatable and impactful. The diary has been translated into numerous languages, reaching millions worldwide. It has become a cornerstone of Holocaust education, fostering empathy and understanding. The diary’s message of hope and resilience has inspired countless individuals, cementing its place as a vital literary and historical work. Its influence extends beyond literature, contributing to global discussions on tolerance, peace, and human rights. The diary’s enduring popularity underscores its universal relevance and timeless appeal.

5.3 The Diary’s Role in Holocaust Education

Anne Frank’s diary plays a pivotal role in Holocaust education, offering a deeply personal and relatable account of life under Nazi oppression. It humanizes the victims, providing students with a connection to the historical events. Educational resources, including PDF extracts and study guides, facilitate its integration into curricula worldwide. The diary’s emotional depth and authenticity make it an invaluable tool for teaching empathy and understanding. By recounting her experiences, Anne Frank’s diary ensures the Holocaust’s lessons are never forgotten, inspiring future generations to promote tolerance and peace. Its inclusion in educational programs underscores its importance as a historical document and a powerful medium for Holocaust remembrance and awareness.

Educational Resources and Study Materials

PDF extracts, study guides, and lesson plans based on Anne Frank’s diary are widely available, offering valuable educational tools for students and educators to explore her story.

6.1 PDF Extracts and Study Guides for Students

PDF extracts from Anne Frank’s diary are widely available for educational purposes, offering students access to key entries and reflections. These resources often include study guides, revision notes, and analysis to aid comprehension. Many educational platforms provide downloadable PDFs, such as NCERT Solutions for Class 10 English, which focus on excerpts from the diary. These materials are designed to help students engage with the text, understand its historical context, and explore themes like hope, identity, and resilience. Additionally, lesson plans and activities based on the diary entries are included in these guides, making them invaluable for both teachers and learners. The PDF extracts also highlight Anne’s emotional depth, providing insights into her experiences during WWII.

6.2 Lesson Plans and Activities Based on the Diary

Lesson plans and activities inspired by Anne Frank’s diary are designed to engage students in meaningful discussions and reflections. These plans often incorporate diary extracts, encouraging students to analyze themes like tolerance, peace, and resilience. Activities may include reading selected entries, marking up texts, and paraphrasing complex sentences. Teachers can use these resources to create interactive exercises, such as role-playing scenarios or debates, to deepen understanding of Anne’s experiences. Online platforms offer additional materials, such as discussion guides and project ideas, to enhance learning. These activities not only educate students about WWII history but also foster empathy and critical thinking skills, aligning with educational goals for Holocaust studies and literature appreciation.

6.3 Online Resources for Further Exploration

Online resources provide extensive opportunities to delve deeper into Anne Frank’s diary. Websites like the Anne Frank House offer detailed extracts, historical context, and interactive features. Educational platforms provide PDF study guides, lesson plans, and activities for students. These resources include marked-up diary entries, paraphrasing exercises, and analysis tools. Additionally, online archives offer access to rare documents and scholarly articles. Multimedia resources, such as videos and podcasts, enhance understanding of the diary’s historical significance. These digital tools cater to diverse learning needs, making Anne Frank’s story accessible and engaging for global audiences. They serve as invaluable supplements for classroom instruction and independent study, fostering a deeper connection to the diary’s themes and legacy.

The Diary’s Relevance in the Modern World

Anne Frank’s diary remains a powerful symbol of hope and resilience, offering timeless lessons on tolerance and peace. Its universal themes continue to inspire global audiences.

7.1 The Diary’s Message of Tolerance and Peace

Anne Frank’s diary delivers a profound message of tolerance and peace, emphasizing the importance of understanding and empathy. Her writings highlight the human capacity for kindness even in the darkest times, inspiring readers to embrace diversity and reject prejudice. The diary serves as a reminder of the devastating consequences of hatred and the enduring power of hope. By sharing her experiences, Anne fosters a sense of unity and encourages readers to strive for a more compassionate world. Her words continue to resonate, promoting tolerance and peace across generations. The diary’s universal themes make it a vital tool for educating young people about the importance of coexistence and mutual respect.

7.2 The Diary’s Influence on Modern Literature and Media

Anne Frank’s diary has profoundly influenced modern literature and media, inspiring numerous adaptations and works. Its raw, emotional narrative has shaped Holocaust literature, encouraging authors to explore personal stories of resilience. The diary’s themes of hope and identity are reflected in contemporary writings, making it a cornerstone of historical fiction. In media, adaptations like films and plays have brought Anne’s story to global audiences, ensuring her legacy endures. The diary’s impact extends beyond literature, influencing educational materials and public discourse on tolerance. Its timeless relevance continues to inspire new generations of writers, filmmakers, and artists, cementing its place in cultural history.

7.3 The Diary’s Continued Importance for Young Readers

Anne Frank’s diary remains a vital resource for young readers, offering timeless lessons on hope, resilience, and self-discovery. Its themes of adolescence, identity, and humanity resonate deeply with teenagers. The diary’s raw honesty about life in hiding provides a personal connection to history, making it accessible and relatable. PDF extracts and study guides facilitate its use in education, helping students grasp the emotional and historical context. Anne’s reflections on youth challenges, such as her 1944 entry on loneliness, highlight universal struggles. This makes the diary a powerful tool for fostering empathy and understanding. Its continued relevance ensures it remains a cornerstone of literature for young audiences, inspiring reflection and personal growth.

bradford white water heater instruction manual

Bradford White Water Heater Instruction Manual: Comprehensive Guide

Welcome to the Bradford White Water Heater Instruction Manual, your go-to guide for installation, operation, and maintenance. This manual covers essential safety precautions, step-by-step instructions, and troubleshooting tips to ensure optimal performance and longevity of your water heater.

Bradford White water heaters are renowned for their durability, efficiency, and innovative technology. As a trusted brand, Bradford White offers a wide range of models, including gas, electric, and hybrid options, designed to meet diverse household and commercial needs. Their products are built with high-quality materials and advanced features to ensure reliable performance and energy savings.

With a focus on safety and sustainability, Bradford White water heaters incorporate cutting-edge designs, such as the Defender Safety System, which prevents accidental ignition of flammable vapors. This commitment to excellence has made Bradford White a preferred choice for professionals and homeowners alike.

This manual provides a detailed guide to understanding and maintaining your Bradford White water heater, ensuring optimal functionality and longevity. Whether you’re installing a new unit or troubleshooting an existing one, this resource offers comprehensive support.

Safety Precautions and Warnings

Safety is paramount when installing and operating your Bradford White water heater. Always read and follow the instructions carefully to avoid potential hazards. Ensure the area is well-ventilated, and keep flammable materials away from the unit. Never attempt to install or repair the water heater without proper training or tools, as this could lead to serious injury or property damage.

Before starting any work, turn off the power and gas supply to the water heater. Use a qualified technician for gas line connections to prevent leaks. Be aware of the risk of scalding from hot water; set the temperature appropriately to avoid burns. The Bradford White Defender Safety System is designed to prevent accidental ignition of flammable vapors, but proper maintenance is essential for its effectiveness.

Never modify or tamper with the water heater’s components, as this can void the warranty and create safety risks. Keep children and pets away from the unit. Always follow local plumbing and electrical codes to ensure compliance and safety. If unsure about any aspect of installation or operation, consult a professional.

Installation Requirements and Preparation

Before installing your Bradford White water heater, ensure the location meets all local plumbing and electrical codes. The unit must be installed on a level, firm surface that can support its weight when filled with water. For electric models, a dedicated 240-volt circuit is required, while gas models need a properly sized gas line and venting system.

A drain pan is recommended to prevent water damage in case of leaks. If installing in a garage or near flammable materials, additional safety measures may be necessary. Ensure proper ventilation in the room to avoid condensation issues. For gas models, verify that the venting system complies with local regulations and is made of approved materials like PVC or stainless steel.

Check the water supply lines for leaks and ensure they are rated for the system’s pressure. The temperature and pressure relief valve must be installed correctly, with a discharge pipe leading to a safe location. Always follow the manufacturer’s instructions and consult a licensed professional if unsure about any step to ensure a safe and proper installation. Proper preparation will help prevent future issues and ensure optimal performance.

Step-by-Step Installation Instructions

Begin by preparing the installation site, ensuring it is level and free from debris. Position the Bradford White water heater in the designated area, securing it with brackets if necessary. For electric models, connect the water supply lines to the inlet and outlet ports, ensuring they are properly sized and leak-free. Install a shut-off valve for easy maintenance access.

  • Connect the temperature and pressure relief valve to the unit, directing the discharge pipe to a safe location.
  • For electric models, attach the power supply lines to the designated terminals, ensuring all connections are tight and insulated.
  • For gas models, connect the gas line to the unit, testing for leaks using a soap solution or leak detector.
  • Install the venting system according to local codes, ensuring proper airflow and clearance from combustible materials.

Once all connections are secure, set the desired temperature using the control panel. Turn on the power or gas supply and check for leaks. Test the unit by running hot water through a faucet to ensure proper operation. Always follow local plumbing codes and manufacturer guidelines for a safe and efficient installation. If unsure, consult a licensed professional. Proper installation ensures optimal performance and longevity of your Bradford White water heater.

Initial Start-Up and Operation

After successful installation, follow these steps to start and operate your Bradford White water heater. Ensure all connections are secure and leak-free before proceeding. For electric models, switch on the power supply and set the temperature using the control panel. For gas models, turn on the gas supply and ignite the pilot light according to the manufacturer’s instructions. Allow the unit to heat the water for 30-60 minutes before use. Check for leaks at all connections using a soap solution or leak detector. Once operational, test the system by running hot water through a faucet to ensure proper function. Adjust the temperature setting as needed, typically between 120°F and 140°F for optimal performance and safety. Regularly monitor the temperature and pressure relief valve to ensure it is functioning correctly. Always refer to the specific model’s manual for detailed start-up procedures. If unsure, consult a licensed professional to avoid potential hazards. Proper start-up ensures efficient and safe operation of your Bradford White water heater.

Understanding Temperature and Pressure Relief Valves

The Temperature and Pressure Relief (TPR) valve is a critical safety component of your Bradford White water heater. Its primary function is to release excess pressure or temperature buildup inside the tank, preventing potential hazards such as explosion or scalding. Locate the TPR valve on the top or side of the water heater and ensure it is connected to a discharge pipe that directs water safely to the floor or outside. To test the valve, lift the test lever gently; water should flow through the discharge pipe. If no water flows or the valve leaks after testing, replace it immediately. Never cap or block the discharge pipe, as this could lead to dangerous pressure buildup. If the TPR valve discharges water frequently, it may indicate high pressure or temperature levels, requiring professional inspection. Always follow local plumbing codes and manufacturer guidelines for installation and maintenance. Regular inspection of the TPR valve ensures safe and efficient operation of your water heater.

Energy Efficiency and Cost-Saving Features

Bradford White water heaters are designed with advanced energy-efficient technologies to reduce energy consumption and lower utility bills. The Eco Defender and Power Vented models incorporate features like high-efficiency burners and insulated tanks, minimizing heat loss and optimizing fuel use. Some models include smart controls that allow users to program temperature settings, reducing unnecessary energy usage. For instance, the Bradford White Connect adapter enables remote monitoring and adjustments, ensuring your water heater operates only when needed. Additionally, the use of advanced flow control technology maintains consistent water temperature while reducing energy waste. These features not only enhance performance but also contribute to environmental sustainability. Regular maintenance, such as inspecting the TPR valve and ensuring proper venting, further improves efficiency. By leveraging these cost-saving features, homeowners can enjoy reliable hot water while minimizing their energy footprint. Bradford White’s commitment to innovation ensures their water heaters meet high energy efficiency standards, offering long-term savings and reliability.

Maintenance and Upkeep Recommendations

Regular maintenance is crucial to ensure optimal performance, safety, and longevity of your Bradford White water heater. Start by inspecting the temperature and pressure relief (TPR) valve annually to ensure it functions correctly. Drain a few gallons of water from the tank every 6-12 months to remove sediment buildup, which can improve efficiency and prevent corrosion. Check for leaks around connections and replace worn-out gaskets or seals promptly. For gas models, inspect the venting system to ensure proper airflow and verify that the gas supply line is free from damage or blockages.

Additionally, maintain the recommended water temperature setting (typically 120°F) to balance energy efficiency and safety. For electric models, monitor the heating elements and thermostats for proper operation. Schedule professional servicing every 3-5 years to inspect internal components and address potential issues before they escalate. Keeping the area around the water heater clean and clear of debris will also enhance safety and functionality. By following these maintenance recommendations, you can extend the lifespan of your Bradford White water heater and ensure reliable service for years to come;

Troubleshooting Common Issues

Identifying and addressing common issues with your Bradford White water heater can ensure continuous hot water supply and prevent costly repairs. If the water is not hot enough, check the thermostat settings and ensure it’s set between 120°F and 140°F. For models with dual heating elements, verify both are functioning properly. If the water is too hot, adjust the thermostat to a lower setting to prevent scalding. For gas models, ensure the pilot light is lit and the gas supply is open. If the water heater does not turn on, check the circuit breaker or fuse for electric models, or ensure the gas supply is on and the igniter is functioning for gas units.

Water leaks can indicate worn-out gaskets, loose connections, or internal tank corrosion. Inspect all connections and replace any damaged parts. For persistent leaks, contact a professional. Strange noises, such as rumbling or banging, often result from sediment buildup. Draining the tank periodically can help resolve this issue. If the TPR valve discharges water, check for excessive pressure and ensure the valve is functioning correctly. Always refer to the Bradford White troubleshooting guide for specific instructions and safety precautions before attempting any repairs. Regular maintenance can prevent many of these issues and extend the lifespan of your water heater.

Diagnostic Codes and Error Messages

Bradford White water heaters are equipped with advanced diagnostic systems to help identify issues quickly. Error codes, such as “E1,” “E2,” or “E3,” are displayed on the control panel to indicate specific problems. These codes correspond to issues like sensor malfunctions, heating element failures, or system overheat conditions; Refer to the user manual or the Bradford White website for a detailed list of codes and their meanings. For example, “E1” may indicate a temperature sensor error, while “E5” could signal a communication error between components. Understanding these codes allows for targeted troubleshooting and faster resolution. Always ensure the power is off before attempting any repairs, and consult a professional if you are unsure. Regular maintenance, such as checking sensors and connections, can help prevent errors and ensure reliable operation. By addressing these codes promptly, you can extend the lifespan of your water heater and maintain optimal performance.

Repair and Replacement of Parts

Regular maintenance and timely repairs are essential to ensure your Bradford White water heater operates efficiently. If a part fails, refer to the diagnostic codes in the manual to identify the issue. Common parts that may need replacement include heating elements, thermostats, and temperature sensors. Always turn off the power and gas supply before starting any repair. For electric models, disconnect the power at the circuit breaker. Gas models require shutting off the gas valve. Use a wrench to disconnect gas lines and ensure no leaks are present before proceeding. Replacement parts can be ordered directly from Bradford White or authorized distributors. When replacing elements, ensure they are compatible with your model to avoid damage; If you are unsure about the repair, consult a licensed plumber or technician. Properly dispose of old parts and test the system after replacement to ensure it functions correctly. Regular inspections can help prevent unexpected failures and extend the lifespan of your water heater. Always follow safety guidelines to avoid accidents during repairs.

Venting and Gas Supply Requirements

Proper venting and gas supply are critical for the safe and efficient operation of your Bradford White gas water heater. Ensure the gas supply line is correctly sized and installed according to local regulations and the heater’s specifications. Use approved materials for gas lines, such as copper or steel, and ensure all connections are leak-free. Venting systems must be designed to handle flue gases safely, typically requiring a Category III venting system for high-efficiency models. The venting system should be installed vertically or horizontally, following the manufacturer’s guidelines, and must maintain proper clearance from combustible materials. Regularly inspect the venting system for blockages or damage to ensure proper airflow. Always test for gas leaks using a soap solution or leak detector after installation or repairs. Proper venting and gas supply ensure efficient combustion, reduce the risk of carbon monoxide buildup, and comply with safety standards. Refer to local building codes and the user manual for specific requirements in your area.

Water Heater Capacity and Sizing

Selecting the right water heater capacity ensures adequate hot water supply for your household needs. Bradford White water heaters are available in various sizes, ranging from 30 to 100 gallons, depending on model and type. To determine the appropriate size, consider factors such as the number of people in your household, peak usage periods, and the types of appliances requiring hot water. A general rule of thumb is to allow 10-20 gallons per person daily for typical usage. For example, a family of four may require a 50-75 gallon unit. Additionally, consider the recovery rate and first-hour rating, which indicate how quickly the heater can replenish hot water. Energy-efficient models may have lower capacities but higher efficiency, balancing performance and energy savings; Proper sizing ensures consistent hot water delivery without excessive energy consumption. Always consult the manufacturer’s guidelines and local regulations for precise sizing recommendations tailored to your specific needs. This ensures optimal performance and satisfaction with your Bradford White water heater.

Special Features of Bradford White Models

Bradford White water heaters are known for their innovative features designed to enhance performance, efficiency, and safety. One standout feature is the Defender Safety System, which provides advanced protection against flammable vapor ignition and other potential hazards. Additionally, many models include Advanced Flow Control, ensuring consistent water temperature even during simultaneous usage. Energy-efficient options like the Heat Pump Water Heater offer significant energy savings while maintaining high performance. Some models also feature Smart Control Technology, allowing users to monitor and adjust settings remotely via the Bradford White Connect app. High-efficiency gas models include Power Venting, which improves installation flexibility and reduces venting costs. Certain electric models offer dual-element configurations, providing faster recovery times and tailored water heating solutions. These features, combined with durable construction and reliable operation, make Bradford White water heaters a top choice for homeowners seeking long-term value and advanced functionality; Whether you prioritize energy savings, safety, or convenience, Bradford White models are engineered to meet a wide range of needs and preferences.

Warranty and Customer Support Information

Bradford White water heaters are backed by comprehensive warranty programs, ensuring peace of mind for homeowners. The standard warranty typically covers the tank for 6 years and parts for 1 year, though extended warranties may be available for added protection. Customers can access detailed warranty terms and conditions through the official Bradford White website or by contacting their local dealer.

Bradford White also offers robust customer support, including online resources such as user manuals, troubleshooting guides, and FAQs. For immediate assistance, customers can reach out to the Bradford White customer service team via phone or email. Additionally, the company provides a network of authorized service technicians to address any installation or repair needs. By visiting the Bradford White website, users can easily locate their model’s specifications, download manuals, and find guidance on maintenance and operation. This commitment to customer support ensures that Bradford White water heaters remain reliable and efficient for years to come.

Environmental and Safety Compliance

Bradford White water heaters are designed to meet rigorous environmental and safety standards, ensuring eco-friendly and hazard-free operation. These units comply with industry regulations, including ASHRAE and NFPA standards, and are engineered to minimize environmental impact. Energy efficiency is prioritized, with many models earning ENERGY STAR certification for reduced energy consumption and lower greenhouse gas emissions.

The water heaters also feature advanced safety mechanisms, such as temperature and pressure relief valves, to prevent hazards like scalding or tank rupture. Bradford White incorporates eco-conscious materials and manufacturing processes to reduce waste and promote sustainability. Users are encouraged to follow local environmental regulations and disposal guidelines when replacing or upgrading their water heaters. By adhering to these standards, Bradford White ensures a safer and greener experience for homeowners while maintaining high performance and reliability.

Downloading and Accessing the Full Manual

To ensure optimal use and maintenance of your Bradford White water heater, accessing the full instruction manual is essential. Visit the official Bradford White website, where you can download the manual in PDF format by entering your water heater’s model or serial number. This resource provides detailed instructions for installation, operation, and troubleshooting, ensuring compliance with safety and efficiency standards.

Additionally, platforms like the Internet Archive offer free access to Bradford White user manuals, including the Eco Defender and Power Vented models. These documents cover specifications, maintenance tips, and diagnostic guides. For convenience, manuals are available in multiple formats, such as PDF or TXT, and can be read online or downloaded for offline use.

Always refer to the official Bradford White website or authorized distributors to ensure you have the most accurate and up-to-date manual for your specific model. Reading and understanding the manual thoroughly is crucial for safe and efficient operation of your water heater. If assistance is needed, Bradford White’s customer support team is available to help navigate the process.

acute coronary syndrome pdf

Acute Coronary Syndrome (ACS) refers to a range of conditions caused by reduced blood flow to the heart, leading to myocardial ischemia․ It is a medical emergency requiring prompt intervention, often presenting as chest pain or discomfort․ Early recognition and treatment are critical to improving patient outcomes and reducing the risk of complications․ ACS is a leading cause of morbidity and mortality worldwide, emphasizing the importance of understanding its pathophysiology, diagnosis, and management strategies․

1․1 Definition and Overview

Acute Coronary Syndrome (ACS) encompasses a spectrum of clinical conditions caused by reduced coronary blood flow, including myocardial ischemia or infarction․ It is characterized by chest pain or discomfort, often radiating to the arm, neck, or jaw, and may be accompanied by shortness of breath or nausea․ ACS is a medical emergency requiring immediate attention to prevent further cardiac damage․ Early diagnosis and treatment are critical to improving outcomes and reducing mortality rates․

1․2 Importance of Understanding ACS

Understanding ACS is crucial for early detection and effective management, significantly improving patient outcomes․ Prompt recognition of symptoms and risk factors enables timely interventions, reducing mortality and morbidity․ Accurate diagnosis and treatment strategies, such as reperfusion therapies and medication, can prevent further cardiac damage․ Awareness among healthcare providers and the public fosters better prevention and treatment approaches, ultimately enhancing quality of life for those affected by ACS․

Classification of Acute Coronary Syndrome

Acute Coronary Syndrome (ACS) is categorized based on clinical presentation and electrocardiogram (ECG) findings, primarily distinguishing STEMI, NSTEMI, and unstable angina․ These classifications guide treatment approaches and outcomes․

2․1 ST-Segment Elevation Myocardial Infarction (STEMI)

ST-Segment Elevation Myocardial Infarction (STEMI) is a severe form of ACS characterized by ST-segment elevation on an electrocardiogram (ECG), indicating complete occlusion of a coronary artery․ It leads to significant myocardial necrosis and is associated with high morbidity and mortality if untreated․ Prompt reperfusion therapy, such as primary percutaneous coronary intervention (PCI) or fibrinolysis, is critical to restore blood flow and minimize cardiac damage․ STEMI is a medical emergency requiring rapid identification and intervention․

2;2 Non-ST-Segment Elevation Myocardial Infarction (NSTEMI)

Non-ST-Segment Elevation Myocardial Infarction (NSTEMI) is a type of ACS characterized by partial occlusion of a coronary artery, leading to myocardial ischemia without ST-segment elevation on ECG․ It often presents with non-specific ECG changes, such as ST-segment depression or T-wave inversion․ NSTEMI is less severe than STEMI but still requires prompt evaluation and treatment, including antiplatelet therapy and possible revascularization, to reduce cardiac damage and improve outcomes․

2․3 Unstable Angina

Unstable angina is a type of ACS characterized by chest pain or discomfort due to transient myocardial ischemia, without evidence of permanent damage․ It often occurs at rest or with minimal exertion and may signal an impending myocardial infarction․ ECG findings are typically non-specific, such as ST-segment depression or T-wave inversion․ Immediate evaluation and treatment are essential to prevent progression to a full-blown heart attack and improve patient outcomes․

Pathophysiology of ACS

Acute Coronary Syndrome primarily results from atherosclerosis, with plaque rupture leading to ischemia․ This imbalance between oxygen supply and demand causes myocardial damage and clinical symptoms․

3․1 Role of Atherosclerosis and Plaque Rupture

Atherosclerosis is the cornerstone of ACS, involving the accumulation of lipids and inflammatory cells in arterial walls, forming plaques․ Plaque rupture exposes highly thrombogenic lipid cores, leading to thrombus formation and occlusion․ This process disrupts blood flow, causing ischemia and myocardial infarction; The instability of plaques, often triggered by inflammation or mechanical stress, is a critical event in ACS pathogenesis․

3․2 Mechanisms of Myocardial Ischemia

Myocardial ischemia occurs when blood flow to the heart muscle is reduced, often due to atherosclerotic plaque rupture and subsequent thrombus formation․ This obstruction impairs oxygen delivery, leading to cellular hypoxia and metabolic shifts․ Ischemia triggers a cascade of events, including ATP depletion, membrane dysfunction, and eventual necrosis․ Vasospasm and inflammation can exacerbate ischemia, further compromising cardiac function and clinical outcomes in ACS patients․

Risk Factors for ACS

ACS risk factors include hypertension, hyperlipidemia, diabetes, and smoking, which contribute to atherosclerosis․ Family history and obesity also play significant roles, increasing cardiovascular vulnerability and disease progression․

4․1 Traditional Risk Factors

Traditional risk factors for ACS include hypertension, hyperlipidemia, diabetes mellitus, and smoking․ These factors contribute to the development of atherosclerosis, the underlying cause of most ACS cases․ Hypertension damages arterial walls, while hyperlipidemia promotes plaque formation․ Diabetes increases inflammation and oxidative stress, accelerating plaque rupture․ Smoking damages endothelial function, reducing blood flow and increasing thrombus formation․ Family history also plays a role, indicating genetic predisposition to cardiovascular diseases․ Recognizing these factors is crucial for early intervention and prevention․

4․2 Emerging Risk Factors

Emerging risk factors for ACS include inflammation, oxidative stress, and genetic predispositions․ Elevated levels of C-reactive protein and homocysteine are associated with increased risk․ Additionally, mental health factors such as depression and stress contribute to ACS development․ Physical inactivity, poor diet, and environmental factors like air pollution also play roles․ Understanding these factors helps in early identification and tailored interventions, improving patient outcomes and reducing mortality rates․ Recognition of these risks is essential for comprehensive management strategies․

Clinical Presentation of ACS

ACS often presents with chest pain or discomfort, radiating to the arm, neck, or jaw, accompanied by shortness of breath, nausea, or lightheadedness․ Atypical symptoms, such as indigestion or fatigue, are common in women and older adults․ Gender differences in symptom presentation are notable, with women frequently experiencing non-chest pain symptoms, delaying timely care and diagnosis․

5․1 Typical and Atypical Symptoms

Typical ACS symptoms include chest pain or discomfort, often radiating to the arm, neck, or jaw, and may be accompanied by shortness of breath, nausea, or lightheadedness․ Atypical symptoms, such as indigestion, fatigue, or palpitations, are more common in women and older adults․ Women frequently experience non-chest pain symptoms, which can delay seeking care․ These variations in presentation highlight the importance of a thorough clinical evaluation to ensure timely diagnosis and treatment․

5․2 Gender Differences in Symptoms

Women with ACS often experience atypical symptoms such as indigestion, fatigue, or shortness of breath, rather than chest pain․ This can lead to delays in seeking medical help․ Studies show that young women are at higher risk of mortality during hospitalization for myocardial infarction compared to men of the same age․ Gender differences in symptom presentation highlight the need for increased awareness and tailored diagnostic approaches to improve outcomes for women with ACS․

Diagnosis of ACS

Diagnosis of ACS involves ECG findings such as ST-segment changes and cardiac biomarkers like troponin․ Timely identification ensures appropriate management and improves patient outcomes significantly․

6․1 Electrocardiogram (ECG) Findings

The ECG is a cornerstone in diagnosing ACS, with specific patterns indicating myocardial ischemia․ ST-segment elevation suggests STEMI, while ST-segment depression or T-wave inversion may indicate NSTEMI or unstable angina․ ECG findings guide immediate treatment decisions, such as reperfusion therapy, and help differentiate between ACS types, ensuring timely and appropriate care for improved patient outcomes․

6․2 Cardiac Biomarkers and Imaging

Cardiac biomarkers, such as troponin and CK-MB, are essential for diagnosing myocardial damage in ACS․ Elevated troponin levels indicate myocardial infarction, distinguishing STEMI from unstable angina․ Imaging techniques like echocardiography assess left ventricular function and identify wall motion abnormalities․ These tools, combined with ECG findings, provide a comprehensive evaluation of ACS, guiding treatment decisions and prognosis․ Their integration ensures accurate diagnosis and tailored management strategies․

Management of ACS

Management of ACS involves immediate stabilization, pharmacological therapies, and interventional procedures․ Antiplatelets, anticoagulants, and beta-blockers are cornerstone treatments․ Revascularization strategies, such as PCI or CABG, are often necessary․ Long-term management focuses on lifestyle modifications and adherence to cardioprotective medications to reduce recurrence risk and improve outcomes․

7․1 Immediate Assessment and Stabilization

Immediate assessment involves rapid evaluation of symptoms, ECG findings, and biomarkers to confirm ACS․ Stabilization includes oxygen therapy, pain relief, and antiplatelet agents to reduce ischemia․ The GRACE Risk Tool helps stratify patients for early intervention․ Prompt identification of STEMI or NSTEMI ensures timely reperfusion strategies․ Early stabilization aims to restore blood flow, minimize cardiac damage, and prevent complications, improving patient outcomes significantly in acute settings․

7;2 Pharmacological and Interventional Therapies

Pharmacological therapies for ACS include antiplatelet agents, anticoagulants, beta-blockers, and statins to reduce ischemia and prevent further complications․ Interventional approaches, such as percutaneous coronary intervention (PCI) or coronary artery bypass grafting (CABG), are used to restore blood flow in obstructed arteries․ Timely reperfusion therapy, especially in STEMI, significantly improves outcomes․ These treatments aim to stabilize the patient, minimize cardiac damage, and reduce mortality rates associated with ACS․

7․3 Long-Term Management and Secondary Prevention

Long-term management of ACS focuses on reducing cardiovascular risk factors and preventing future events․ This includes adherence to cardioprotective medications, lifestyle modifications, and regular monitoring․ Pharmacological therapies such as statins, beta-blockers, and ACE inhibitors are essential․ Lifestyle changes involve a heart-healthy diet, regular exercise, and smoking cessation․ Secondary prevention aims to improve quality of life and reduce mortality by addressing modifiable risk factors and ensuring long-term adherence to treatment plans․

Complications of ACS

ACS can lead to serious complications, including arrhythmias, heart failure, and cardiac arrest․ Early complications often involve acute myocardial damage, while late complications may result in chronic conditions․ These complications underscore the importance of prompt and effective management to mitigate long-term cardiovascular risks and improve patient outcomes․ Timely intervention is crucial to prevent these potentially life-threatening developments․ Early and late complications require tailored approaches for optimal care․ The risk of recurrent events and progressive cardiac dysfunction highlights the need for comprehensive management strategies․ ACS complications can significantly impact a patient’s quality of life and survival, emphasizing the importance of aggressive secondary prevention measures․ Comprehensive care is essential to address both immediate and long-term complications effectively․ Regular follow-up and adherence to treatment plans are vital to minimize the risk of complications and improve long-term prognosis․ Recognizing and managing these complications promptly can significantly enhance patient outcomes and reduce mortality rates․ Effective management of ACS complications involves a multidisciplinary approach, including lifestyle modifications, pharmacotherapy, and ongoing monitoring․ Patient education and adherence to treatment are critical in preventing complications and improving overall health․ Addressing modifiable risk factors is key to reducing the burden of ACS-related complications․ Long-term management strategies should focus on preventing recurrent events and managing existing complications to enhance patient well-being․ The complexities of ACS complications necessitate a personalized and integrated care approach to achieve optimal results․ By prioritizing early intervention and comprehensive care, healthcare providers can effectively manage ACS complications and improve patient outcomes․ Regular medical evaluations and tailored treatment plans are essential to address the diverse complications associated with ACS․ The interplay between acute and chronic complications requires a holistic management strategy to ensure the best possible patient care․ Ongoing research and advancements in treatment options continue to refine the approach to managing ACS complications, offering hope for improved outcomes․ Collaborative efforts between healthcare providers and patients are crucial in navigating the challenges posed by ACS complications․ Proactive management and patient engagement are vital to minimizing the impact of ACS complications and enhancing long-term health․ The multifaceted nature of ACS complications demands a thorough and coordinated approach to ensure effective patient care and improved quality of life․ By addressing both early and late complications, healthcare providers can significantly reduce the overall burden of ACS on patients․ The importance of timely and appropriate management cannot be overstated in preventing and managing ACS-related complications․ Comprehensive care strategies are essential to optimize outcomes and reduce the risk of future events․ The intricate relationship between acute and chronic complications requires a nuanced approach to ensure the best possible results for patients․ Ongoing monitoring and personalized treatment are cornerstones of effective complication management in ACS․ By understanding and addressing the diverse complications of ACS, healthcare providers can deliver high-quality, patient-centered care that improves survival and well-being․ The dynamic nature of ACS complications necessitates a flexible and adaptive management strategy to meet the evolving needs of patients․ Early recognition and intervention are critical in mitigating the impact of complications and enhancing patient outcomes․ The complexities of ACS complications underscore the importance of a multidisciplinary team approach to ensure comprehensive and effective care․ Patient education and support are essential components of managing ACS complications and promoting long-term health․ The interplay between various complications requires a detailed and coordinated management plan to address the unique needs of each patient․ By focusing on both prevention and treatment, healthcare providers can effectively manage ACS complications and improve patient prognosis․ The multifaceted challenges posed by ACS complications demand a proactive and integrated approach to achieve optimal results․ Ongoing research and clinical advancements continue to enhance the understanding and management of ACS-related complications, offering new opportunities for improved care․ The long-term implications of ACS complications highlight the need for sustained efforts in prevention, treatment, and patient education․ By addressing the root causes and manifestations of complications, healthcare providers can significantly improve the quality of life for patients with ACS․ The intricate balance between acute and chronic management strategies requires careful consideration to ensure the best possible outcomes․ Comprehensive care plans that integrate prevention, treatment, and monitoring are essential to effectively manage ACS complications; The dynamic interplay between various complications necessitates a flexible and responsive approach to patient care․ By prioritizing patient-centered care, healthcare providers can address the diverse needs of individuals with ACS and improve their overall well-being․ The ongoing challenges posed by ACS complications emphasize the importance of continuous learning and adaptation in clinical practice․ By staying at the forefront of medical advancements, healthcare providers can deliver cutting-edge care that addresses the complexities of ACS complications․ The intricate relationship between early and late complications requires a thorough understanding of pathophysiology and treatment options to ensure optimal management․ Proactive management strategies, including lifestyle modifications and pharmacotherapy, are essential to minimize the impact of ACS complications․ By fostering collaboration between patients and healthcare providers, effective management of complications can be achieved, leading to improved outcomes and enhanced quality of life․ The multifaceted nature of ACS complications demands a comprehensive and integrated approach to ensure the best possible results for patients․ Ongoing research and clinical innovations continue to refine the management of ACS-related complications, offering new hope for patients worldwide․ By addressing the root causes and manifestations of complications, healthcare providers can significantly improve the prognosis and quality of life for individuals with ACS․ The importance of timely and appropriate intervention cannot be overstated in managing the diverse complications associated with ACS․ Comprehensive care strategies that emphasize prevention, treatment, and patient education are essential to optimize outcomes and reduce the burden of ACS․ The intricate challenges posed by ACS complications require a nuanced and adaptive approach to ensure effective patient care and improved long-term health․ By understanding the interplay between acute and chronic complications, healthcare providers can develop targeted strategies to address the unique needs of each patient․ Proactive management and patient engagement are vital to minimizing the impact of ACS complications and enhancing overall well-being․ The ongoing evolution of medical knowledge and treatment options underscores the importance of staying informed and adapting clinical practices to address the complexities of ACS complications․ By prioritizing patient-centered care and leveraging the latest advancements, healthcare providers can deliver high-quality, effective care that improves survival and quality of life for individuals with ACS․

8․1 Early Complications

Early complications of ACS include arrhythmias, such as ventricular fibrillation, and pulmonary edema․ Cardiac arrest can occur due to severe ischemia․ Myocardial rupture is a rare but life-threatening complication․ Early identification and treatment are critical to prevent these complications, which often arise within hours of symptom onset․ Prompt interventions like reperfusion therapy and medical stabilization are essential to mitigate risks and improve patient outcomes during the acute phase of ACS․

8․2 Late Complications

Late complications of ACS may develop weeks to months after the initial event, including heart failure and ventricular remodeling․ Chronic ischemia can lead to reduced ejection fraction and arrhythmias․ There is also an increased risk of re-infarction due to persistent coronary artery disease․ These complications underscore the importance of long-term management, lifestyle modifications, and adherence to prescribed therapies to mitigate their impact and improve patient outcomes․

Prognosis and Outcomes

Prognosis in ACS varies based on severity, timely intervention, and underlying health․ Early treatment improves survival, reducing mortality and enhancing quality of life for patients․

9․1 Predictors of Mortality and Morbidity

Predictors of mortality and morbidity in ACS include age, comorbidities, and severity of symptoms․ Poor adherence to medications and delayed treatment increase risks․ Women often experience worse outcomes due to atypical symptoms and delayed care․ Timely intervention and adherence to guideline-based therapies significantly improve survival and reduce long-term complications, emphasizing the importance of early recognition and management․ These factors highlight the need for personalized treatment approaches to optimize patient outcomes․

9․2 Impact of Timely Intervention

Timely intervention significantly improves outcomes in ACS, reducing mortality and morbidity․ Early reperfusion therapies, such as PCI or fibrinolysis, restore blood flow, limiting myocardial damage․ Medications like aspirin and P2Y12 inhibitors enhance outcomes when administered promptly․ Studies show that delaying treatment increases complications and mortality, emphasizing the critical role of rapid diagnosis and treatment․ The American Heart Association highlights that a heart attack occurs every 41 seconds, underscoring the urgent need for immediate care to improve survival and recovery․

Prevention of ACS

Preventing ACS involves lifestyle modifications and medical therapies to reduce risk factors․ Strategies include a heart-healthy diet, regular exercise, smoking cessation, and managing hypertension and diabetes․ Medications like statins and antiplatelets are often prescribed to lower cholesterol and prevent clots․ Early intervention in high-risk individuals significantly reduces the likelihood of developing ACS, emphasizing the importance of proactive care․

10․1 Lifestyle Modifications

Lifestyle modifications are crucial in preventing ACS․ A heart-healthy diet rich in fruits, vegetables, and whole grains can reduce cholesterol and blood pressure; Regular physical activity, such as walking or swimming, improves cardiovascular health․ Smoking cessation and limiting alcohol intake further lower risk․ Stress management through techniques like meditation or yoga also plays a role in reducing cardiac strain․ These changes collectively contribute to a significant reduction in ACS risk factors, promoting long-term heart health and well-being․

10․2 Medical Therapies for Prevention

Medical therapies play a vital role in preventing ACS․ Statins are commonly prescribed to lower cholesterol, reducing plaque buildup in arteries․ Beta-blockers and ACE inhibitors help manage blood pressure and decrease cardiac workload․ Antiplatelet medications, such as aspirin, prevent blood clots․ Adherence to these therapies is crucial for reducing the risk of ACS and improving long-term cardiovascular outcomes․ Regular monitoring and adjustments ensure optimal effectiveness and safety․

Emerging Research and Advances

Emerging research focuses on novel therapeutic targets, such as anti-inflammatory therapies and advanced imaging techniques․ The GRACE Risk Tool enhances risk stratification, while wearable technologies improve remote monitoring of ACS patients․

11․1 Novel Therapeutic Targets

Research identifies novel therapeutic targets, including anti-inflammatory agents and cell therapy, to address ACS․ These innovations aim to reduce inflammation, promote cardiac repair, and improve outcomes․ Emerging therapies target specific pathways involved in myocardial ischemia, offering personalized treatment options․ Advances in gene therapy and stem cell research also show promise in repairing damaged heart tissue, potentially revolutionizing ACS management․ These developments highlight the evolving landscape of cardiovascular care․

11․2 Role of Technology in ACS Management

Technology plays a pivotal role in enhancing ACS management through wearable devices, AI-driven diagnostics, and telemedicine․ Wearable ECG monitors enable early detection of ischemic changes, while AI algorithms improve risk stratification and treatment planning․ Telemedicine platforms facilitate timely consultations, reducing delays in care․ Advanced imaging technologies and point-of-care testing further streamline diagnosis and treatment, ensuring better patient outcomes and more efficient care coordination․

Case Studies and Patient Experiences

A 2022 study highlighted a patient with ACS whose timely intervention using the GRACE Risk Tool improved outcomes, showcasing the importance of personalized care strategies․

12․1 Real-World Insights from Patients

Real-world insights from patients with ACS highlight challenges in adherence to cardioprotective medications and delayed care-seeking due to atypical symptoms․ Studies reveal that women often experience delays in seeking care, while men may underestimate symptom severity․ Patient experiences emphasize the importance of addressing psychological and social barriers to improve outcomes․ These insights underscore the need for personalized care and education to enhance recovery and quality of life for ACS patients․

12․2 Lessons Learned from Clinical Cases

Clinical cases highlight the importance of early intervention in ACS, with delays in care-seeking, especially in women, often due to atypical symptoms․ Studies show young women have higher mortality rates during AMI hospitalization․ The GRACE Risk Tool effectively stratifies ischemic and bleeding risks, improving outcomes․ Adherence to cardioprotective medications remains a challenge, emphasizing the need for personalized approaches․ These insights guide better clinical decision-making and patient management strategies in ACS care․

Acute coronary syndrome remains a leading cause of morbidity and mortality, emphasizing the need for early intervention and personalized care to improve patient outcomes and reduce complications․

13․1 Summary of Key Points

Acute coronary syndrome (ACS) is a life-threatening condition requiring immediate medical attention․ It encompasses myocardial infarction and unstable angina, often caused by atherosclerosis and plaque rupture․ Early diagnosis using ECG and biomarkers is critical for effective treatment․ Management strategies include pharmacological therapies and interventions like PCI; Long-term care focuses on reducing risk factors and preventing recurrence․ Timely intervention significantly improves outcomes, emphasizing the importance of education and awareness for both patients and healthcare providers․

13․2 Future Directions in ACS Care

Future directions in ACS care focus on personalized treatment approaches, integrating advanced technologies like wearable devices and AI for early detection․ Research emphasizes novel therapeutic targets, such as anti-inflammatory therapies, to reduce ischemic damage․ Enhanced risk stratification tools, like the GRACE Risk Score, improve outcomes by tailoring interventions․ Additionally, telemedicine and community-based programs aim to address disparities and ensure equitable access to timely care, reducing mortality and morbidity globally․

traxxas 1 16 e-revo vxl parts manual

This manual provides detailed insights into the Traxxas 1/16 E-Revo VXL, covering its components, maintenance, and repair. It helps users understand and optimize their model effectively.

Overview of the Traxxas 1/16 E-Revo VXL

The Traxxas 1/16 E-Revo VXL is a high-performance, brushless-powered monster truck designed for speed and durability. It features the VXL-6S power system and Maxx-Spec driveline, minimizing broken parts. Capable of reaching speeds over 70 MPH, it is equipped with a TQi radio system, Velineon brushless motor, and pre-glued tires. The truck comes fully assembled with a painted body, NiMH battery, and charger, making it Ready-To-Race. Its compact 1/16 scale ensures agility while maintaining the power and strength of larger models. The E-Revo VXL is ideal for both beginners and experienced enthusiasts, offering a balance of power, stability, and versatility for various terrains.

Importance of the Parts Manual

The parts manual is essential for understanding and maintaining the Traxxas 1/16 E-Revo VXL. It provides a detailed inventory of components, ensuring users can identify and replace parts correctly. By referencing the manual, owners can perform routine maintenance, diagnose issues, and execute repairs effectively. It also serves as a guide for upgrades, helping users enhance performance and durability. The manual’s exploded views and part numbers simplify ordering replacements, reducing downtime. Proper use of the manual ensures optimal functionality, extends the model’s lifespan, and maximizes the driving experience. It is a crucial resource for both novice and experienced enthusiasts, fostering a deeper understanding of their vehicle’s mechanics and operation.

Understanding the Traxxas 1/16 E-Revo VXL Parts Manual

This section explains how to navigate and interpret the manual, highlighting key components, symbols, and terminology to ensure users can effectively utilize the guide for maintenance and repairs.

Table of Contents and Navigation

, Essential Parts, and Troubleshooting. Each section is further divided into subsections, making it easy to locate specific topics. Users can navigate through the manual by referencing page numbers or using the index. The clear structure ensures quick access to information on Chassis Components, Drivetrain Parts, and Electrical Systems. Visual aids like exploded diagrams and part lists enhance understanding, while cross-references guide users to related sections for comprehensive repairs and upgrades. This organized approach simplifies maintenance and ensures users can efficiently address any issue.

Key Symbols and Abbreviations

The Traxxas 1/16 E-Revo VXL parts manual uses specific symbols and abbreviations to convey important information quickly. Symbols such as warning signs (⚠️) indicate potential hazards, while caution symbols (✳️) highlight critical procedures. Abbreviations like ESC (Electronic Speed Control) and LiPo (Lithium Polymer battery) are frequently used to simplify technical terms. The manual also employs part numbers and diagrams to identify components accurately. Understanding these symbols and abbreviations is essential for safe and effective maintenance. A dedicated reference section at the beginning of the manual deciphers these markings, ensuring users can interpret instructions without confusion. This consistent use of visual and textual cues enhances readability and helps users navigate the manual efficiently.

Important Safety Guidelines

Adhering to the safety guidelines in the Traxxas 1/16 E-Revo VXL parts manual is crucial to prevent accidents and ensure optimal performance. Always use genuine Traxxas parts to maintain safety and durability. When handling the vehicle, avoid overheating the motor or ESC by monitoring temperatures during operation. Keep the model away from flammable materials and never operate it near open flames. Properly charge batteries using the provided Traxxas charger, and avoid overcharging LiPo batteries. Wear protective gear, such as safety goggles, when operating the vehicle. Ensure the operating area is clear of obstacles and bystanders. Follow all instructions carefully, especially when performing maintenance or repairs. Failure to comply with these guidelines may result in damage to the vehicle or personal injury. Always refer to the manual for specific safety precautions related to your model.

Essential Parts and Components

The Traxxas 1/16 E-Revo VXL includes a durable chassis, high-performance drivetrain, robust suspension system, and advanced electrical components like the VXL-6S power system for optimal functionality and speed.

Chassis and Frame Components

The 1/16 E-Revo VXL features a durable chassis designed for high-performance racing and durability. The frame is constructed from high-quality materials to withstand impacts and maintain structural integrity. Key components include the internal splined half shafts, which provide smooth power delivery, and the external splined components for enhanced strength. The chassis is paired with a robust suspension system, including aluminum toe/tie links that allow for adjustable toe settings to optimize stability and handling. Plastic components like suspension arms, axle carriers, and chassis parts are engineered to endure shear stress and impacts. Replacement parts, such as half shafts and chassis components, are readily available to ensure longevity and peak performance. Regular inspection and maintenance of these parts are crucial for maintaining the vehicle’s reliability and speed.

Drivetrain and Transmission Parts

The drivetrain of the Traxxas 1/16 E-Revo VXL is designed for maximum performance and durability. It features a Maxx-Spec driveline, which minimizes broken parts by optimizing power delivery. Key components include internal and external splined half shafts, which ensure smooth transmission of power to the wheels. The drivetrain is supported by a robust gear system, designed to handle high-speed and high-torque applications. Regular maintenance, such as lubricating gears and inspecting for wear, is essential to maintain optimal performance. Replacement parts, like half shafts and transmission components, are readily available to address any issues. Proper care of the drivetrain ensures the vehicle’s reliability and speed, making it a top choice for enthusiasts seeking a durable and high-performance model.

Suspension and Steering Components

The suspension system of the Traxxas 1/16 E-Revo VXL is designed to provide superior stability and control. It features durable suspension arms and hub carriers that withstand impacts and maintain precise alignment. Adjustable aluminum toe links allow for fine-tuning of the toe-in and toe-out settings, enhancing straight-line stability and cornering performance. The steering system includes a servo that ensures responsive control, while the bellcrank and steering rods direct input accurately to the wheels. Regular inspection and maintenance of these components are crucial to prevent wear and ensure optimal handling. Replacement parts, such as suspension arms and steering linkage components, are available to keep the vehicle performing at its best. Proper alignment and adjustment of these parts are key to maximizing the model’s agility and responsiveness.

Electrical System Components

The Traxxas 1/16 E-Revo VXL features a robust electrical system designed for high performance and reliability. At its core is the VXL-6S electronic speed control (ESC), which efficiently manages power delivery to the brushless motor, ensuring smooth acceleration and responsive control. The motor itself is a high-torque, low-maintenance unit optimized for speed and durability. The system also includes a TQi radio system, providing precise steering and throttle control. The electronic components are protected by a low-voltage detection system, which alerts the driver when the LiPo batteries reach their minimum voltage. Additionally, the model incorporates a reliable servo for steering and a wiring harness that ensures consistent power distribution. Regular inspection of connections and components is essential to maintain optimal performance and prevent electrical issues. Proper care of these components ensures the vehicle operates at its peak efficiency and responsiveness.

Maintenance and Repair Tips

Regular cleaning and lubrication of moving parts ensure smooth operation. Inspect chassis, suspension, and drivetrain for wear. Address issues promptly to prevent damage. Follow manual guidelines for repairs.

Regular Maintenance Schedule

Regular maintenance is crucial to ensure optimal performance and longevity of the Traxxas 1/16 E-Revo VXL. Start with weekly checks of the battery, tire pressure, and chassis bolts. Monthly, inspect drivetrain components like gears and shafts for wear. Clean and lubricate moving parts to prevent friction; After every 10 hours of use, check the suspension arms, steering links, and electrical connections for tightness and damage. Replace worn-out parts promptly to avoid further damage. For extreme use conditions, such as high-speed runs or jumps, increase the frequency of inspections. Always use genuine Traxxas parts for replacements to maintain reliability; Refer to the manual for detailed guidelines and schedules tailored to your model.

Common Repair Procedures

Common repairs for the Traxxas 1/16 E-Revo VXL often involve replacing worn drivetrain components like gears and shafts. Inspect these parts regularly for signs of wear or damage. If the motor or ESC overheats, check for blocked cooling vents or loose electrical connections. For damaged suspension arms, replace them immediately to prevent further damage to the chassis. When replacing parts, always use genuine Traxxas components to ensure compatibility and performance; Refer to the manual for step-by-step instructions and torque specifications. Regular cleaning of the chassis and drivetrain can prevent debris buildup, reducing the need for frequent repairs. Proper maintenance and timely repairs will keep your model running smoothly and extend its lifespan.

Upgrade and Modification Options

Upgrading your Traxxas 1/16 E-Revo VXL can enhance its performance, durability, and customization. Consider installing a high-torque brushless motor for improved speed and power. Aluminum suspension components, such as C-hubs and steering knuckles, can add strength and reduce flex. Upgrading to metal gears in the transmission and drivetrain can minimize wear and tear. For better handling, adjustable toe links and sway bars are excellent modifications. Additionally, upgrading to a LiPo battery with higher capacity can increase runtime and power delivery. Use genuine Traxxas hop-up parts to ensure compatibility and reliability. Always follow the manual’s guidelines for modifications to maintain warranty and performance standards. These upgrades can transform your E-Revo VXL into a high-performance machine tailored to your driving style.

Troubleshooting Common Issues

Identify and resolve common problems like loss of remote control response, motor overheating, or broken parts. Check battery levels, re-bind transmitters, and inspect drivetrain components for damage.

Loss of Remote Control Response

If your Traxxas 1/16 E-Revo VXL stops responding to the remote control, start by checking the battery levels in both the transmitter and the vehicle. Ensure they are fully charged and properly connected. Next, try re-binding the transmitter and receiver by following the manufacturer’s instructions. This process often resolves connectivity issues. Additionally, check for physical obstructions between the transmitter and receiver, as these can interfere with the signal. If the problem persists, inspect the receiver and servo for damage or loose connections. In some cases, recalibrating the transmitter or replacing faulty components may be necessary. Refer to the manual for detailed steps on re-binding and troubleshooting.

Overheating of the Motor or ESC

Overheating of the motor or Electronic Speed Controller (ESC) in your Traxxas 1/16 E-Revo VXL can lead to reduced performance and potential damage. Ensure proper airflow by keeping the chassis clear of debris and avoiding prolonged operation in high-temperature environments. Check for excessive wear on gears or drivetrain components, as this can increase friction and heat generation. Inspect the motor and ESC for loose connections or damaged wiring. If using a LiPo battery, ensure it is within the recommended voltage range and not discharged below the minimum level. Regular maintenance, such as cleaning and lubricating moving parts, can also help prevent overheating. Always follow the manufacturer’s guidelines for operation and maintenance to ensure optimal performance and longevity of your model.

Broken or Damaged Parts Identification

Identifying broken or damaged parts on your Traxxas 1/16 E-Revo VXL is crucial for maintaining performance and preventing further damage. Start by visually inspecting the chassis, drivetrain, and suspension components for signs of wear or breakage. Common areas prone to damage include the driveshafts, suspension arms, and hub carriers. If you notice unusual noise, vibration, or loss of functionality, it may indicate a broken part. Refer to the exploded views in the parts manual to locate and identify specific components. Replace damaged parts with genuine Traxxas replacement items to ensure compatibility and reliability. Regularly checking for damage and addressing issues promptly will help extend the lifespan of your model and keep it running at peak performance.

Upgrading Your Traxxas 1/16 E-Revo VXL

Upgrade your Traxxas 1/16 E-Revo VXL for enhanced performance and durability. Consider improving the motor, ESC, drivetrain, and suspension components. The VXL version allows for motor upgrades up to 50% power, making it ideal for advanced users seeking higher speeds and torque. Additionally, upgrading to aluminum parts or high-quality electronics can significantly boost reliability and customization. Ensure all upgrades are compatible with the VXL system to maintain optimal functionality and avoid potential damage. Always refer to the parts manual for guidance on compatible upgrades and installation procedures.

Performance Upgrades

Enhance your Traxxas 1/16 E-Revo VXL’s performance with strategic upgrades. Consider upgrading the motor to a higher KV rating for improved speed or torque. The VXL-6S power system supports motor upgrades up to 50% power, allowing for enhanced acceleration and top speed. Additionally, replacing the stock electronic speed control (ESC) with a high-quality unit, such as the Sidewinder, can improve thermal efficiency and responsiveness. Drivetrain upgrades, like aluminum driveshafts and gearboxes, reduce weight and increase durability. Suspension upgrades, including adjustable shocks and aluminum arms, enhance stability and handling. Ensure all upgrades are compatible with the VXL system to maintain optimal performance. Always refer to the parts manual for guidance on compatible upgrades and proper installation procedures to avoid potential damage.

Durability and Strength Enhancements

Boost the durability of your Traxxas 1/16 E-Revo VXL with essential strength enhancements. Replace stock plastic components with aluminum parts, such as driveshafts, axles, and suspension arms, to reduce breakage under stress. Upgrading to high-quality materials ensures long-term reliability. Install metal gears in the transmission to prevent stripping and improve torque handling. Strengthen the chassis with aluminum braces to enhance rigidity. Additionally, consider upgrading to heavy-duty shocks and springs to handle rough terrains without compromising stability. Use Traxxas-approved parts to maintain compatibility and ensure optimal performance. These enhancements not only extend the lifespan of your model but also improve its overall resilience during intense driving sessions. Always follow the parts manual for guidance on compatible upgrades and installation best practices to maintain your vehicle’s integrity.

Electronic System Upgrades

Enhance your Traxxas 1/16 E-Revo VXL’s performance with advanced electronic upgrades. Consider upgrading to a high-torque brushless motor for improved power and efficiency. Install a programmable ESC to customize settings like punch and brake strength, ensuring optimal control. For better connectivity, upgrade to a high-frequency receiver with fail-safe technology to prevent signal loss. Additionally, integrating a LiPo battery with a higher mAh rating can extend runtime and deliver consistent power. Use Traxxas-approved electronic components to ensure compatibility and reliability. These upgrades not only enhance speed and responsiveness but also provide a more stable and controlled driving experience. Always refer to the parts manual for guidance on compatible upgrades and installation procedures to avoid damage to your vehicle’s system.

Key Components and Their Functions

The Traxxas 1/16 E-Revo VXL features essential components like the VXL-6S power system, Maxx-Spec driveline, and TQi radio system. These parts ensure high performance, durability, and precise control.

Drivetrain and Transmission Explained

The Traxxas 1/16 E-Revo VXL features a robust drivetrain designed for high performance and durability. The Maxx-Spec driveline minimizes broken parts by reducing stress on components. The transmission system includes a 2-speed setup, allowing seamless transitions between low and high gear ratios for optimal speed and torque. This ensures smooth acceleration and control, whether racing or navigating challenging terrain. The drivetrain is complemented by high-quality gears and shafts, ensuring efficient power transfer from the motor to the wheels. Regular maintenance, such as lubricating gears and checking for wear, is essential to maintain peak performance. Understanding the drivetrain and transmission is crucial for troubleshooting and upgrading, making this section a cornerstone of the parts manual.

Suspension Arms and Their Role

The suspension arms on the Traxxas 1/16 E-Revo VXL are critical for maintaining stability and handling. Made from high-quality materials, these arms absorb impacts and ensure smooth movement over various terrains. Proper alignment and tightness are essential to prevent wear and tear. Regular inspection for damage or excessive play is recommended. Upgrading to aluminum or reinforced plastic arms can enhance durability. The suspension arms work in conjunction with the shocks and springs to provide a responsive and controlled driving experience. Ensuring they are well-maintained is vital for optimal performance and longevity of the vehicle.

The Traxxas 1/16 E-Revo VXL parts manual is an essential resource for optimizing performance, maintenance, and repairs. Regular upkeep and proper component use ensure durability and peak functionality.

Final Tips for Optimal Performance

For peak performance, ensure regular maintenance by inspecting drivetrain components and replacing worn parts promptly. Adjust the suspension to suit driving conditions and upgrade with high-quality Traxxas accessories. Use the correct battery type and follow charging guidelines to maintain power efficiency. Keep the electrical system clean and free from debris. Utilize the parts manual for accurate repairs and upgrades. Practice proper driving techniques to minimize wear and tear. By adhering to these tips, you can extend the lifespan of your Traxxas 1/16 E-Revo VXL and enjoy enhanced speed and durability on various terrains.

Resources for Further Assistance

For additional support, visit the official Traxxas website to download the latest manuals and exploded views. Engage with online forums and communities where experienced users share tips and solutions. Contact Traxxas customer service for technical inquiries. Explore YouTube tutorials for visual guides on repairs and upgrades. Utilize authorized Traxxas dealers for genuine parts and expert advice. Stay updated with manufacturer notifications for any product updates or recalls. These resources ensure comprehensive support for maintaining and enhancing your Traxxas 1/16 E-Revo VXL, fostering a smooth and enjoyable ownership experience.

plan de negocios ejemplo pdf

Explore our collection of business plan examples in PDF format‚ offering a clear structure and professional outlook for your entrepreneurial ventures. These templates provide a practical starting point for outlining your business strategy‚ ensuring clarity and organization while helping you achieve your goals.

1.1. Importance of a Business Plan

A business plan is essential for outlining strategies‚ goals‚ and operational frameworks‚ ensuring clarity and direction for entrepreneurs and organizations. It helps identify market opportunities‚ understand competition‚ and allocate resources effectively. A well-structured plan acts as a roadmap‚ guiding decision-making and measuring progress. It also highlights strengths‚ weaknesses‚ opportunities‚ and threats‚ enabling proactive adjustments. Additionally‚ a business plan is crucial for securing funding‚ as it demonstrates viability and potential returns to investors. By defining mission‚ vision‚ and objectives‚ it aligns teams and stakeholders‚ fostering collaboration and accountability. Regularly updating the plan allows businesses to adapt to changing environments and maintain competitiveness. Ultimately‚ a business plan is a foundational tool for achieving long-term success and sustainability in any industry.

1.2. Benefits of Using PDF Templates

Using PDF templates for business plans offers numerous advantages‚ including a structured format and professional appearance. These templates provide pre-designed sections‚ ensuring clarity and organization‚ while allowing for customization to suit specific needs. They are easily sharable across devices and platforms‚ maintaining consistency and accessibility. PDF templates also support the inclusion of visual elements like charts and graphs‚ enhancing presentations. Additionally‚ they often feature scannable formats‚ making it simple to identify key components of the plan. Templates may include SWOT analyses‚ timelines‚ and financial projections‚ guiding users through essential aspects of business planning. By streamlining the creation process‚ PDF templates save time and effort‚ enabling entrepreneurs to focus on strategy and execution. They are particularly beneficial for startups and small businesses‚ offering a cost-effective solution for developing a comprehensive and convincing business plan.

1.3. Overview of Key Sections in a Business Plan

A comprehensive business plan typically includes several key sections that provide a detailed roadmap for your venture. These sections often start with an Executive Summary‚ which offers a concise overview of your business. Next‚ the Company Description outlines your business model‚ mission‚ and vision. A thorough Market Analysis is essential‚ highlighting industry trends‚ target audiences‚ and competitors. The Products or Services Offered section details your offerings‚ emphasizing their unique value. A robust Marketing and Sales Strategy follows‚ explaining how you’ll attract and retain customers. Financial Projections are critical‚ providing forecasts for revenue‚ expenses‚ and profitability. Additional sections may include an Operational Plan‚ Management and Organization details‚ and a Funding Request if seeking investment. Together‚ these sections ensure a clear‚ actionable plan for your business’s success.

Structure of a Typical Business Plan

A typical business plan includes key sections like Executive Summary‚ Company Description‚ Market Analysis‚ Products/Services‚ Marketing Strategy‚ Financial Projections‚ and Operational Plan‚ providing a clear roadmap for success.

2.1. Executive Summary

The Executive Summary is a concise overview of your business plan‚ capturing the essence of your venture. It should briefly introduce your company‚ highlighting its mission‚ vision‚ and core objectives. This section is crucial as it provides a snapshot of your business strategy‚ making it easier for readers to understand your goals and motivations. Key elements to include are your value proposition‚ target market‚ competitive advantage‚ and financial highlights. The Executive Summary should be engaging and succinct‚ ideally no more than one page‚ to ensure it effectively communicates your business’s potential and attracts the interest of investors or stakeholders. By clearly articulating your business’s purpose and strategy‚ this section sets the tone for the rest of your plan and helps readers grasp the bigger picture.

2.2. Company Description

The Company Description provides a detailed overview of your business‚ including its structure‚ history‚ and mission. This section outlines the core values and objectives of your organization‚ helping readers understand your business’s identity. It should also highlight the products or services you offer‚ emphasizing how they meet customer needs and differentiate from competitors. Additionally‚ this part of the plan may include information about your company’s location‚ legal structure‚ and team leadership. By clearly defining your business’s purpose and operations‚ the Company Description establishes a solid foundation for the rest of your business plan. It also serves as a narrative that connects your company’s vision with its practical execution‚ making it easier for stakeholders to align with your goals. This section is essential for building credibility and trust with potential investors or partners.

2.3. Market Analysis

A thorough Market Analysis is crucial for understanding your industry‚ competitors‚ and target audience. This section identifies market trends‚ growth opportunities‚ and potential challenges. It highlights the size and structure of your market‚ as well as customer demographics‚ preferences‚ and purchasing behaviors. By analyzing competitors‚ you can determine your business’s competitive advantages and identify gaps in the market. Additionally‚ this section should address regulatory and environmental factors that may impact your operations. The insights gained from this analysis will help you formulate a tailored marketing strategy and ensure your business aligns with market demands. Including data-driven research and credible sources strengthens the credibility of your plan. This comprehensive overview enables you to make informed decisions and position your business for success in a dynamic marketplace. A well-crafted Market Analysis is essential for attracting investors and demonstrating your understanding of the industry landscape.

2.4. Products or Services Offered

This section details the products or services your business provides‚ emphasizing their unique value proposition. Clearly describe the features‚ benefits‚ and lifecycle of your offerings. Highlight what sets your products or services apart from competitors‚ such as quality‚ innovation‚ or cost-effectiveness. Include details about pricing strategies‚ packaging‚ and branding to demonstrate how your offerings meet customer needs. If applicable‚ outline any intellectual property‚ patents‚ or exclusive rights that protect your products or services. Additionally‚ discuss the development process‚ production costs‚ and scalability. This section should also address how your offerings align with your target market’s preferences and industry trends. Using examples from PDF templates can help organize this information effectively‚ ensuring a clear and compelling presentation of your business’s core offerings. This clarity is essential for attracting investors and demonstrating market readiness.

2.5. Marketing and Sales Strategy

This section outlines how your business will attract and retain customers. It includes a detailed analysis of your target market‚ competitive landscape‚ and unique value proposition. Define your branding strategy‚ pricing model‚ and sales channels‚ such as online platforms‚ retail partnerships‚ or direct sales. Highlight promotional tactics like digital marketing‚ social media campaigns‚ or content marketing to build awareness and drive engagement. Include a SWOT analysis to identify strengths‚ weaknesses‚ opportunities‚ and threats in your marketing approach. Describe how you will measure the effectiveness of your strategies through metrics like website traffic‚ conversion rates‚ or customer acquisition cost. Use examples from PDF templates to structure this section clearly‚ ensuring alignment with your business goals and market demands. A well-defined marketing and sales strategy is crucial for demonstrating how your business will gain and maintain a competitive edge.

2.6. Financial Projections

This section provides a detailed financial outlook for your business‚ typically covering 3-5 years. It includes projected income statements‚ cash flow analysis‚ and balance sheets‚ showcasing your business’s potential profitability and financial health. Outline revenue streams‚ expense breakdowns‚ and profit margins‚ supported by realistic assumptions. Highlight key financial metrics such as break-even points‚ ROI‚ and debt repayment plans. Use charts or tables to present data clearly. PDF templates often include spreadsheets or financial models to simplify these calculations. Be clear and realistic to build credibility with investors or stakeholders. This section demonstrates your understanding of financial management and your ability to achieve sustainability and growth. Ensure alignment with your business goals and market analysis for a cohesive plan.

2.7. Operational Plan

The operational plan outlines the day-to-day activities and resources required to run your business effectively. It details production processes‚ supply chain management‚ staffing needs‚ and facility requirements. This section explains how your business will deliver its products or services‚ ensuring operational efficiency and alignment with strategic goals. Include timelines‚ key responsibilities‚ and workflows to illustrate how tasks will be managed. Highlight any unique operational advantages‚ such as proprietary technology or strategic partnerships. Additionally‚ address potential challenges and contingency plans to maintain continuity. The operational plan demonstrates your ability to execute the business strategy and manage resources effectively‚ ensuring long-term sustainability and scalability. Use this section to showcase your understanding of the practical aspects of running the business and how you will achieve operational excellence. Ensure the plan is realistic and aligned with your financial and market analysis.

2.8. Management and Organization

The management and organization section details the structure and leadership of your business‚ outlining key roles‚ responsibilities‚ and the organizational hierarchy. Describe the ownership structure‚ whether it’s a sole proprietorship‚ partnership‚ LLC‚ or corporation. Highlight the qualifications and expertise of your management team‚ including their roles in driving the business forward. Include bios of key personnel‚ emphasizing their relevant experience and skills. Explain how decisions are made and how the organization is structured to ensure efficiency and accountability. This section also covers the company’s leadership style and how it fosters a productive work environment. Provide an organizational chart if applicable to visualize the reporting structure. This part of the plan reassures investors and stakeholders that your team is capable of executing the business strategy effectively. A strong management section builds credibility and confidence in your business’s leadership. Ensure clarity and transparency in presenting your team’s strengths and organizational framework.

2.9. Funding Request

The funding request section outlines the financial requirements of your business‚ specifying the amount of capital needed and how it will be allocated. Clearly state the total funding required and break it down into key areas such as product development‚ marketing‚ operational costs‚ and equipment purchases. If seeking investment‚ detail the equity or ownership stake being offered in exchange for funding. For loans‚ outline repayment terms and interest rates. Provide a compelling justification for the funding request‚ highlighting how the capital will drive growth and profitability. Include a timeline for the use of funds and expected milestones. This section should demonstrate a clear understanding of financial needs and how the funding will be utilized to achieve business objectives. Ensure transparency and credibility by providing a detailed yet concise overview of your funding requirements and plans. This section is critical for attracting investors or securing loans.

Examples of Business Plans in PDF Format

Discover various business plan examples in PDF format‚ from traditional to lean startup plans‚ designed to guide entrepreneurs in structuring and organizing their business strategies effectively.

3.1. Traditional Business Plan Example

A traditional business plan is a comprehensive and detailed document outlining all aspects of a business‚ including its goals‚ target market‚ products or services‚ marketing strategies‚ financial projections‚ and operational plans. It typically includes sections like an executive summary‚ company description‚ market analysis‚ product offerings‚ and financial projections. This format is ideal for established businesses or startups seeking funding‚ as it provides a thorough overview of the business model. The traditional plan is often lengthy‚ ranging from 20 to 30 pages‚ and is designed to attract investors or lenders by demonstrating the viability and potential of the business. It may also include charts‚ graphs‚ and detailed financial tables to support the business case. Examples of traditional business plans can be found in PDF formats online‚ offering templates that guide users through each section. These templates are particularly useful for industries like retail‚ manufacturing‚ or hospitality‚ where detailed planning is crucial. They provide a structured approach to developing a robust business strategy‚ ensuring no critical aspect is overlooked.

3.2. Lean Business Plan Example

A lean business plan is a streamlined and flexible approach to business planning‚ focusing on key elements such as the problem‚ solution‚ market‚ and financial projections. Unlike traditional plans‚ it emphasizes simplicity and adaptability‚ making it ideal for startups or businesses in dynamic environments. The lean plan typically includes sections like a value proposition‚ target market‚ competitive analysis‚ and revenue streams. It prioritizes clarity and brevity‚ often presented in a single page or a concise document. This format allows entrepreneurs to quickly iterate and refine their strategy as conditions change. Lean business plans are also useful for internal communication and tracking progress. Examples of lean business plans in PDF format provide templates that guide users through the essential components‚ ensuring a focused and actionable strategy. This approach is particularly popular among agile startups seeking to validate assumptions and pivot as needed.

3.3. One-Page Business Plan Example

A one-page business plan example is a concise and straightforward template designed to summarize key aspects of a business strategy on a single page. This format is ideal for entrepreneurs who need to present their ideas quickly and clearly to investors‚ partners‚ or stakeholders. It typically includes sections such as the business idea‚ target market‚ value proposition‚ competitive advantage‚ and financial projections. The one-page plan focuses on brevity while ensuring all essential elements are covered. Visual elements like charts or graphs can be used to simplify complex data‚ making the plan easy to understand at a glance. This format is particularly useful for startups or small businesses looking to communicate their vision effectively without overwhelming the reader. By distilling the business strategy into a single page‚ it encourages clarity and precision‚ ensuring the core ideas shine through.

3.4. Nonprofit Business Plan Example

A nonprofit business plan example provides a structured approach for organizations aiming to create social impact while ensuring financial sustainability. Unlike for-profit plans‚ nonprofit templates emphasize mission-driven goals‚ outlining how the organization will achieve its objectives and benefit the community. Key sections include a clear mission statement‚ vision‚ and actionable goals. Financial projections focus on funding sources‚ such as grants‚ donations‚ and sponsorships‚ while operational plans detail how resources will be allocated to maximize impact. These templates often include tools like SWOT analyses to assess internal strengths and external opportunities. Additionally‚ they highlight strategies for building partnerships and engaging stakeholders. Nonprofit business plans are essential for securing funding and demonstrating accountability to donors. By using a PDF template‚ nonprofits can present their strategy professionally and clearly‚ ensuring alignment with their charitable purpose and long-term sustainability.

Business Plan Templates

Discover a variety of customizable business plan templates designed to help you structure and organize your strategic goals effectively‚ ensuring a professional and clear presentation of your ideas.

4.1. Simple Business Plan Template

A simple business plan template is ideal for entrepreneurs seeking a straightforward approach to outline their business strategy. This template is designed to be user-friendly‚ offering essential sections such as an executive summary‚ company description‚ market analysis‚ products/services‚ marketing strategy‚ financial projections‚ and operational plans. It provides a clear structure‚ making it easy to organize ideas without unnecessary complexity. The template is fully customizable‚ allowing users to tailor each section to their specific business needs. Whether you’re launching a startup or expanding an existing business‚ this template ensures your plan is concise and professional. It also includes space for key performance metrics and a timeline of activities‚ helping you stay focused and track progress effectively. Download and personalize this template to create a solid foundation for your business strategy.

4.2. 30-60-90 Day Business Plan Template

The 30-60-90 day business plan template is a structured framework designed to help businesses set and achieve short-term goals. This template divides the plan into three manageable phases‚ allowing users to outline specific objectives‚ key results‚ and actions for each period. It is particularly useful for new roles‚ startups‚ or businesses looking to launch a new product or service. The template includes sections for breaking down goals into actionable steps‚ assigning responsibilities‚ and setting deadlines. By focusing on short-term milestones‚ businesses can maintain momentum and track progress effectively. This template is customizable‚ making it suitable for various industries and business sizes. It also includes space for reviewing and adjusting strategies as needed‚ ensuring adaptability and continuous improvement. Use this template to create a clear roadmap for the first 90 days of your business venture‚ ensuring alignment with long-term goals while maintaining focus on immediate priorities.

4.3. Small Business Plan Template

The small business plan template is tailored to meet the unique needs of small businesses‚ providing a straightforward and organized approach to strategic planning. This template includes sections for outlining the business description‚ target market‚ product or service offerings‚ marketing strategies‚ and financial projections. It also offers space for a SWOT analysis‚ helping small businesses identify strengths‚ weaknesses‚ opportunities‚ and threats. The template is designed to be user-friendly‚ allowing entrepreneurs to focus on key elements without unnecessary complexity. By using this template‚ small businesses can create a comprehensive yet concise plan‚ ensuring they cover all critical aspects of their operations. It serves as a valuable tool for startups and established businesses alike‚ helping them clarify their vision and achieve sustainable growth in a competitive market.

4.4. Startup Business Plan Template

The startup business plan template is specifically designed for new ventures‚ offering a structured approach to developing a robust business strategy. It includes essential sections such as an executive summary‚ market analysis‚ product or service description‚ marketing strategy‚ and financial projections. This template also incorporates a visual timeline for key milestones and a SWOT analysis to evaluate strengths‚ weaknesses‚ opportunities‚ and threats. Tailored for startups‚ it provides a clear framework to validate business ideas and secure funding. The template allows entrepreneurs to outline their mission‚ vision‚ and unique value proposition while detailing pricing structures and revenue models. Additionally‚ it includes space for team descriptions and operational plans‚ ensuring a comprehensive overview of the business. This customizable template is ideal for startups seeking to present a professional and compelling plan to investors or stakeholders.

4.5. Blank Business Plan Template

A blank business plan template offers a versatile and flexible framework for creating a customized business plan from scratch. Designed to accommodate businesses of all sizes and industries‚ this template provides an outline of essential sections‚ such as the executive summary‚ company description‚ market analysis‚ products/services‚ marketing strategy‚ financial projections‚ and operational plan. It allows users to fill in each section with specific details relevant to their business‚ ensuring a tailored approach. The template is ideal for entrepreneurs who prefer a DIY method‚ offering a clean and professional structure without pre-filled content. It serves as a comprehensive guide‚ helping users organize their ideas and present a cohesive strategy. Perfect for startups‚ small businesses‚ or established companies‚ this blank template provides the freedom to create a unique and detailed business plan that aligns with their goals and vision.

Additional Resources

Discover tools‚ guides‚ and templates to refine your business strategy. Explore online resources‚ PDF examples‚ and expert tips to enhance your business planning process and achieve success.

5.1. Tools for Creating a Business Plan

Utilize professional tools to streamline your business planning process. Smartsheet offers comprehensive templates and collaboration features‚ while LivePlan provides an intuitive interface for startups. BizPlanBuilder guides you through structured sections‚ and Canva ensures a visually appealing design. These tools help you create detailed financial projections‚ market analyses‚ and strategic outlines‚ saving time and ensuring a polished result. Whether you’re a seasoned entrepreneur or a newcomer‚ these resources provide the support needed to craft a compelling business plan. Explore these tools to enhance your planning efficiency and achieve professional-grade outcomes.

5.2. Best Practices for Writing a Business Plan

When crafting a business plan‚ prioritize clarity and conciseness to ensure your vision is easily understood. Begin with a strong executive summary that encapsulates your business’s core objectives and value proposition. Tailor your language to your audience‚ avoiding overly technical jargon unless necessary. Organize your plan into clear‚ well-defined sections‚ such as market analysis‚ financial projections‚ and operational strategies. Use visual aids like charts and graphs to present complex data in an engaging manner. Regularly review and update your plan to reflect market changes and business evolution. Maintain a professional tone while keeping your content approachable. Finally‚ ensure your plan is aligned with your business goals‚ whether you’re seeking investment‚ guiding your team‚ or mapping your company’s future. A well-structured and thoughtfully written plan is essential for success.

5.3. Common Mistakes to Avoid

When developing a business plan‚ avoid common pitfalls that can undermine its effectiveness. One major mistake is lack of clarity and conciseness‚ which can confuse readers. Overly optimistic financial projections may seem appealing but can damage credibility if unrealistic. Neglecting thorough market analysis and competitive research is another error‚ as it leaves strategies unsupported. Many plans also fail to detail operational specifics‚ such as supply chains or team roles. Additionally‚ ignoring the unique needs of your target audience can lead to misaligned strategies. Avoid using overly technical language unless necessary‚ as it can alienate potential investors or stakeholders. Lastly‚ failing to regularly update your plan to reflect market changes or business evolution can render it obsolete. By addressing these common mistakes‚ you can create a more robust and actionable business plan.

5.4. Where to Find More Examples and Templates

To access more business plan examples and templates in PDF format‚ explore reputable online resources. Websites like Smartsheet‚ Microsoft Office‚ and Google Docs offer a wide range of customizable templates. Additionally‚ platforms like Template.net and BizPlanBuilder provide professional and versatile options tailored to various business types. Academic institutions and business schools often share sample plans for educational purposes. Small Business Administration (SBA) websites and entrepreneur-focused forums are also excellent sources. Many libraries offer free access to business plan databases and tools. For nonprofit-specific plans‚ resources like Foundation Center or NonprofitReady.org are invaluable. Utilize these resources to find templates that align with your business needs‚ ensuring you can create a comprehensive and compelling plan. These examples and templates serve as a solid foundation for drafting your own unique business strategy.

A well-crafted business plan is essential for guiding your entrepreneurial journey and achieving long-term success. By leveraging the examples and templates available in PDF format‚ you can create a structured and professional document that outlines your vision‚ strategy‚ and goals. These resources provide a solid foundation‚ enabling you to tailor your plan to your specific business needs. Whether you’re launching a startup‚ expanding an existing business‚ or exploring nonprofit ventures‚ having a clear and comprehensive plan is crucial. Use these tools to streamline your planning process‚ ensure clarity‚ and convey confidence to stakeholders. Remember‚ a business plan is not just a document—it’s a roadmap to turning your ideas into reality. With the right approach and resources‚ you can create a compelling plan that drives growth and prosperity for your organization.

new cadet guide

Welcome to the Cadet Program! This guide will help you understand the expectations, responsibilities, and opportunities ahead. Prepare to embrace discipline, growth, and camaraderie while developing leadership skills.

1.1 Overview of the Cadet Program

The Cadet Program offers a transformative experience, blending military structure with personal development. It equips cadets with leadership, discipline, and teamwork skills while fostering camaraderie. Participants engage in training, community service, and character-building activities. The program emphasizes physical fitness, mental resilience, and ethical decision-making. Cadets progress through ranks, gaining responsibilities and confidence. Mentorship from experienced instructors guides their journey, ensuring a supportive environment for growth. This structured framework helps cadets develop into capable, disciplined individuals prepared for future challenges. The program is a gateway to lifelong skills and values.

1.2 Benefits of Joining the Cadet Program

Joining the Cadet Program offers numerous benefits, including enhanced leadership skills, improved physical fitness, and mental resilience. Cadets gain opportunities for advancement, scholarships, and career development. They develop strong communication and teamwork abilities, fostering lifelong friendships. The program builds confidence and discipline, preparing cadets for future challenges. Additionally, cadets earn recognition through awards and promotions, while contributing to community service. The structured environment encourages personal growth and a sense of purpose, helping cadets become capable and disciplined individuals.

Understanding the Role and Responsibilities

As a cadet, you will learn to embrace discipline, respect, and teamwork while fulfilling assigned duties. Understanding your role is key to contributing effectively and growing personally.

2.1 Overview of Cadet Duties

Cadet duties include participating in training exercises, attending drills, and engaging in community service. You will also be expected to maintain proper uniform standards and adhere to the chain of command. Additionally, cadets are encouraged to actively contribute to team activities and demonstrate leadership skills. Understanding and fulfilling these responsibilities is essential for personal growth and successful integration into the program. Always seek guidance from superiors and peers to ensure you meet expectations and excel in your role.

2.2 Chain of Command and Communication

The chain of command is a structured hierarchy that ensures clear communication and accountability. As a cadet, you will report to your superiors and follow the established ranks. Proper communication is vital for coordination and discipline. Always address superiors with respect and clarity, and be prepared to follow instructions promptly. Understanding the chain of command helps maintain order and efficiency within the program. Effective communication fosters teamwork and ensures everyone works toward common goals. Seek guidance from your superiors when unsure, and always maintain professionalism in your interactions.

Preparing for the Cadet Program

Prepare physically, mentally, and logistically for the Cadet Program. Focus on fitness, proper grooming, and obtaining necessary gear. Dedication and discipline will set you up for success.

3.1 Physical Conditioning and Fitness

Physical conditioning is essential for cadets to build endurance, strength, and agility. A regular exercise routine, including cardio and strength training, will prepare you for the demands of the program. Focus on improving flexibility and overall health to meet the rigorous standards. Proper nutrition and hydration are also vital to support your physical development. Set achievable fitness goals and track your progress to ensure steady improvement. Remember, physical fitness is a cornerstone of the cadet experience, fostering discipline and resilience for your journey ahead.

3.2 Uniform Standards and Grooming

Adhering to uniform standards and grooming protocols is crucial for cadets.Ensure your uniform is always clean, properly fitted, and worn correctly. Maintain a neat hairstyle, trimmed nails, and polished shoes. Facial hair must be kept to a minimum or shaved completely. Females should style their hair neatly, avoiding loose ends. These standards promote discipline, professionalism, and unity among cadets. Familiarize yourself with the dress code and grooming guidelines to present yourself confidently and respectfully. Proper appearance reflects pride in the program and your commitment to excellence.

3.3 Essential Gear and Equipment

As a new cadet, it’s important to have the right gear to meet program requirements. Essential items include a proper uniform, polished footwear, and grooming tools. Invest in a sturdy backpack for carrying supplies. Bring a water bottle, notebook, and pen for training sessions. A first-aid kit is also recommended. Ensure all gear is well-maintained and easily accessible. Familiarize yourself with the equipment list provided by your unit to stay prepared. Properly equipped cadets perform better and demonstrate readiness for challenges ahead. Being organized with the right gear fosters discipline and success in the program.

Daily Life as a New Cadet

Daily life as a new cadet is structured and demanding, focusing on routine, discipline, and teamwork. Adapt to a military environment, embrace challenges, and grow personally and professionally.

4.1 Routine and Time Management

Mastering a daily routine is crucial for new cadets. Establish a strict schedule for activities, ensuring balance between training, study, and personal time. Effective time management enhances productivity and reduces stress. Prioritize tasks, set clear goals, and adhere to timelines. Utilize tools like planners to stay organized. Consistency builds discipline, essential for success in the program. Remember, a well-structured routine fosters accountability and prepares you for future challenges.

4.2 Etiquette and Courtesy

Etiquette and courtesy are cornerstone values in the Cadet Program. Cadets must always demonstrate respect through proper military courtesies, such as salutes and addressing superiors correctly. Common courtesy, like saying “please” and “thank you,” is equally important. Maintain a polite demeanor in all interactions, whether formal or informal. Consistency in these practices fosters a positive and disciplined environment. Remember, courteous behavior reflects not only on you but also on your unit and the program as a whole.

Adapting to the military environment requires discipline and a willingness to embrace structure. Cadets must quickly adjust to protocols, respect the chain of command, and understand their role within the unit. Maintain a neat and organized living space, as cleanliness reflects personal discipline. Familiarize yourself with daily routines and duty hours to avoid confusion. Building strong relationships with peers and superiors fosters a supportive atmosphere. Embrace the challenges as opportunities for growth, and remember that teamwork and discipline are essential to thriving in this structured setting.

Training and Development

4.3 Adapting to the Military Environment

Adapting to the military environment demands discipline, respect for hierarchy, and understanding your role. Maintain a tidy space, as organization reflects personal discipline. Build strong bonds with peers and superiors to foster support. Embrace challenges as growth opportunities and recognize that teamwork and discipline are crucial in this structured setting.

5.1 Basic Training Overview

Basic training introduces cadets to the fundamentals of military life, emphasizing discipline, teamwork, and leadership. The program covers essential skills like drill, first aid, and navigation. Cadets learn to work collaboratively, adapting to structured routines and physical challenges. Instruction focuses on building confidence and resilience while fostering camaraderie. Training includes classroom sessions, practical exercises, and field activities to ensure a well-rounded foundation for future success in the program.

5.2 Leadership and Teamwork Skills

Leadership and teamwork are cornerstone skills for cadets. Training emphasizes developing these abilities through collaborative exercises, decision-making drills, and shared responsibilities. Cadets learn to communicate effectively, delegate tasks, and inspire peers. Teamwork fosters unity and mutual support, while leadership training builds confidence and problem-solving skills. These experiences prepare cadets to lead by example, both within the program and in future endeavors, creating a strong foundation for personal and professional growth.

5.3 Advanced Training Opportunities

Advanced training offers cadets specialized courses to enhance their skills beyond basic training. These programs focus on leadership development, tactical operations, and specialized fields like aviation or emergency response. Cadets gain hands-on experience through simulations, workshops, and real-world applications. Mentorship from experienced instructors and peers fosters growth and confidence. These opportunities not only deepen expertise but also prepare cadets for future challenges, both within the program and beyond, ensuring they are well-equipped to excel in diverse roles.

Etiquette and Protocol

Understanding military courtesies and proper etiquette is essential for cadets. It ensures respect, discipline, and cohesion within the corps. Cadets must demonstrate courtesy and follow protocols in all settings, respecting traditions and maintaining a professional image.

6.1 Military Salutes and Courtesies

Military salutes and courtesies are fundamental to maintaining discipline and respect. Cadets must learn proper saluting techniques, when to salute, and whom to salute. Salutes are rendered when encountering officers or senior cadets, demonstrating respect for authority and tradition. Proper posture and eye contact are essential during salutes. Additionally, cadets should understand the appropriate times for formal and informal courtesies, such as addressing superiors with “Sir” or “Ma’am.” Consistent practice ensures these courtesies become second nature, reflecting professionalism and unity within the corps.

6.2 Proper Addressing of Superiors

Addressing superiors correctly is a cornerstone of military etiquette. Cadets must use formal titles such as “Sir,” “Ma’am,” or “Dr.” when speaking to officers or senior cadets. Proper addressing shows respect and maintains order within the chain of command. When unsure of a superior’s rank, it’s best to err on the side of formality. Verbal communication should always be clear and polite, avoiding slang or casual language. Written communication, such as emails, should also follow formal protocols. Consistently addressing superiors properly fosters a culture of respect and discipline within the corps.

6.3 Behavior in Formal and Informal Settings

Behavior in formal settings requires cadets to maintain strict adherence to protocol. This includes proper posture, eye contact, and respectful silence when necessary. In informal settings, cadets must still uphold military standards, avoiding inappropriate jokes or overly casual behavior. The key is to strike a balance—being approachable yet maintaining professionalism. Consistency in behavior across all settings fosters trust and respect among peers and superiors. Cadets should always be mindful of their actions, ensuring they reflect positively on themselves and the program. Proper conduct in both contexts is essential for a cohesive and disciplined unit.

Health and Wellness

Prioritizing physical and mental health is crucial for cadets. Regular exercise, balanced nutrition, and stress management are essential to maintain peak performance and overall well-being in the program.

7.1 Importance of Physical Health

Maintaining physical health is vital for cadets to meet training demands and perform duties effectively. Regular exercise improves stamina, strength, and agility, while a healthy lifestyle prevents injuries and enhances focus.

7.2 Mental Health and Stress Management

Mental health is crucial for cadets to handle the pressures of training and daily responsibilities. Stress management techniques, such as mindfulness and seeking support, help maintain emotional balance. Prioritizing mental well-being ensures resilience and focus, enabling cadets to thrive in challenging environments. A healthy mind supports overall performance and personal growth.

7.3 Nutrition and Hydration Tips

Proper nutrition and hydration are vital for maintaining energy and focus. Cadets should consume balanced meals, including lean proteins, complex carbs, and essential vitamins. Staying hydrated with water is crucial, especially during physical activities. Avoid sugary and processed foods to optimize performance. A well-nourished body supports physical training, mental clarity, and overall health, ensuring cadets are prepared for daily challenges and achieve their goals effectively.

Building Relationships

Building strong relationships is key to success. Foster teamwork, communicate effectively, and seek mentorship. Mutual respect and trust strengthen bonds, creating a supportive and cohesive environment.

8.1 Teamwork and Camaraderie

Teamwork and camaraderie are essential in the Cadet Program. Cadets learn to rely on each other, fostering trust and unity. Shared experiences and collaborative efforts strengthen bonds, creating a supportive environment. Peer support enhances resilience and mutual respect, while collective achievements boost morale. By working together, cadets build lasting friendships and develop a sense of belonging. These relationships are vital for personal and professional growth, helping cadets overcome challenges and achieve their goals together.

8.2 Mentorship and Guidance

Mentorship is crucial for cadets’ growth, providing guidance and support. Experienced leaders offer valuable insights, helping cadets navigate challenges and improve skills. Regular feedback and encouragement foster confidence and decision-making abilities. Cadets are encouraged to seek mentorship from superiors and peers to refine their performance. This relationship builds trust and accelerates personal and professional development. Open communication with mentors ensures cadets receive tailored advice, enabling them to achieve their full potential and excel in the program.

8.3 Communication with Peers and Leaders

Effective communication is key to success in the Cadet Program. Cadets should maintain clear, respectful dialogue with peers and leaders, ensuring understanding and collaboration. Active listening and concise messaging foster strong relationships. Regular updates and feedback are essential for alignment and growth. Leaders encourage open communication to address concerns and share knowledge. Cadets are expected to communicate clearly, both formally and informally, to ensure teamwork and unity. Proper communication builds trust and ensures everyone works toward common goals efficiently and effectively.

Continuous Improvement

Continuous improvement is vital for cadet success. Set personal goals, seek feedback, and learn from mistakes to grow. Stay motivated, embrace challenges, and maintain discipline for long-term development.

9.1 Setting Personal Goals

Setting clear and achievable personal goals is crucial for cadet development. Start by identifying short-term objectives, such as improving fitness or mastering drill techniques, and align them with long-term aspirations like leadership roles. Break down larger goals into manageable steps and regularly track progress. Celebrate small victories to maintain motivation. Ensure goals are specific, measurable, and time-bound to stay focused and driven. This structured approach will help you stay on track and achieve success in the program.

9.2 Seeking Feedback and Learning from Mistakes

Seeking feedback is vital for personal growth as a cadet. Regularly ask for constructive criticism from superiors and peers to identify strengths and areas for improvement. Mistakes are opportunities to learn and grow, fostering resilience and accountability. Embrace feedback with a positive mindset, using it to refine skills and decision-making. By addressing errors and implementing corrections, you demonstrate initiative and commitment to self-improvement. This proactive approach will help you develop confidence and excel in your cadet journey.

9.3 Staying Motivated and Disciplined

Staying motivated and disciplined requires a strong mindset and clear goals. Set achievable objectives and celebrate small victories to maintain momentum. Surround yourself with supportive peers who share your commitment. Consistently adhere to routines, including physical training and study schedules, to build habits. Remind yourself of the program’s purpose and the personal growth it offers. Embrace challenges as opportunities to improve. Stay focused, and when faced with setbacks, draw strength from your goals and the support of your team. Discipline will guide you toward success and resilience in your cadet journey.

Embrace the journey, stay disciplined, and seek growth; Use the guide’s insights to excel, foster strong relationships, and achieve personal and professional success in the Cadet Program.

10.1 Final Tips for Success

To excel as a cadet, maintain discipline, stay motivated, and embrace challenges. Seek feedback, learn from mistakes, and set clear goals. Build strong relationships with peers and leaders, fostering teamwork and camaraderie. Prioritize physical and mental health, ensuring you’re well-prepared for duties. Adhere to etiquette and protocols, demonstrating respect and professionalism. Stay curious, continuously seek improvement, and take advantage of training opportunities. By doing so, you’ll navigate the program successfully and achieve personal and professional growth.

10.2 Embracing the Cadet Journey

Embracing the cadet journey means committing to personal growth, teamwork, and discipline. View challenges as opportunities to develop resilience and leadership skills. Foster meaningful relationships with peers and mentors, as they will support your journey. Stay motivated by celebrating small achievements and reflecting on progress. Remember, the cadet experience is a transformative path that shapes character and prepares you for future success. Approach each day with enthusiasm and dedication, knowing that your efforts will yield lasting rewards.

series guide forum logo

Series Guide Forum Logo: An Overview

The Series Guide Forum logo represents the essence of the platform in a concise visual. It typically embodies simplicity and clarity‚ aiming to immediately convey the forum’s purpose. The design often incorporates elements that symbolize discussion‚ guidance‚ and community interaction.

Understanding the Series Guide Forum

The Series Guide Forum serves as a dedicated space for users seeking information and guidance on TV series. It’s a community-driven platform where members discuss episodes‚ share reviews‚ and offer recommendations. The forum fosters interaction among series enthusiasts.

Purpose and Functionality of the Forum

The Series Guide Forum is designed to provide a collaborative environment for TV series enthusiasts. Its primary purpose is to facilitate discussions‚ share insights‚ and offer guidance related to various television shows. Functionally‚ the forum allows users to create threads‚ post comments‚ and engage in conversations about specific episodes‚ seasons‚ or entire series. Members can also share reviews‚ ratings‚ and recommendations‚ helping others discover new shows or deepen their understanding of existing ones. The forum aims to create a helpful and informative community for all things TV-related‚ fostering engagement and knowledge exchange among its users.

Logo Design Elements

The Series Guide Forum logo incorporates specific design elements to represent its brand. These elements include a carefully chosen color scheme‚ symbolic imagery‚ and legible typography‚ all working together to convey the forum’s identity.

Color Scheme and Symbolism

The color scheme of the Series Guide Forum logo often utilizes blues and whites. Blue can symbolize trust‚ stability‚ and knowledge‚ reflecting the reliable guidance offered within the forum. White typically represents clarity‚ openness‚ and neutrality‚ highlighting the inclusive nature of discussions. The combination aims to project an image of a dependable and accessible platform. The symbolism behind the logo elements‚ such as brackets or speech bubbles‚ further reinforces the forum’s core function as a space for conversation and shared information. These colors and symbols work together to create a visual identity that aligns with the forum’s mission.

Typography and Readability

Typography plays a vital role in the Series Guide Forum logo‚ ensuring clear communication. The chosen font should be easily readable‚ even at smaller sizes‚ to maintain legibility across various platforms. Sans-serif fonts are often preferred for their modern and clean appearance‚ which aligns well with digital environments. The font’s weight should be balanced‚ avoiding extremes that could compromise readability. Careful consideration is given to letter spacing and kerning to enhance visual appeal. The overall typography aims to present the “Series Guide Forum” name in a way that is both accessible and visually engaging‚ reinforcing brand recognition and usability.

Design Principles in the Logo

The Series Guide Forum logo adheres to key design principles for effective visual communication. Simplicity‚ clarity‚ and balance are prioritized to ensure the logo is easily recognizable and memorable. These elements contribute to a professional and user-friendly image.

Minimalism and Clarity

The logo design embraces minimalism‚ focusing on essential elements to avoid clutter and enhance recognition. A clean‚ uncluttered design ensures that the logo remains easily identifiable‚ even at smaller sizes. Clarity is paramount‚ with the logo visually communicating the forum’s core function. This simplicity fosters a professional and approachable image‚ allowing users to quickly understand the forum’s purpose. By reducing unnecessary details‚ the logo achieves a timeless quality‚ ensuring its relevance and effectiveness over time. The minimalist approach also aids in versatility‚ enabling the logo to be used across various platforms and applications without losing its impact.

Reflecting the Forum’s Interactive Nature

The logo design visually represents the interactive environment of the Series Guide Forum; It incorporates elements that suggest conversation‚ exchange of ideas‚ and community engagement. The use of interconnected shapes or symbols conveys the dynamic interaction among forum members. Color choices may reflect the energy and collaborative spirit of the community. The design aims to create a sense of openness and participation‚ inviting users to actively contribute and engage in discussions. Ultimately‚ the logo serves as a visual invitation‚ encouraging viewers to join the forum and become part of its vibrant‚ interactive community‚ fostering a sense of belonging and shared knowledge.

The Logo’s Visual Representation

The logo visually embodies the forum’s core function. It uses symbols and imagery to convey information exchange and discussion. The design elements aim to be instantly recognizable and representative of the Series Guide Forum’s purpose.

Depiction of Open Brackets

The logo frequently features open brackets‚ a visual metaphor signifying a space for dialogue and contribution. These brackets symbolize the forum’s role as an inclusive environment where diverse perspectives are welcome. The open nature of the brackets suggests ongoing conversations and the continuous flow of information. They visually represent the collaborative spirit of the Series Guide Forum. Furthermore‚ the strategic placement and design of the brackets enhance the logo’s overall impact‚ reinforcing the forum’s commitment to open communication and shared knowledge within the TV series community‚ making it inviting and representative of the forum’s interactive nature.

Conveying Discussion and Information Exchange

The Series Guide Forum logo aims to visually represent the exchange of ideas and collaborative discussion. This is often achieved through symbolic elements that suggest communication and shared knowledge. The design may incorporate abstract shapes‚ connecting lines‚ or speech bubble-like forms to illustrate the dynamic interaction between forum members. The overall composition seeks to evoke a sense of community and collaborative learning‚ reinforcing the forum’s primary function as a hub for discussing TV series‚ sharing information‚ and fostering engaging conversations among its users‚ ensuring the logo encapsulates the forum’s core values and purpose effectively.

Creating a TV Series Logo

Creating a TV series logo involves selecting colors‚ symbols‚ and typography that represent the show’s theme and style. The logo should be unique‚ memorable‚ and effective across various platforms‚ attracting viewers.

Choosing Colors and Symbols

Selecting the right colors and symbols is crucial for visually representing the essence of a TV series. Colors should reflect the show’s mood and genre‚ with vibrant hues for comedies and darker tones for dramas. Symbols‚ such as film reels or genre-specific icons‚ should create an immediate connection with the television industry and potential viewers. The chosen elements must resonate with the target audience‚ enhancing the show’s identity. Consistency in color and symbolism across all platforms ensures brand recognition‚ contributing to the show’s overall success. A well-considered palette and iconography establish a strong visual presence.

AI-Powered Logo Design for TV Series

AI-powered logo design offers a streamlined approach to creating impactful visuals for TV series. These tools generate unique logo options tailored to the show’s style‚ theme‚ and vision‚ simplifying the design process.

Customization and Versatility

AI-driven logo platforms offer extensive customization options‚ ensuring the final design perfectly aligns with the TV series’ identity. Users can adjust colors‚ fonts‚ and layouts to reflect the show’s unique style and genre. This adaptability ensures the logo resonates with the target audience and effectively communicates the series’ essence. Versatility is key‚ with logos designed to look impactful across various platforms‚ from promotional materials to digital streaming services. The ability to tweak and refine the design ensures a professional and cohesive brand presence‚ enhancing the series’ overall appeal and recognition. This makes AI a powerful tool.

Ensuring Logo Uniqueness and Protection

Protecting a logo involves thorough research to prevent trademark infringement. Securing a trademark safeguards your brand’s visual identity‚ ensuring exclusivity. This legal protection is vital for maintaining logo uniqueness and preventing unauthorized use.

Trademark Considerations

When designing a logo‚ it is crucial to conduct a thorough search to ensure that the design does not infringe on any existing trademarks. This involves checking databases and resources to confirm the logo’s uniqueness. Trademarking your logo provides legal protection‚ preventing others from using a similar design that could confuse consumers. This safeguards your brand identity and ensures that your logo remains exclusive to your forum. Protecting your logo through trademark registration is an investment in your brand’s future‚ securing its visual representation and preventing potential legal disputes. This step is essential for establishing a strong and defensible brand presence.

Forum Logo Design Inspiration

Explore a variety of forum logo designs to spark your creativity. Look at different styles‚ color schemes‚ and symbolic representations. Analyze successful logos in similar fields for valuable insights.

Examples and Styles

Delve into existing forum logos to understand design trends and effective visual communication. Consider minimalistic designs with clean typography for clarity. Explore logos that incorporate symbolic imagery‚ such as speech bubbles or interconnected nodes‚ to represent community and discussion. Analyze color palettes that evoke trust‚ knowledge‚ and engagement. Look at logos that use abstract shapes to convey innovation and forward-thinking. Pay attention to the use of negative space to create memorable and impactful designs. Examine various font styles‚ ensuring readability and visual appeal. Consider how different logos adapt across various platforms and sizes‚ maintaining their integrity and impact.

indesit washing machine iwdc6125 manual

Indesit IWDC6125 Washing Machine Manual: A Comprehensive Guide

Welcome to your comprehensive guide to the Indesit IWDC6125 washer-dryer! This manual provides essential information, from installation to troubleshooting. Discover how to maximize the efficiency and lifespan of your appliance with our detailed instructions and helpful tips. Get ready to master your laundry!

The Indesit IWDC6125 is a freestanding washer-dryer designed for efficient and effective laundry care. This appliance combines washing and drying capabilities, offering a convenient solution for households seeking to save space and time. With its user-friendly interface and range of programs, the IWDC6125 aims to simplify the laundry process.

This comprehensive guide will walk you through every aspect of the Indesit IWDC6125, from initial setup and operation to maintenance and troubleshooting. Whether you’re a first-time user or looking to optimize your appliance’s performance, this manual provides all the necessary information to ensure a seamless experience.

We’ll explore the key features and specifications of the IWDC6125, including its washing and drying capacities, spin speed, and energy efficiency. You’ll also find detailed instructions on how to use the control panel, select the appropriate wash cycle, set the drying cycle, and maintain your machine for long-lasting performance. By following this guide, you’ll be well-equipped to make the most of your Indesit IWDC6125 washer-dryer.

Let’s dive in and discover how to unlock the full potential of your Indesit IWDC6125!

Key Features and Specifications

The Indesit IWDC6125 boasts several features designed to enhance your laundry experience. Its freestanding design allows for flexible placement in your home, while its combination of washing and drying functions saves space. Key specifications include a 6 kg washing capacity and a 5 kg drying capacity, catering to average household needs.

This model features a maximum spin speed of 1200 RPM, ensuring effective water extraction and reducing drying time. The machine’s control panel offers a variety of wash cycles to accommodate different fabric types and soil levels. These include programs for cotton, synthetics, delicates, and wool, providing versatility for all your laundry needs.

In terms of energy efficiency, the Indesit IWDC6125 is designed to minimize water and electricity consumption. Its dimensions are approximately 59;5 cm in width, 85 cm in height, and 53.5 cm in depth, making it suitable for various spaces. The drum has a capacity of 58 liters, allowing for thorough cleaning and drying of your clothes.

The IWDC6125 also includes safety features such as a child lock and overflow protection, ensuring peace of mind during operation. These features, combined with its performance capabilities, make it a reliable choice for your laundry needs.

Dimensions and Capacity

Understanding the dimensions and capacity of the Indesit IWDC6125 is crucial for ensuring it fits seamlessly into your living space and meets your laundry requirements. This washer-dryer measures 59;5 cm in width, 85 cm in height, and 53.5 cm in depth, making it a compact yet efficient appliance for most homes.

The washing capacity of the IWDC6125 is 6 kg, allowing you to wash a substantial amount of laundry in a single cycle. This is ideal for small to medium-sized families. The drying capacity is 5 kg, slightly less than the washing capacity, so you may need to divide larger loads for the drying cycle to ensure optimal performance.

The drum itself has a capacity of 58 liters, providing ample space for clothes to move freely during washing and drying. This ensures thorough cleaning and even drying. The combination of these dimensions and capacities makes the Indesit IWDC6125 a practical choice for those looking to maximize space without compromising on functionality.

When planning your installation, consider these measurements to ensure adequate space for the appliance and proper ventilation. Proper installation will help maintain the efficiency and longevity of your washer-dryer.

Control Panel Overview

The control panel of the Indesit IWDC6125 is designed for ease of use, allowing you to select the appropriate settings for each load. Familiarizing yourself with the control panel is the first step to efficient laundry management. The primary components include a program selection knob, buttons for adjusting settings, and indicator lights that display the current status of the machine.

The program selection knob is used to choose from a variety of wash cycles, each tailored to different types of fabrics and soil levels. Options typically include cotton, synthetics, delicates, and quick wash cycles. Additionally, there are settings for drying, which can be set independently or in combination with a wash cycle.

The control panel also features buttons for adjusting temperature, spin speed, and drying time. These settings allow you to customize each cycle to meet specific needs. Indicator lights will show which settings are currently active, providing clear feedback on the machine’s operation.

A key feature is the On/Off button, which powers the machine. The detergent dispenser drawer is also conveniently located for easy access. By understanding the functions of each element on the control panel, you can effectively operate the Indesit IWDC6125 and achieve optimal cleaning and drying results.

Starting a Wash Cycle: Step-by-Step Instructions

Initiating a wash cycle on the Indesit IWDC6125 is straightforward, ensuring your laundry is cleaned efficiently. Begin by sorting your clothes and loading them into the drum, avoiding overloading. Next, add the appropriate amount of detergent to the dispenser drawer, following the detergent manufacturer’s instructions.

Turn the program selection knob to choose the desired wash cycle, considering the fabric type and level of soiling. Adjust the temperature and spin speed settings using the corresponding buttons on the control panel to suit your needs. For heavily soiled items, consider using a pre-wash option if available.

Close the door securely, ensuring it clicks into place. Press the Start/Pause button to begin the wash cycle. The indicator lights will illuminate, showing the cycle’s progress. If you need to pause the cycle, press the Start/Pause button again.

Once the wash cycle is complete, the machine will beep or display an indicator, signaling the end of the cycle. Wait for the door to unlock before removing your clean laundry. Remember to clean the detergent dispenser drawer periodically to prevent buildup and ensure optimal performance. Following these steps will help you get the most out of your Indesit IWDC6125.

Wash Cycle Table: Program Selection Guide

The Indesit IWDC6125 offers a variety of wash cycles tailored to different fabric types and laundry needs. This program selection guide will help you choose the optimal setting for each load, ensuring effective cleaning and fabric care. For cottons, use the dedicated cotton cycle, which provides a thorough wash at higher temperatures, ideal for everyday items.

Synthetics benefit from a gentler cycle with lower temperatures and reduced spin speeds to prevent damage. Delicate fabrics, such as silk or wool, require a specialized delicate cycle to protect their fibers. The wool program is designed to gently clean woolens, preventing shrinkage and maintaining their texture.

For mixed loads, the mixed fabrics cycle offers a balanced approach, suitable for items that require similar care. Quick wash cycles are perfect for lightly soiled items needing a fast turnaround. Additionally, specific programs cater to items like jeans, sportswear, and baby clothes, each optimized for their unique requirements.

Remember to consult the control panel for precise temperature and spin speed adjustments within each cycle; This guide ensures you maximize your Indesit IWDC6125’s capabilities, providing excellent results while preserving the quality of your garments.

Setting the Drying Cycle

The Indesit IWDC6125 offers multiple drying options to cater to various fabric types and desired dryness levels. To begin, ensure your laundry is suitable for machine drying, checking the care labels for guidance. Select your preferred drying program using the control panel, typically indicated by symbols representing different dryness levels, such as “iron dry,” “cupboard dry,” or “extra dry.”

For delicate items, opt for a lower heat setting to prevent shrinkage or damage. The “timed drying” function allows you to set a specific drying duration, providing flexibility for smaller loads or items needing a quick refresh. Remember to adjust the drying time based on the load size and fabric thickness.

Avoid overloading the machine to ensure efficient and even drying. Periodically clean the lint filter to maintain optimal performance and prevent fire hazards. After the drying cycle, allow the laundry to cool slightly before removing it to minimize wrinkling. Familiarize yourself with the symbols and settings on your control panel to achieve the best drying results for your clothes.

By following these guidelines, you can effectively utilize the drying capabilities of your Indesit IWDC6125, keeping your clothes in excellent condition.

Detergents and Laundry Recommendations

Choosing the right detergent and preparing your laundry correctly are crucial for optimal performance of your Indesit IWDC6125. Always use detergents specifically designed for automatic washing machines. Powder, liquid, or gel detergents are all suitable, but follow the manufacturer’s instructions regarding dosage based on the load size and water hardness.

For heavily soiled items, consider using a detergent with enzymes or pre-treating stains before washing. Sort your laundry by color and fabric type to prevent color bleeding and damage. Empty pockets and remove loose items like belts or accessories that could harm the machine or clothing.

Delicate items should be placed in a mesh laundry bag to protect them during the wash cycle. Avoid overloading the machine, as this can hinder proper cleaning and rinsing. Use fabric softener sparingly, as excessive use can reduce the absorbency of towels and affect the machine’s performance.

When washing heavily soiled items or those with strong odors, consider using a higher temperature setting, if appropriate for the fabric. Regularly clean the detergent dispenser to prevent build-up and ensure proper dispensing. By following these recommendations, you’ll achieve cleaner, fresher laundry while prolonging the life of your Indesit IWDC6125.

Care and Maintenance: Keeping Your Machine in Top Condition

Proper care and maintenance are essential for prolonging the life and ensuring the efficient operation of your Indesit IWDC6125. Regularly clean the detergent dispenser drawer to prevent detergent buildup, which can hinder proper dispensing and affect washing performance. Wipe down the exterior of the machine with a damp cloth to keep it clean and free from dust.

Periodically inspect and clean the door seal to remove any debris or mildew that may accumulate. Check the water inlet hose for any signs of wear or damage, and replace it if necessary; Clean the pump filter every few months to remove lint and small objects that may clog it, preventing proper drainage. To do this, locate the pump filter access panel, usually at the bottom front of the machine, and carefully remove the filter, cleaning it thoroughly before replacing it.

Run a maintenance wash cycle with a washing machine cleaner every few months to remove any buildup of detergent or limescale inside the drum and pipes. If you live in an area with hard water, consider using a water softener to prevent limescale buildup, which can reduce the machine’s efficiency and lifespan.

By following these simple maintenance steps, you can keep your Indesit IWDC6125 in top condition and ensure years of reliable performance.

Troubleshooting Common Issues

Encountering issues with your Indesit IWDC6125 can be frustrating, but many problems have simple solutions; If the machine won’t start, ensure it’s properly plugged in and the door is securely closed. Check the water supply to confirm it’s turned on and the inlet hose isn’t kinked or blocked. If the machine fills with water but doesn’t start washing, verify that you’ve selected a wash cycle and pressed the start button.

If the machine isn’t draining, inspect the drain hose for obstructions and ensure it’s properly connected to the drain. Clean the pump filter to remove any lint or debris. If the machine is making excessive noise, check for unbalanced loads or foreign objects in the drum. Redistribute the load or remove any obstructions. If the clothes are still wet after the cycle, ensure the spin speed is appropriate for the fabric type and that the drain hose isn’t blocked.

For error codes displayed on the control panel, consult the user manual for specific troubleshooting steps. If the issue persists, contact a qualified appliance repair technician for assistance. By following these troubleshooting tips, you can resolve many common issues and keep your Indesit IWDC6125 running smoothly.

Installation Guide: Unpacking and Levelling

Proper installation is crucial for the optimal performance of your Indesit IWDC6125. Begin by carefully unpacking the washing machine, removing all packaging materials and transit bolts. These bolts, usually located at the rear of the machine, prevent damage during transportation and must be removed before use. Retain these bolts for future transportation.

Next, position the washing machine on a firm, level surface. Use a spirit level to check the machine’s horizontal alignment. Adjust the adjustable feet at the bottom of the machine to ensure it sits perfectly level. This step is vital to prevent excessive vibration and noise during operation. Uneven levelling can also lead to premature wear and tear on the machine’s components.

Once the machine is level, gently rock it to confirm its stability. If it rocks, readjust the feet until it stands firmly. Ensure there is sufficient space around the machine for ventilation and access to the water and electricity connections. A well-installed and levelled washing machine will operate smoothly and efficiently, providing years of reliable service. Refer to the manual for specific diagrams and instructions.

Connecting Electricity and Water Supplies

After unpacking and levelling your Indesit IWDC6125, the next crucial step is connecting the electricity and water supplies. First, locate the power cord and plug it into a grounded electrical outlet that matches the voltage specified on the machine’s data plate. Ensure the outlet is easily accessible and protected by a circuit breaker. Never use extension cords or adapters, as they can be hazardous.

Next, connect the water inlet hose to a cold water tap with a 3/4-inch threaded connection. Ensure the hose is securely tightened to prevent leaks. Some models may also have a hot water connection, so refer to your manual for specific instructions. The water pressure should be within the range specified in the manual to ensure proper operation.

Finally, connect the drain hose to a standpipe or sink drain. Ensure the drain hose is securely attached and positioned to prevent siphoning. The end of the drain hose should be at least 60 cm and no more than 90 cm above the floor. After connecting both water and electricity, run a test cycle to check for leaks and ensure proper operation. A secure and correct connection is essential for safe and efficient use.