Aldi Take and Bake Pizza Instructions: A Comprehensive Guide (Updated 04/28/2026)
Aldi’s take and bake pizzas are a shopper favorite, sparking numerous clever hacks and devoted fans sharing tips for the perfect, easy meal.
Aldi’s take and bake pizzas have cultivated a dedicated following, becoming a true cult favorite amongst budget-conscious and convenience-seeking shoppers. These aren’t just any frozen pizzas; they represent an incredible value, offering a surprisingly fresh-tasting and customizable meal at a remarkably affordable price point.
The appeal lies in their simplicity – a pre-made pizza ready for your personal touch before baking. This allows for a quick and easy dinner solution without sacrificing flavor or the enjoyment of a homemade experience. Shoppers are actively sharing “game-changing hacks” and tips, demonstrating the widespread enthusiasm for these pizzas. From simple additions to complete overhauls, the possibilities are endless, making Aldi’s take and bake pizzas a versatile staple in many households.
Popular Aldi Take and Bake Pizza Varieties
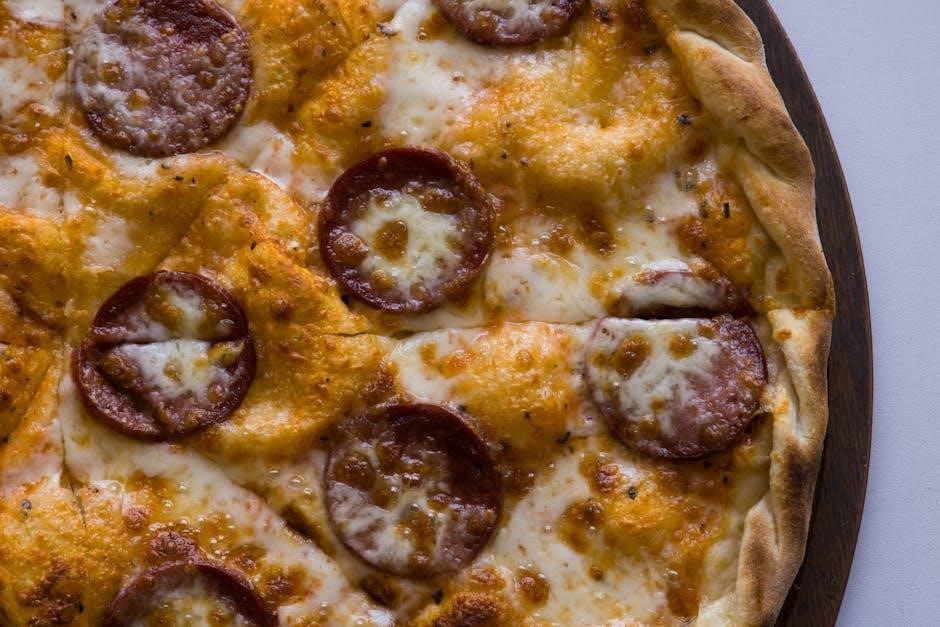
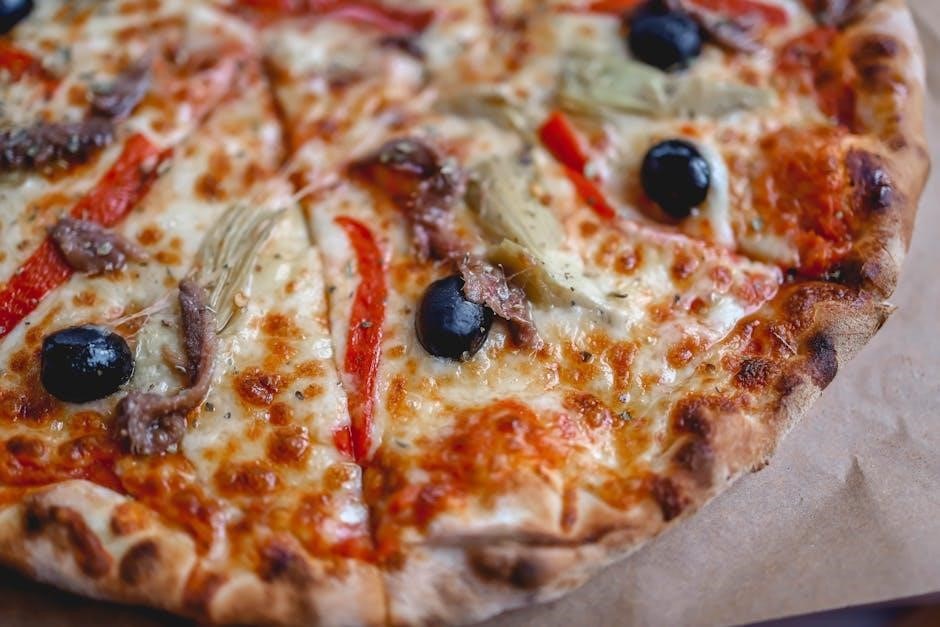
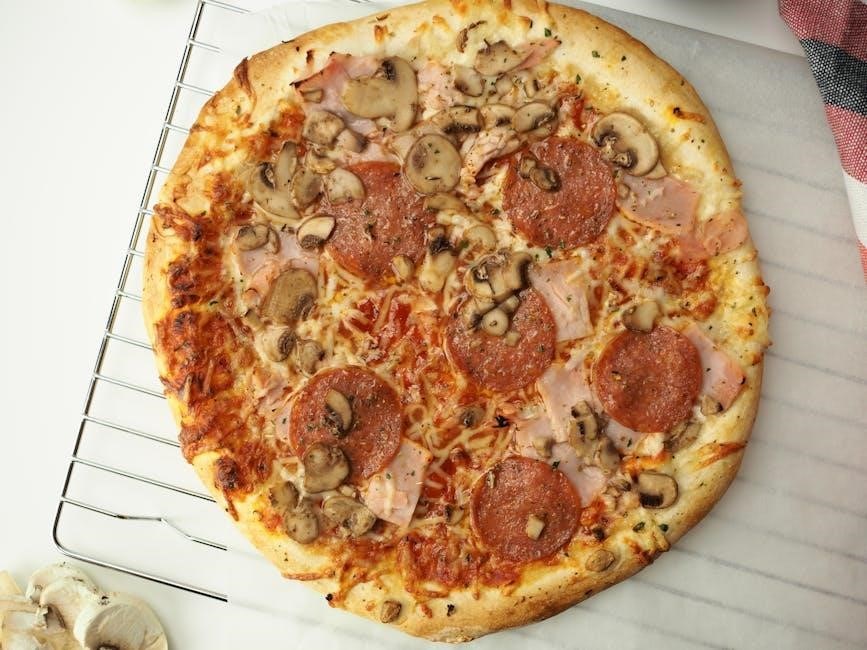
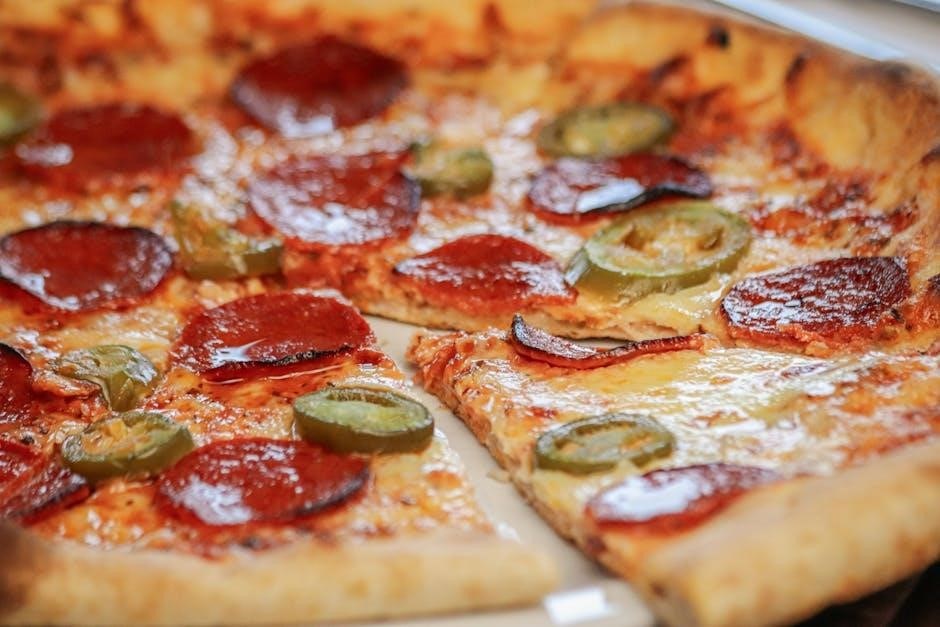
Aldi consistently offers a rotating selection of take and bake pizzas, but several varieties have risen to prominence among devoted customers. The classic pepperoni remains a steadfast favorite, providing a familiar and satisfying taste. Beyond pepperoni, the three-meat combination pizza frequently receives high praise for its generous toppings and robust flavor profile.
Specialty pizzas, such as those featuring supreme toppings or unique cheese blends, also appear regularly, offering exciting alternatives. Seasonal options, often tied to holidays or specific times of year, add further variety to the lineup. The consistent quality and affordability across all varieties contribute to their widespread popularity, making Aldi’s take and bake pizzas a reliable choice for a quick and delicious meal.
Understanding the Pizza Components
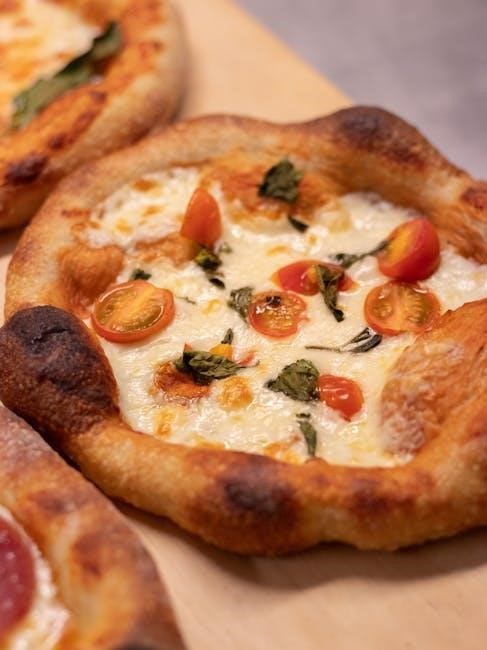
Aldi’s take and bake pizzas are thoughtfully assembled with several key components working in harmony. The foundation is a pre-made crust, typically a thin or traditional style, designed for convenient baking. A layer of pizza sauce, often seasoned with herbs and spices, provides the base flavor. Next comes a generous spread of mozzarella cheese, which melts beautifully during baking, creating a gooey and satisfying texture.
Toppings vary depending on the chosen variety, ranging from classic pepperoni and sausage to more elaborate combinations of vegetables and meats. Understanding these components allows for informed customization – adding extra cheese or fresh ingredients to elevate the pizza to your personal preference. Recognizing the quality of each element contributes to a more enjoyable baking experience.
Pre-Baking Preparation: Essential Steps
Before you even preheat the oven, proper preparation is crucial for an optimal Aldi take and bake pizza experience. Begin by carefully removing the pizza from its packaging, ensuring no plastic or cardboard remains. A quick inspection for any damage during transport is also wise. Next, gently peel back any protective film covering the toppings.
Allowing the pizza to sit at room temperature for a short period – around 15-20 minutes – can help ensure even baking. Prepare your baking sheet or pizza stone by lightly greasing it or lining it with parchment paper to prevent sticking. These simple steps set the stage for a perfectly cooked, delicious pizza, maximizing flavor and texture.
Checking the Ingredients and Expiration Date
Prior to baking, always scrutinize the ingredient list on your Aldi take and bake pizza. This is especially important for individuals with allergies or dietary restrictions. Carefully review the packaging for potential allergens like wheat, soy, dairy, or nuts. Beyond ingredients, the expiration date is paramount. Consuming a pizza past its “use by” date could compromise its quality and safety.
A quick visual inspection of the toppings is also recommended. Ensure they appear fresh and haven’t undergone any discoloration. Confirm the pizza has been stored correctly, typically refrigerated, to maintain optimal freshness. Taking these precautionary steps guarantees a safe and enjoyable pizza experience.
Allowing the Pizza to Reach Room Temperature
While tempting to immediately bake a frozen Aldi take and bake pizza, allowing it to sit at room temperature for a short period yields better results. Approximately 20-30 minutes is generally sufficient. This slight warming helps ensure more even cooking, preventing a frozen center while the crust burns. It also improves the texture of the cheese and toppings, allowing them to melt and blend more harmoniously during baking.
However, do not leave the pizza at room temperature for extended periods, exceeding two hours, to avoid potential bacterial growth. This brief thaw is a crucial step towards achieving a perfectly baked, delicious pizza.
Preparing Your Baking Surface
Proper preparation of your baking surface is key to preventing sticking and ensuring a crispy crust. While parchment paper isn’t strictly necessary, it’s highly recommended for easy cleanup and to avoid any potential adhesion. If not using parchment, lightly grease your baking sheet with cooking spray or a thin layer of olive oil.
A pizza stone can also elevate your Aldi pizza experience, providing superior heat retention and a wonderfully crisp base. Preheating the stone in the oven for at least 30 minutes is crucial. Avoid using a cold stone, as it can cause cracking. Ensure the baking sheet or stone is appropriately sized for the pizza;
Baking Instructions: Oven Temperature and Time
Generally, Aldi take and bake pizzas require baking at 375°F (190°C) for approximately 18-22 minutes. However, always refer to the specific instructions printed on the pizza’s packaging, as times can vary slightly depending on the variety and thickness. Preheating your oven is absolutely essential for even cooking.
Begin checking the pizza around the 18-minute mark. The goal is a golden-brown crust and bubbly, melted cheese. Avoid opening the oven frequently during baking, as this can lower the temperature and affect the cooking process. Consistent temperature is vital for optimal results and a perfectly baked pizza.
Recommended Oven Racks for Optimal Baking
For consistently excellent results with your Aldi take and bake pizza, positioning the rack in the center of the oven is generally recommended. This ensures even heat distribution around the entire pizza, promoting a uniformly cooked crust and thoroughly melted toppings.
However, if you prefer a crispier crust, consider placing the pizza on the lower rack. Conversely, if the toppings are browning too quickly, move the pizza to the upper rack. Experimentation may be needed to find your sweet spot, depending on your oven’s specific heating characteristics. Consistent rack placement aids repeatable results.
Monitoring the Pizza During Baking
Regularly checking your Aldi take and bake pizza during the baking process is crucial for achieving optimal results. Begin observing around the 8-minute mark, peering through the oven door without opening it excessively to avoid heat loss.
Focus on the cheese – it should be melting and bubbling, transitioning to a golden-brown hue. Simultaneously, assess the crust; it should be firming up and gaining a slight golden color. Rotate the pizza halfway through baking to ensure even cooking, especially if your oven has hot spots. Vigilance prevents burning and guarantees a perfectly baked pizza.
Signs of a Perfectly Baked Aldi Pizza
Determining when your Aldi take and bake pizza is perfectly done involves observing several key indicators. The cheese should be fully melted, bubbly, and exhibit a beautiful golden-brown color with slight blistering. The crust needs to be firm to the touch and possess a golden-brown hue, indicating it’s crispy and cooked through.
Lift a slice gently; it should hold its shape without flopping. The bottom of the crust should also be golden brown and slightly firm, avoiding any doughy or pale appearance. A delightful aroma filling your kitchen is another positive sign! These visual and textural cues confirm baking success.
Troubleshooting Common Baking Issues
Even with careful attention, occasional baking mishaps can occur. A soggy crust often results from insufficient baking time or a low oven temperature – increase baking duration and verify oven calibration. Over-browning of toppings, particularly cheese, suggests the oven temperature is too high; reduce it slightly or shield the toppings with foil.
If the crust burns before the toppings are cooked, move the pizza to a lower oven rack. Uneven cooking can be addressed by rotating the pizza halfway through baking. Remember, every oven varies, so adjustments may be needed for optimal results!
Dealing with a Soggy Crust
A soggy crust is a frequent concern with take and bake pizzas. To combat this, ensure your baking surface isn’t overcrowded, allowing for proper heat circulation. Preheating the baking sheet can also create a crisper base. Consider briefly baking the crust before adding toppings – a technique known as “par-baking.”
If sogginess persists, lightly brush the crust with olive oil before baking to create a moisture barrier. Avoid overloading the pizza with wet ingredients like fresh tomatoes or excessive sauce. Increasing the oven temperature slightly (within the recommended range) can also help crisp the crust effectively.
Preventing Over-Browning of Toppings
Over-browning of toppings, particularly cheese and pepperoni, is a common issue. To mitigate this, lower the oven rack position slightly during the final few minutes of baking. Tenting the pizza loosely with aluminum foil can shield the toppings from direct heat, slowing down browning without fully stopping the cooking process.
Monitoring the pizza closely is crucial; adjust baking time as needed. If using a convection oven, reduce the temperature by 25 degrees Fahrenheit to prevent excessive heat. Consider adding toppings that brown quickly later in the baking cycle to ensure even cooking and prevent burning.
Aldi Pizza Hacks & Customizations
Elevate your Aldi take and bake pizza with simple customizations! Many shoppers suggest adding extra cheese – mozzarella, cheddar, or a blend – before baking for a richer flavor. Incorporating fresh vegetables like sliced bell peppers, onions, or mushrooms adds texture and nutrients. Don’t be afraid to experiment with different combinations.
For a spicy kick, sprinkle red pepper flakes or Italian herbs over the pizza before baking. A drizzle of garlic-infused olive oil post-bake enhances the aroma and taste. These hacks transform a convenient meal into a personalized culinary experience, maximizing enjoyment.
Adding Extra Cheese
To truly enhance your Aldi take and bake pizza, consider the art of adding extra cheese. A generous layer of shredded mozzarella is a classic choice, providing that familiar stretch and creamy texture. However, don’t limit yourself! Experiment with a blend of cheeses – provolone for a slightly sharper taste, or cheddar for a bolder flavor profile.
Sprinkling the cheese evenly across the pizza before baking ensures a consistent melt. Some enthusiasts even add a sprinkle of Parmesan after baking for a salty, umami boost. Remember, more cheese generally means a more satisfying pizza experience!
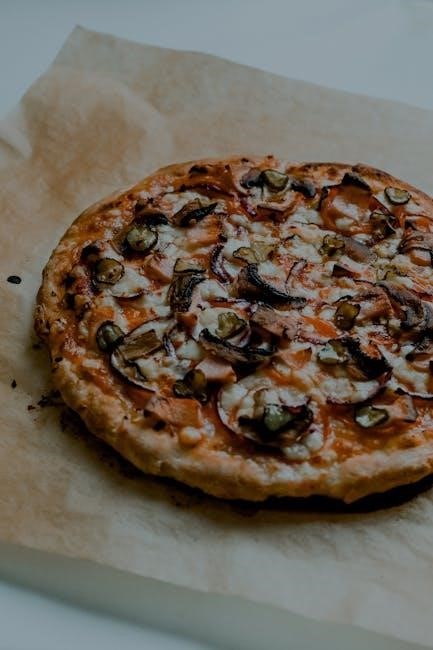
Incorporating Fresh Vegetables
Elevate your Aldi take and bake pizza with the vibrant flavors and textures of fresh vegetables. Pre-cooking is key for most options; lightly sautéing or roasting vegetables like bell peppers, onions, mushrooms, and zucchini prevents a soggy pizza. Spinach can be wilted briefly before adding, while thinly sliced tomatoes can be added directly before baking.
Distribute the vegetables evenly over the pizza, ensuring they don’t overload any single area. Consider the moisture content – drier vegetables work best. A sprinkle of Italian seasoning alongside the veggies complements the pizza’s existing flavors beautifully, creating a customized and healthier meal.
Spice it Up: Adding Red Pepper Flakes or Herbs
Transform your Aldi take and bake pizza from good to gourmet with a simple spice boost! A pinch of red pepper flakes delivers a delightful kick, adding warmth and complexity to each bite. Dried Italian herbs – oregano, basil, and rosemary – enhance the classic pizza flavors, creating an aromatic experience.
Sprinkle these seasonings evenly over the pizza before baking, allowing the flavors to meld with the sauce and cheese. Fresh herbs, like basil or parsley, are best added after baking to preserve their vibrant taste and color. Experiment with different combinations to discover your perfect spice profile – a little goes a long way!
Serving Suggestions & Pairings
Elevate your Aldi take and bake pizza night with complementary sides and beverages! A crisp, refreshing salad – perhaps a simple garden salad with Italian dressing – provides a delightful contrast to the richness of the pizza. Steamed or roasted vegetables, like broccoli or green beans, add a healthy and flavorful element.
For beverages, consider a light and bubbly Italian soda, a crisp lager, or a glass of chilled Pinot Grigio. Don’t forget a classic pairing: a cold, refreshing root beer! A simple garlic bread or breadsticks also enhance the meal. Finish with a sweet treat like cannoli or biscotti for a truly satisfying experience.
Ideal Side Dishes for Aldi Pizza
Complement your Aldi take and bake pizza with a variety of delicious side dishes to create a complete and satisfying meal. A vibrant salad, featuring mixed greens, cherry tomatoes, and a zesty vinaigrette, offers a refreshing counterpoint to the pizza’s richness. Consider Aldi’s pre-made salad kits for convenience!
For a heartier option, try a side of roasted vegetables – Brussels sprouts, carrots, or bell peppers are excellent choices. Garlic knots or breadsticks, readily available in Aldi’s bakery section, are always a crowd-pleaser. A simple fruit platter with seasonal favorites adds a touch of sweetness. Don’t overlook the classic pairing of chicken wings for a truly indulgent feast!
Beverage Recommendations
Pairing the right beverage with your Aldi take and bake pizza elevates the entire dining experience. For a classic combination, reach for a chilled lager or pilsner – the crispness cuts through the richness of the cheese and toppings. If you prefer wine, a light-bodied red like Pinot Noir or a dry rosé complements many pizza varieties.
For non-alcoholic options, consider a sparkling Italian soda or a refreshing iced tea. A zesty lemonade provides a bright contrast to savory flavors. Root beer is a surprisingly delightful pairing, especially with meat-lover’s pizzas. Ultimately, the best beverage is the one you enjoy most with your slice!
Storage and Reheating Instructions

Properly storing leftover Aldi take and bake pizza is crucial for maintaining its quality. Allow the pizza to cool completely before transferring slices to an airtight container or wrapping them tightly in plastic wrap. Refrigerate promptly; consume within 3-4 days for optimal freshness.
When reheating, avoid the microwave if possible, as it can lead to a soggy crust. A preheated oven at 350°F (175°C) for 5-10 minutes yields the best results. Alternatively, a skillet on medium heat can crisp the crust nicely. For a quick fix, use a toaster oven. Reheating restores some of the original flavor and texture;
Properly Storing Leftover Pizza
To ensure leftover Aldi take and bake pizza remains delicious, immediate and correct storage is key. Once cooled completely – crucial to prevent condensation – transfer slices to an airtight container. Alternatively, tightly wrap individual portions in plastic wrap, expelling as much air as possible.
Refrigerate promptly, ideally within two hours of baking. Properly stored, leftover pizza will maintain acceptable quality for 3-4 days. Discard any pizza exhibiting signs of spoilage, such as unusual odors or visible mold. Remember, airtight storage minimizes dryness and flavor absorption from other fridge contents.

Reheating Methods for Best Results
Reviving leftover Aldi take and bake pizza requires careful technique to restore its original texture. The oven is preferred: preheat to 350°F (175°C) and reheat for 5-10 minutes, until bubbly and warmed through. For a crispier crust, place slices directly on the oven rack.
A skillet method also works well – heat a slice over medium heat for a few minutes, adding a few drops of water and covering briefly to melt the cheese. Microwaving is quickest, but can result in a soggy crust; use short bursts and a microwave-safe plate. Avoid prolonged heating to prevent rubbery cheese.
Nutritional Information & Allergen Details
Understanding the nutritional content of Aldi’s take and bake pizzas is crucial for informed dietary choices. Each variety differs, but generally, a single serving contains approximately 300-400 calories, with 12-18 grams of fat and 30-40 grams of carbohydrates. Protein content typically ranges from 10-15 grams.
Allergen information is prominently displayed on packaging. Common allergens include wheat, dairy, and soy. Some varieties may contain traces of nuts or other allergens due to manufacturing processes. Always review the ingredient list carefully, especially if you have sensitivities or allergies. Detailed nutritional facts are also available on Aldi’s website.
Reviewing the Nutritional Facts
Carefully examining the nutritional facts panel on Aldi’s take and bake pizza packaging is essential. Pay close attention to serving size, as the entire pizza often contains multiple servings. Note the calorie count, fat content (saturated and trans fats), cholesterol levels, and sodium intake – these are key indicators for health-conscious consumers.
Furthermore, assess the carbohydrate content, including dietary fiber and sugars. Protein levels contribute to satiety. Comparing nutritional values across different Aldi pizza varieties allows for selecting options aligning with individual dietary needs and preferences. Utilize this information to incorporate the pizza into a balanced meal plan responsibly.
Identifying Potential Allergens
Individuals with food allergies must meticulously review the ingredient list on Aldi’s take and bake pizzas. Common allergens like wheat (gluten), milk, soy, and eggs are frequently present. The packaging will explicitly state if these or other allergens – such as tree nuts, peanuts, or fish – are included in the product.
Cross-contamination is also a concern; the packaging may indicate if the pizza was produced in a facility that also processes allergens. Always prioritize reading the “Contains” statement and any precautionary allergen warnings. If unsure, contacting Aldi’s customer service for clarification is highly recommended to ensure a safe dining experience.
Customer Reviews and Ratings
Aldi’s take and bake pizzas consistently garner positive customer feedback, frequently praised for their exceptional value and convenience. Online reviews highlight the surprisingly good quality for the price point, with many shoppers comparing them favorably to more expensive pizzeria options. Ratings typically range from 4 to 5 stars across various platforms.
Common themes in customer comments include enjoyment of the generous toppings and the ease of preparation. However, some reviewers suggest adding extra cheese or adjusting baking times to achieve optimal results. Overall, the consensus is overwhelmingly positive, establishing Aldi’s pizzas as a beloved, budget-friendly meal choice.
Analyzing Common Feedback
A detailed analysis of customer reviews reveals recurring patterns regarding Aldi’s take and bake pizzas. The most frequent suggestion centers around extending the baking time slightly, often by 2-5 minutes, to ensure a crisper crust. Many customers also proactively add extra cheese, believing it enhances the overall flavor and texture.
Negative feedback, while less common, typically relates to occasional sogginess in the center of the pizza. This is often attributed to varying oven temperatures or insufficient preheating of the baking surface. Despite these minor concerns, the overwhelming sentiment is positive, with shoppers consistently emphasizing the pizza’s affordability and convenience as key benefits.
Where to Find More Aldi Pizza Information
For official details and the most up-to-date product information regarding Aldi’s take and bake pizzas, the primary resource is Aldi’s official website. Look for dedicated product pages and frequently asked questions sections. Beyond the official source, a vibrant community of Aldi enthusiasts actively shares tips, tricks, and reviews on various social media platforms.
Dedicated Facebook groups and online forums, specifically centered around Aldi finds, are excellent places to discover user-generated content, including baking hacks and customization ideas. Websites like Parade, which originally featured Aldi pizza hacks, also compile valuable insights from shoppers. These platforms offer a wealth of practical advice and real-world experiences.
Aldi’s Official Website and Resources
Aldi’s official website, aldi.us, serves as the central hub for product information, including their popular take and bake pizzas. While dedicated pizza-specific pages might be limited, the site offers general product details, ingredient lists, and nutritional facts. Regularly checking the “Aldi Finds” section is crucial, as these pizzas often fall under weekly special buys.
Furthermore, the website provides access to Aldi’s customer service channels, allowing you to directly inquire about specific pizza varieties or baking recommendations. Look for downloadable resources like product manuals or FAQs. Though not extensively detailed for pizzas specifically, Aldi’s overall resource center can address general food safety and storage questions.
Social Media Groups and Forums
Numerous online communities dedicated to Aldi shopping thrive on platforms like Facebook and Reddit. Searching for “Aldi Finds” or “Aldi Lovers” will reveal active groups where customers enthusiastically share their experiences with the take and bake pizzas. These forums are goldmines for discovering user-tested baking hacks, customization ideas, and honest reviews.
Specifically, members often discuss optimal baking times, preferred oven racks, and creative topping additions. Reddit’s r/Aldi subreddit is particularly valuable, offering a searchable archive of past discussions. These platforms provide a space to ask questions, troubleshoot issues, and learn from fellow pizza enthusiasts, offering insights beyond official resources.