Pressure Washer Nozzle Size Guide: A Comprehensive Overview
Navigating the world of pressure washing requires understanding nozzle sizes; they dictate spray width‚ impact‚ and overall cleaning effectiveness for various tasks.
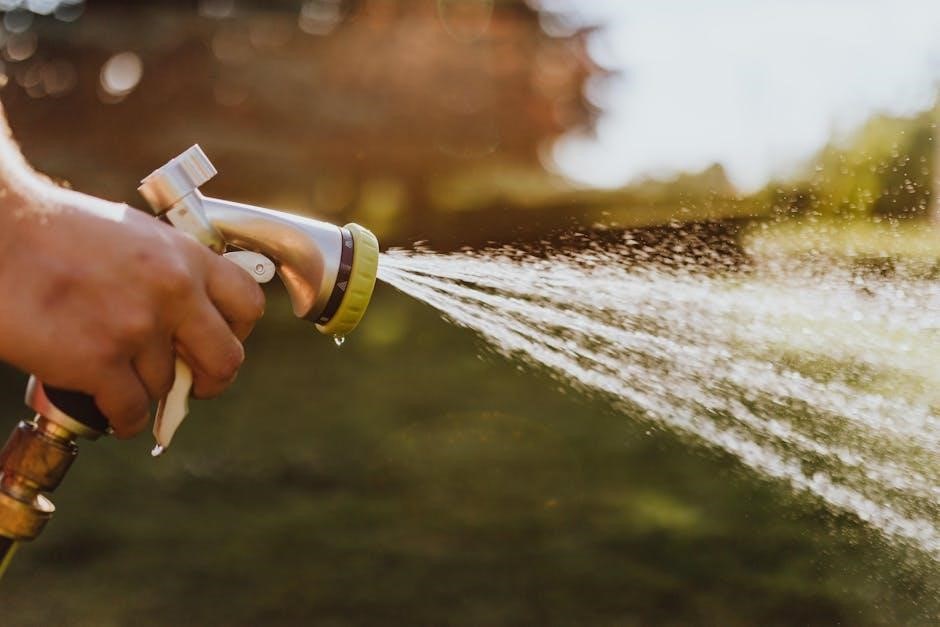
Pressure washer nozzles are essential components that control the flow and spray pattern of water‚ directly impacting the cleaning power and reach of your machine. They aren’t simply interchangeable parts; each nozzle is engineered to deliver a specific degree of spray‚ ranging from pinpoint jets to wide‚ gentle fans.
Understanding these differences is crucial for achieving optimal cleaning results without causing damage to the surface you’re working on. The nozzle determines the concentration of the water pressure – a narrower spray focuses the power for tough grime‚ while a wider spray disperses it for more delicate cleaning.
Choosing the correct nozzle isn’t just about power; it’s about efficiency and protecting your investment. Using the wrong nozzle can lead to ineffective cleaning‚ wasted time‚ and potential harm to your pressure washer or the surfaces you intend to clean. This guide will demystify the world of pressure washer nozzles‚ helping you select the perfect one for every job.
Why Nozzle Size Matters
Nozzle size profoundly impacts a pressure washer’s performance‚ extending beyond simply “more power is better.” A smaller nozzle orifice concentrates the water pressure into a tighter stream‚ increasing PSI at the point of impact – ideal for blasting away stubborn dirt and grime from durable surfaces like concrete.
Conversely‚ larger nozzles create a wider spray pattern‚ reducing the pressure per square inch. This is vital for delicate surfaces like painted wood or car finishes‚ preventing damage from excessive force. Incorrect nozzle selection can lead to etching‚ stripping paint‚ or even causing structural harm.
Furthermore‚ nozzle size affects water consumption and cleaning efficiency. A narrow stream uses less water but requires more passes‚ while a wider spray covers more area quickly but uses more water. Understanding this balance allows you to optimize cleaning time‚ conserve water‚ and achieve the best possible results for each unique cleaning task.
Understanding Nozzle Degrees & Spray Patterns
Spray patterns‚ measured in degrees‚ define the water’s dispersion; lower degrees mean focused power‚ while higher degrees offer wider‚ gentler coverage for diverse cleaning.
0-Degree Nozzles: The Focused Blast
Zero-degree nozzles deliver an incredibly concentrated‚ pencil-thin stream of water with maximum pressure. This intense force makes them ideal for tackling extremely stubborn‚ stuck-on debris like hardened grime‚ rust‚ or old paint. However‚ their power demands extreme caution!
Due to the highly focused pressure‚ 0-degree nozzles can easily damage softer surfaces – wood‚ vinyl siding‚ or even concrete can be etched or pitted if used improperly. They are best reserved for durable‚ non-sensitive materials and require a skilled operator maintaining a safe distance.
Common applications include stripping paint‚ removing graffiti‚ cleaning heavily soiled industrial equipment‚ and unclogging drains. Always test in an inconspicuous area first and use sweeping motions to avoid concentrated damage. Protective gear‚ including eye protection‚ is absolutely essential when operating a pressure washer with a 0-degree nozzle.
15-Degree Nozzles: Heavy-Duty Cleaning
Fifteen-degree nozzles strike a balance between power and coverage‚ offering a more dispersed spray pattern than a 0-degree nozzle‚ yet still delivering significant cleaning force. This makes them a versatile choice for a wide range of heavy-duty cleaning tasks around the home and property.
They excel at removing deeply embedded dirt‚ mildew‚ and grime from surfaces like concrete driveways‚ brick walls‚ and patio furniture. While still potent‚ the wider spray reduces the risk of damage compared to the pinpoint stream of a 0-degree nozzle‚ allowing for more confident use on slightly less durable materials.
Ideal applications include preparing surfaces for staining or painting‚ cleaning stubborn stains from siding‚ and revitalizing weathered outdoor structures. Remember to maintain a safe distance and test on an inconspicuous area first. Proper technique and protective eyewear are still crucial for safe and effective operation.
25-Degree Nozzles: Versatile All-Purpose Cleaning
The 25-degree nozzle is often considered the “go-to” for everyday pressure washing tasks‚ offering a fantastic blend of cleaning power and surface protection. Its wider spray pattern covers a larger area quickly‚ making it incredibly efficient for general cleaning projects around the house.
This nozzle is perfect for washing cars‚ trucks‚ and other vehicles‚ cleaning vinyl siding‚ and removing dirt and grime from fences and decks. It’s powerful enough to tackle moderate stains but gentle enough to minimize the risk of damage to softer surfaces.
Because of its versatility‚ a 25-degree nozzle is a great starting point for beginners. It allows you to get comfortable with your pressure washer without the immediate risk of causing harm. Always remember to adjust your distance from the surface to control the cleaning intensity and achieve optimal results.
40-Degree Nozzles: Gentle Surface Cleaning
For delicate surfaces requiring a softer touch‚ the 40-degree nozzle is an excellent choice. This nozzle produces a wider spray pattern with reduced pressure‚ making it ideal for cleaning surfaces prone to damage‚ like painted wood‚ fragile siding‚ or even intricate landscaping features.

It’s particularly useful for rinsing away loose dirt and debris without stripping paint or etching softer materials. Think of cleaning outdoor furniture‚ prepping surfaces for staining‚ or gently washing windows. The wider fan minimizes the risk of concentrated impact‚ preventing unsightly marks or damage.
While it won’t deliver the same aggressive cleaning power as narrower nozzles‚ the 40-degree nozzle excels at providing a safe and effective clean for sensitive areas. Remember to maintain a closer working distance for increased cleaning action‚ but always test in an inconspicuous area first!
65-Degree Nozzles: Wide Fan for Delicate Surfaces
The 65-degree nozzle represents the gentlest option in the standard pressure washer nozzle lineup. Characterized by its exceptionally wide spray fan and low pressure‚ it’s specifically designed for the most delicate cleaning tasks where minimizing impact is paramount. This makes it perfect for washing cars‚ boats‚ or applying soap evenly across large areas.
It’s also ideal for rinsing surfaces after detergent application‚ as the broad spray effectively removes residue without causing harm. Think of cleaning awnings‚ screens‚ or even delicate flowerbeds. The reduced pressure significantly lowers the risk of damage‚ making it a safe choice for vulnerable materials.
While it requires closer proximity and potentially multiple passes for stubborn dirt‚ the 65-degree nozzle prioritizes safety and prevents etching or stripping. Always test on a hidden area first to ensure compatibility with the surface you’re cleaning.

Nozzle Color Coding – A Standard Guide
Manufacturers commonly employ a color-coded system for quick nozzle identification‚ simplifying selection and ensuring users choose the appropriate spray pattern for their cleaning needs.
Red Nozzle – 0 Degree
The red nozzle‚ representing a 0-degree spray pattern‚ delivers an incredibly concentrated and powerful stream of water. This focused blast is the most aggressive option available‚ making it ideal for extremely stubborn‚ stuck-on debris. However‚ its intensity demands extreme caution.
Due to the high pressure‚ a 0-degree nozzle can easily damage softer surfaces like wood‚ vinyl siding‚ or even concrete if used improperly. It’s best reserved for tasks such as removing graffiti‚ stripping paint‚ or cleaning heavily soiled industrial equipment.
Always maintain a significant distance from the surface being cleaned and use sweeping motions to avoid etching or causing permanent damage. Never point a 0-degree nozzle directly at people‚ animals‚ or fragile objects. Proper safety gear‚ including eye protection‚ is absolutely essential when operating with this nozzle.
Yellow Nozzle – 15 Degree
The yellow nozzle‚ producing a 15-degree spray pattern‚ strikes a balance between power and coverage. It’s a heavy-duty cleaning option‚ significantly more aggressive than wider-angle nozzles‚ yet less likely to cause damage than the 0-degree red nozzle. This makes it a versatile choice for a wide range of outdoor cleaning tasks.
Ideal applications include removing deeply embedded dirt from concrete driveways‚ cleaning brick surfaces‚ and tackling stubborn grime on patio furniture. It’s effective for restoring faded surfaces and preparing them for painting or staining.
While powerful‚ the 15-degree nozzle still requires careful use. Test on an inconspicuous area first to ensure it doesn’t damage the surface. Maintain a safe distance and use sweeping motions. Safety glasses are crucial‚ and appropriate clothing is recommended to protect against potential splatter.
Green Nozzle – 25 Degree
The green nozzle‚ delivering a 25-degree spray pattern‚ is often considered the quintessential all-purpose nozzle for pressure washing. It provides a fantastic balance between cleaning power and surface protection‚ making it suitable for a vast array of tasks around the home and garden.
This nozzle excels at cleaning siding‚ fences‚ decks‚ and patio furniture. It’s effective at removing dirt‚ mildew‚ and algae without causing significant damage to the underlying material. It’s also a good choice for washing cars and trucks‚ though maintaining a safe distance is still essential.
Because of its versatility‚ the 25-degree nozzle is a great starting point for beginners. It’s less likely to cause damage than narrower-angle nozzles‚ yet still provides enough power to tackle most common cleaning challenges. Remember to always test in an inconspicuous area first!
White Nozzle – 40 Degree
The white nozzle‚ producing a 40-degree spray pattern‚ is your go-to for gentle yet effective cleaning. It delivers a wider spray coverage with reduced pressure‚ making it ideal for delicate surfaces that could be easily damaged by more aggressive nozzles.
This nozzle is perfect for cleaning painted surfaces‚ windows‚ and even car washes where a softer touch is needed. It’s also excellent for rinsing away soap and detergents after cleaning‚ ensuring a streak-free finish. Think of it as the “safe” option when you’re unsure about a surface’s durability.
While it won’t tackle deeply ingrained grime as quickly as a narrower nozzle‚ the 40-degree nozzle minimizes the risk of etching‚ stripping paint‚ or causing other forms of damage. It’s a fantastic choice for maintaining the appearance of your property without harsh consequences.
Black Nozzle – 65 Degree
The black nozzle‚ boasting a 65-degree spray pattern‚ represents the widest and gentlest cleaning option available. It delivers a low-pressure‚ high-volume spray‚ making it exceptionally suitable for tasks requiring minimal impact and maximum coverage.
This nozzle excels at rinsing large areas‚ applying cleaning solutions over broad surfaces‚ and delicately washing cars or boats. It’s also ideal for cleaning fragile items like outdoor furniture with delicate finishes or applying a protective coating evenly. The wide fan minimizes the risk of damage‚ even on sensitive materials.
However‚ be aware that the 65-degree nozzle’s low pressure means it won’t effectively remove stubborn dirt or grime. It’s best used for light cleaning‚ rinsing‚ or applying detergents‚ rather than heavy-duty stain removal. It’s a fantastic choice when preservation is paramount.

Specialty Nozzles & Their Applications
Beyond standard angles‚ specialized nozzles enhance pressure washing; each uniquely designed for specific cleaning challenges and maximizing efficiency on diverse surfaces.
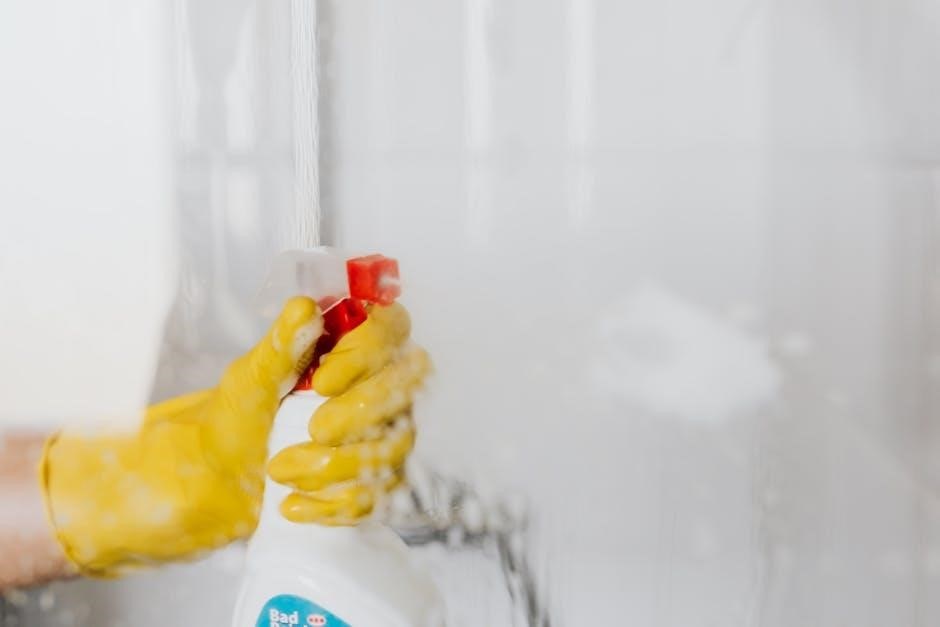
Soap Nozzle: For Detergent Application
The soap nozzle‚ often white in color‚ is specifically engineered for applying detergents‚ soaps‚ or cleaning solutions with your pressure washer. Unlike other nozzles focused on high-impact cleaning‚ the soap nozzle creates a low-pressure‚ high-volume spray. This gentle yet effective spray action is crucial for properly mixing and distributing cleaning agents without causing damage to the surface being cleaned.
It’s important to note that the soap nozzle doesn’t rely on the pressure of the water to clean; instead‚ it allows the detergent to dwell and break down dirt‚ grime‚ and stains. Most pressure washers have a dedicated soap inlet‚ and switching to the soap nozzle automatically activates this feature. Always use detergents specifically formulated for pressure washers to avoid damaging the pump or causing excessive foaming. Experiment with dilution ratios to find the optimal cleaning power for your specific task.
Turbo Nozzle (Rotating Nozzle): Increased Cleaning Power
Also known as a rotating nozzle‚ the turbo nozzle delivers a powerful‚ concentrated cleaning action. Inside‚ a rotating stream of water creates a swirling effect‚ mimicking the force of multiple nozzles in one. This intense impact makes it exceptionally effective at removing stubborn dirt‚ grime‚ paint‚ and other tough deposits from hard surfaces.
However‚ due to its aggressive cleaning power‚ the turbo nozzle requires careful use. It’s not suitable for delicate surfaces like soft wood‚ vinyl siding‚ or painted areas‚ as it can easily cause damage. Maintain a safe distance – typically 8-12 inches – and test in an inconspicuous area first. The rotating action can also create a visually appealing‚ striped cleaning pattern. Be mindful of the potential for etching or streaking on softer materials‚ and always wear appropriate safety gear when operating a turbo nozzle.
Surface Cleaner Nozzle: For Large Flat Surfaces
Designed specifically for cleaning expansive‚ flat areas like driveways‚ patios‚ and sidewalks‚ the surface cleaner nozzle significantly reduces cleaning time and effort. It features a rotating spray bar enclosed within a protective housing‚ preventing water spray from splashing onto surrounding objects and the user.
Unlike a standard nozzle‚ which focuses on a small area‚ the surface cleaner covers a wider path with each pass‚ delivering consistent cleaning power across the entire surface. This minimizes the appearance of streaking and ensures a more uniform finish. Surface cleaners are typically connected to the pressure washer wand and glide smoothly across the surface. They are compatible with both electric and gas-powered pressure washers. Always select a surface cleaner size appropriate for the area you’re cleaning and follow the manufacturer’s instructions for optimal performance and safety.
Variable Nozzle: Adjustable Spray Patterns
Offering ultimate versatility‚ the variable nozzle allows users to adjust the spray pattern with a simple twist of the nozzle’s collar. This eliminates the need to constantly switch between different nozzles for varying cleaning tasks‚ making it a convenient option for tackling multiple surfaces and levels of grime.
Typically‚ these nozzles range from a narrow‚ focused jet – similar to a 0-degree nozzle – to a wider‚ fan-shaped spray – comparable to a 40-degree or 65-degree nozzle. This adjustability makes them suitable for everything from concentrated stain removal to rinsing large areas. However‚ it’s crucial to remember that variable nozzles often don’t deliver the same concentrated power as dedicated fixed-degree nozzles. Always test the selected spray pattern on an inconspicuous area first to ensure it’s appropriate for the surface being cleaned and avoid potential damage.

Choosing the Right Nozzle for Different Surfaces
Selecting the appropriate nozzle prevents damage and maximizes cleaning efficiency; surface material dictates the ideal spray angle and pressure for optimal results.
Wood Surfaces: Avoiding Damage
Wood is particularly susceptible to damage from high-pressure water‚ so caution is paramount. Always begin with a wider spray angle nozzle – a 40-degree or even 65-degree nozzle is recommended for initial cleaning. This minimizes the risk of etching or splintering the wood fibers.
Maintain a safe distance – at least 18 inches – between the nozzle and the wood surface. Test a small‚ inconspicuous area first to assess the pressure’s effect. Avoid using 0-degree or 15-degree nozzles on wood unless you are an experienced user tackling extremely stubborn stains‚ and even then‚ proceed with extreme care.
Consider using a wood-specific cleaning solution designed for pressure washers. These solutions often contain brighteners to restore the wood’s natural color. Always follow the manufacturer’s instructions for dilution and application. After cleaning‚ allow the wood to dry thoroughly before applying any sealant or stain.
Concrete & Brick: Tackling Tough Stains
Concrete and brick are durable surfaces‚ but they can accumulate stubborn stains like oil‚ mildew‚ and rust. For general cleaning‚ a 25-degree nozzle is a good starting point‚ offering a balance between cleaning power and surface protection; For heavily soiled areas or ingrained stains‚ a 15-degree nozzle can be employed‚ but test first!
Maintain a closer working distance – around 8-12 inches – when using a 15-degree nozzle‚ and always move the wand in a consistent sweeping motion to avoid etching. For particularly tough stains‚ consider pre-treating with a concrete or brick cleaner before pressure washing.
A 0-degree nozzle should be reserved for extremely localized‚ difficult stains and used with extreme caution‚ as it can easily damage the surface. Post-cleaning‚ consider applying a concrete sealer to protect against future staining and weathering.
Vinyl Siding: Gentle Cleaning Techniques
Vinyl siding requires a delicate approach to avoid damage. A 40-degree nozzle is generally recommended for cleaning vinyl‚ providing a wider spray pattern and reduced pressure. Maintain a distance of at least 2-3 feet from the siding to prevent water from forcing its way behind the panels.
Always spray downwards‚ following the direction of the siding overlaps. This prevents water from being driven upwards and potentially causing moisture issues. Avoid using a 0-degree or 15-degree nozzle‚ as these can easily puncture or warp the vinyl.
Pre-treating with a vinyl siding cleaner can help loosen dirt and mildew‚ reducing the need for excessive pressure. Rinse thoroughly after cleaning‚ and inspect for any signs of damage. A 65-degree nozzle can be used for very gentle rinsing or cleaning of particularly delicate areas.
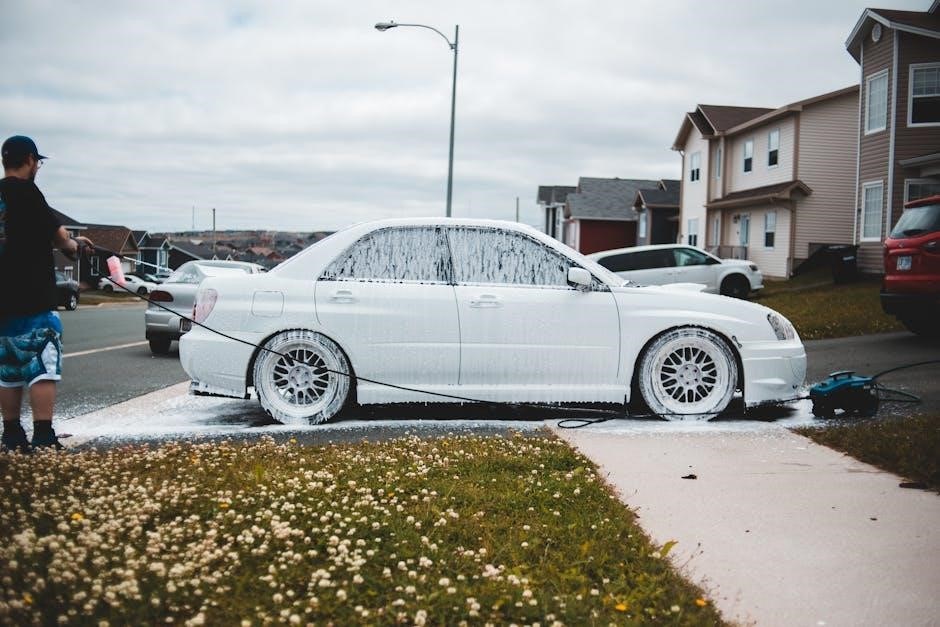
Car & Vehicle Washing: Safe Pressure Levels

Washing vehicles with a pressure washer demands caution to avoid paint damage. A 40-degree or 65-degree nozzle is ideal‚ delivering a wider‚ less aggressive spray. Maintain a distance of at least 18-24 inches from the vehicle’s surface; closer proximity significantly increases the risk of stripping paint or damaging trim.
Begin with a low-pressure rinse to remove loose dirt and debris. Avoid directly spraying sensitive areas like windows‚ seals‚ and electrical components. Utilize a soap nozzle with a dedicated detergent formulated for vehicles to effectively lift grime.
Always rinse from top to bottom‚ ensuring all soap residue is removed. Never use a 0-degree or 15-degree nozzle on a vehicle‚ as the concentrated pressure will almost certainly cause damage. Consider using a foam cannon for a gentler‚ more even soap application.

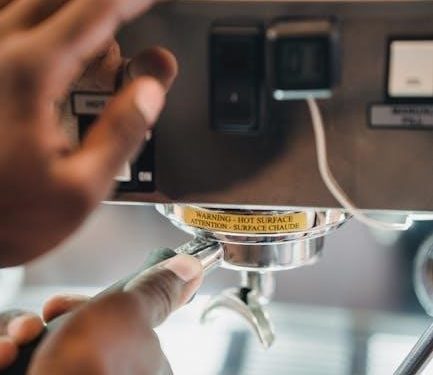
Pressure Washer Nozzle Safety & Maintenance
Prioritize safety and longevity by consistently inspecting nozzles‚ wearing protective gear‚ and storing them properly to prevent damage and ensure optimal performance.
Safety Precautions When Using Nozzles
Always wear safety glasses or a face shield to protect your eyes from debris and potential backsplash. High-pressure water can cause serious eye injury. Similarly‚ closed-toe shoes are essential to safeguard your feet.
Never point the pressure washer nozzle at yourself or others. The force of the water can cause severe harm. Be mindful of your surroundings and ensure no people or pets are within the spray range.
Before starting‚ inspect the nozzle for any cracks or damage. A damaged nozzle can alter the spray pattern and potentially cause injury. Ensure the nozzle is securely attached to the wand.
Maintain a safe distance from the surface you are cleaning‚ starting with a wider nozzle and gradually decreasing the angle as needed. Avoid prolonged exposure to a single spot‚ as this can damage the surface.
Be aware of electrical hazards when using a pressure washer‚ especially near outlets or electrical equipment. Use a Ground Fault Circuit Interrupter (GFCI) outlet for added safety.
Cleaning and Storing Your Nozzles
Regular cleaning is crucial for maintaining nozzle performance. After each use‚ rinse the nozzles thoroughly with clean water to remove any lingering dirt‚ debris‚ or detergent residue. A small brush can help dislodge stubborn particles from the nozzle orifice.
For clogged nozzles‚ a nozzle cleaning kit with fine wires is highly recommended. Gently insert the wire into the nozzle opening to clear any obstructions – avoid using sharp objects that could damage the nozzle.
Before storing‚ ensure the nozzles are completely dry to prevent corrosion. A quick wipe-down with a clean cloth will help. Store nozzles in a dry‚ organized location‚ preferably in a dedicated container or toolbox.
Avoid storing nozzles in direct sunlight or extreme temperatures‚ as this can degrade the plastic or metal components. Proper storage extends the lifespan of your nozzles and ensures they are ready for your next cleaning project.
Replacing Worn or Damaged Nozzles
Over time‚ pressure washer nozzles can wear down or become damaged due to use and exposure to abrasive materials. Signs of wear include an inconsistent spray pattern‚ reduced pressure‚ or visible cracks in the nozzle body.
Replacing a worn or damaged nozzle is essential for maintaining optimal cleaning performance and preventing potential safety hazards. Always use nozzles specifically designed for your pressure washer model.

To replace a nozzle‚ first‚ disconnect the pressure washer from the power source and water supply. Then‚ carefully unscrew the old nozzle from the wand. Apply a small amount of Teflon tape to the threads of the new nozzle before screwing it securely into place.
Ensure the new nozzle is tightened properly‚ but avoid over-tightening‚ which could damage the wand or nozzle. Regularly inspect your nozzles for wear and tear‚ and replace them promptly when necessary for safe and effective cleaning.
Troubleshooting Common Nozzle Issues
Several issues can arise with pressure washer nozzles‚ impacting performance. A common problem is clogging‚ often caused by mineral deposits or debris. Try soaking the nozzle in vinegar or using a nozzle cleaning tool to clear the blockage.
Reduced pressure can indicate a partially clogged nozzle or a worn-out orifice. Inspect for damage and clean thoroughly. If the issue persists‚ replacement is likely needed.
An uneven spray pattern suggests a damaged nozzle or internal obstruction. Examine the nozzle for cracks or deformities. Cleaning might help‚ but a replacement is often the best solution.
If the nozzle spins freely when it shouldn’t (on a fixed-spray nozzle)‚ the retaining clip may be damaged. Check and replace the clip if necessary. Always prioritize safety and disconnect the power before troubleshooting.