honeywell t6 wifi installation manual

Honeywell T6 WiFi Installation Manual: A Comprehensive Guide

This comprehensive guide details the installation process for your Honeywell T6 Pro WiFi thermostat, covering everything from initial setup to WiFi connection and advanced configuration.

It provides instructions for both standard and adapter installations, ensuring a smooth experience, and offers troubleshooting tips for common issues.

The Honeywell T6 Pro represents a significant advancement in home climate control, offering a blend of smart technology and user-friendly operation. This WiFi-enabled thermostat allows for remote access and configuration via the Honeywell Home app, providing unparalleled convenience and energy savings.

Designed as a replacement for traditional thermostats, the T6 Pro seamlessly integrates into existing HVAC systems. It supports various system types and offers features like flexible scheduling, geofencing, and smart alerts. The thermostat’s intuitive interface and customizable display enhance the user experience.

This guide will walk you through the entire installation process, ensuring a successful setup and optimal performance. Whether you’re a seasoned DIY enthusiast or a first-time installer, these instructions will provide clear, step-by-step guidance.

Package Contents & Verification

Upon opening your Honeywell T6 Pro package, carefully verify that all components are present and undamaged. Your kit should include the T6 thermostat itself, a receiver box for wireless connectivity, a UWP mounting system for easy installation, and a Honeywell standard installation adapter (J-box adapter).

Additionally, you’ll find a Honeywell decorative cover plate to enhance the thermostat’s appearance. Ensure the receiver box and thermostat base plate are included. Inspect all items for any signs of physical damage during shipping.

If any components are missing or appear damaged, do not proceed with the installation. Contact Honeywell Home support immediately for assistance and replacement parts. Proper verification ensures a smooth and trouble-free setup process.

Safety Precautions Before Installation

Prior to installing your Honeywell T6 Pro thermostat, prioritize safety. Crucially, always turn OFF power to your HVAC system at the breaker box to avoid electrical shock. Do not attempt installation if you are uncomfortable working with electrical wiring; consult a qualified HVAC professional.

Never burn the product, and keep it away from flammable materials. Ensure the installation location is dry and free from excessive dust or debris. This thermostat is designed for indoor use only.

Read all instructions thoroughly before beginning. Improper installation can damage your HVAC system or the thermostat itself. Follow all local electrical codes and regulations during the installation process.

Turning Off Power & Removing Old Thermostat

Before proceeding, completely shut off power to your HVAC system at the circuit breaker. Verify the power is off using a non-contact voltage tester. Carefully remove the cover of your existing thermostat to expose the wiring.

Take a clear photograph of the existing wiring configuration – this will be invaluable during the installation of your Honeywell T6. Gently disconnect the wires, one at a time, avoiding any shorts.

Do not allow wires to fall back into the wall. Once all wires are disconnected, remove the old thermostat baseplate from the wall. Prepare for the next step: identifying and labeling each wire.

4.1 Identifying Thermostat Wiring

Carefully examine each wire connected to your old thermostat. Common wire designations include R (power), C (common), W (heating), Y (cooling), and G (fan). The wire colors may vary, so rely on the terminal labels, not just the color.

If you encounter a wire labeled “O/B”, it’s typically used for reversing valve control in heat pump systems. A “jump wire” may be present; document its location.

Refer to your HVAC system’s documentation if you’re unsure about any wire’s function. Accurate identification is crucial for correct installation of the Honeywell T6. Incorrect wiring can damage your system.

4.2 Labeling Existing Wires

Before disconnecting any wires, use the provided labels to clearly mark each wire corresponding to its terminal designation (R, C, W, Y, G, etc.). Wrap the labels securely around the wires. This step is absolutely critical to avoid confusion during the installation of your Honeywell T6 thermostat.

Double-check that each label accurately reflects the wire’s connection on the old thermostat. Take a photograph of the existing wiring as a backup reference.

Precise labeling ensures a smooth reconnection process and minimizes the risk of errors that could lead to system malfunction. Don’t skip this vital step!

Preparing the Receiver Box for Installation

The receiver box is a crucial component for enabling the WiFi functionality of your Honeywell T6 thermostat. Before mounting, carefully inspect the box for any damage. Ensure you have the appropriate mounting hardware, potentially including a J-box adapter for specific installations.

Confirm the receiver box is compatible with your HVAC system’s voltage requirements. Locate a suitable mounting position near the thermostat, ensuring easy access for wiring.

Proper preparation streamlines the installation process and guarantees optimal performance of your new thermostat. A secure and correctly wired receiver box is essential for reliable operation.

5.1 Mounting the Receiver Box

Securely mounting the receiver box is vital for a stable installation. Utilize the provided screws and anchors, ensuring they are appropriate for your wall type. If using a J-box adapter, firmly attach it to the existing electrical box before mounting the receiver.

Position the receiver box so the wiring connections are easily accessible. Avoid locations exposed to excessive moisture or extreme temperatures. Ensure the box is level to prevent strain on the wires.

A properly mounted receiver box minimizes the risk of disconnections and ensures long-term reliability of your Honeywell T6 system. Double-check the mounting before proceeding to the wiring stage.

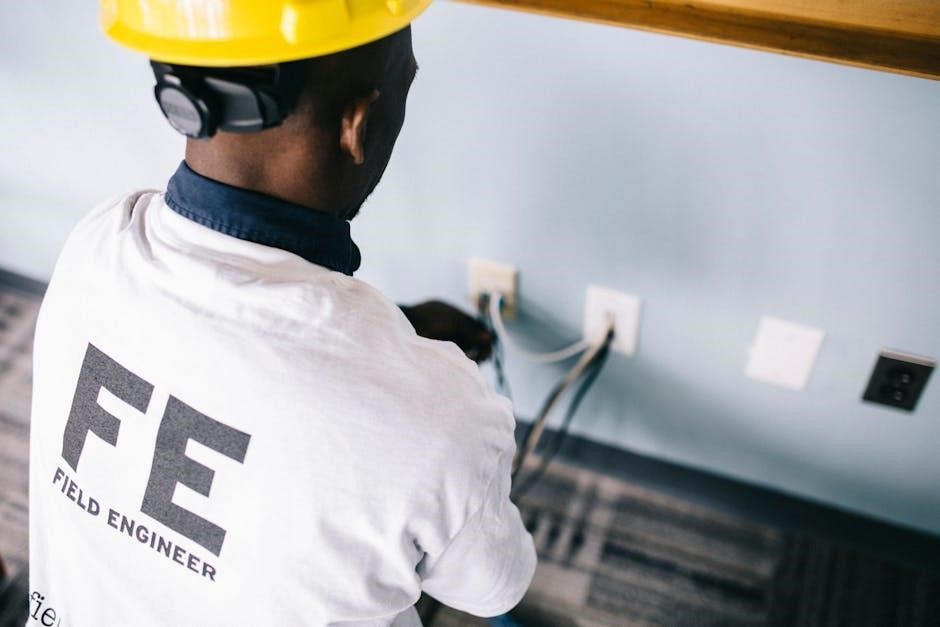
5.2 Wiring the Receiver Box to the HVAC System

Carefully connect the labeled wires from your HVAC system to the corresponding terminals on the receiver box. Refer to your wiring diagram and the Honeywell installation guide for accurate connections. Typically, this involves connecting wires for power (R), heating (W), cooling (Y), and common (C).

Ensure each wire is securely fastened to its terminal. Incorrect wiring can damage your HVAC system or thermostat. If you are unsure about any connection, consult a qualified HVAC technician.

Double-check all connections before proceeding. A secure and correct wiring setup is crucial for the proper functioning of your T6 thermostat and HVAC system.

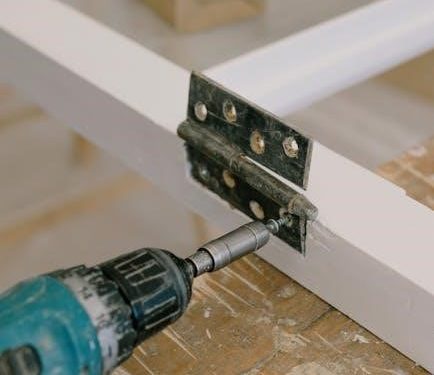
Installing the T6 Thermostat Base Plate

Begin by removing the protective cover from the wall plate of the Honeywell T6 thermostat. Align the base plate with the mounting holes previously marked during the old thermostat removal. Ensure the plate is level for a clean and professional appearance.

Secure the base plate to the wall using the provided screws. Do not overtighten, as this could damage the wall or the base plate itself. The base plate should sit flush against the wall, providing a stable foundation for the thermostat.

This step is crucial for ensuring a secure and reliable connection between the thermostat and the receiver box.

Connecting the Thermostat to the Receiver Box

Carefully align the T6 thermostat with the mounted base plate. Gently push the thermostat onto the base plate until it clicks securely into place. Ensure a firm connection; a loose connection can lead to operational issues.

Once the thermostat is attached, verify that all wires are correctly and securely connected to the receiver box terminals. Double-check the wiring diagram to confirm accuracy, preventing potential damage to your HVAC system.

This connection establishes communication between the thermostat and the HVAC system, enabling control of heating and cooling functions. A proper connection is vital for optimal performance;

Powering On & Initial Setup

Restore power to your HVAC system at the breaker box. The T6 thermostat should power on automatically, displaying the Honeywell Home welcome screen; If it doesn’t, re-check the wiring connections at both the thermostat and receiver box.

Follow the on-screen prompts to begin the initial setup process. This includes selecting your language, date, and time. The thermostat will guide you through a series of questions to tailor settings to your specific HVAC system configuration.

Accurate initial setup is crucial for proper operation. Ensure you select the correct system type to avoid compatibility issues and optimize performance.

Connecting to WiFi Network

To unlock smart features, connect your T6 thermostat to your home WiFi network. From the thermostat display, navigate to the network settings menu. Select your WiFi network from the list of available networks and enter your password when prompted.

Alternatively, utilize the Honeywell Home app for a streamlined connection process. The app provides step-by-step guidance and can automatically detect nearby networks. A stable WiFi signal is essential for reliable remote control and scheduling.

If the connection fails, verify your password and router settings. Refer to the troubleshooting section for further assistance with WiFi connection issues.

9.1 Using the Honeywell Home App

The Honeywell Home app simplifies thermostat configuration and remote control. Download the app from your device’s app store and create an account, or log in if you already have one. Follow the in-app instructions to add your T6 thermostat by selecting “Add a Device”.

The app guides you through WiFi connection, registration, and initial setup. Once connected, you can adjust temperature settings, create schedules, and monitor energy usage from anywhere. The app also provides access to advanced features and troubleshooting resources.

Regular app updates ensure optimal performance and access to the latest features for your Honeywell T6 Pro.

9.2 Troubleshooting WiFi Connection Issues

If your Honeywell T6 thermostat fails to connect to WiFi, first ensure your router is functioning correctly and broadcasting a 2.4 GHz network – the T6 doesn’t support 5 GHz. Verify you’ve entered the correct password within the Honeywell Home app.

Restart both your router and the thermostat. If problems persist, move the thermostat closer to the router to rule out range issues. Check for interference from other wireless devices. A factory reset of the thermostat (see section 15) may also resolve connectivity problems.

Consult the Honeywell Home support website for further assistance and specific error code solutions.

Registering the Thermostat & Creating an Account

To unlock the full potential of your Honeywell T6 Pro, registration and account creation are essential. Download the Honeywell Home app from your app store and follow the on-screen prompts. You’ll need to provide a valid email address and create a secure password.

During registration, you’ll be asked to enter your thermostat’s unique serial number, found on the device itself or the original packaging. This links your thermostat to your account, enabling remote control and access to advanced features.

Honeywell Home utilizes licensing from Honeywell International, Inc. for its services. Account creation grants access to support resources and future updates.

Basic Thermostat Configuration

Once connected, initial configuration is straightforward via the Honeywell Home app or directly on the thermostat. Begin by setting your preferred temperature units – Fahrenheit or Celsius. Next, configure the date and time accurately for proper scheduling.

Define your home’s heating and cooling system type (e.g., forced air, heat pump) to optimize performance. Explore the clock format options: 12-hour or 24-hour display.

Familiarize yourself with setting temporary or permanent hold temperatures. These settings override scheduled programs. Ensure the thermostat correctly identifies your system for efficient operation and accurate temperature control. Proper setup is key to maximizing energy savings.

Understanding the T6 Pro Display & Controls

The Honeywell T6 Pro features a user-friendly touchscreen display. The main screen shows the current temperature, setpoint, and operating mode (Heat, Cool, Auto, Off). Swipe left or right to navigate between screens displaying schedule, fan settings, and system information.

Tap the up and down arrows to adjust the temperature. The menu button (typically three horizontal lines) accesses advanced settings. The fan control allows selection of Auto or On modes.

The display indicates WiFi connection status. Familiarize yourself with the icons representing different system states. The thermostat also provides alerts for filter changes or system issues. Understanding these controls ensures efficient operation and customization.

Advanced Features & Scheduling

The Honeywell T6 Pro offers robust scheduling capabilities via the thermostat itself or the Honeywell Home app. Create custom schedules with different temperature settings for various times of the day and days of the week. Utilize geofencing to automatically adjust the temperature based on your location.

Smart Recovery learns your heating and cooling patterns to ensure comfort when you return home. The thermostat supports multiple heating and cooling stages for optimized efficiency.

Explore features like vacation mode to save energy while away. Integration with HomeKit allows voice control and automation. These advanced features maximize comfort and energy savings.

Troubleshooting Common Installation Problems

Power issues are frequent; ensure the HVAC system’s power is completely off during installation. If the receiver box doesn’t power on, double-check wiring connections to the HVAC system. A WiFi connection failure often stems from incorrect network credentials or signal strength – verify both within the Honeywell Home app.

If the thermostat displays a “no common wire” message, a C-wire adapter might be necessary. Incorrect wiring can cause erratic behavior; meticulously review the wiring diagram.

For unresponsive displays, try a soft reset. If problems persist, consult Honeywell support or a qualified HVAC technician.

Resetting the Thermostat to Factory Defaults

Resetting your Honeywell T6 Pro to factory defaults clears all personalized settings, returning it to its original state. This is useful before troubleshooting or re-installing the thermostat. Access the reset function through the thermostat’s menu – navigate to “Settings,” then “Reset,” and confirm your choice.

Alternatively, a physical reset might be possible, though it varies by model; consult your specific installation manual. Note that a factory reset will disconnect the thermostat from your WiFi network, requiring re-configuration.

Remember to re-register the device and re-establish your scheduling preferences after the reset is complete.

Honeywell Home Support & Resources

Honeywell Home provides extensive support for your T6 Pro WiFi thermostat. Their official website offers a comprehensive FAQ section, detailed installation guides, and troubleshooting assistance for common issues. You can access these resources online at the Honeywell Home support portal.

For direct assistance, Honeywell offers phone support and a community forum where users can share tips and solutions. The Honeywell Home app also includes helpful tutorials and access to support articles.

Remember to have your thermostat’s model number (TH6320U2008, etc.) readily available when contacting support for faster service.

20-minute guided meditation script pdf

Guided meditation scripts‚ particularly those around 20 minutes‚ are gaining popularity as accessible tools for mindfulness. Numerous resources offer PDF versions for convenient use.

These scripts‚ like those for breath awareness or sleep‚ provide structure for cultivating calm and focus. They are readily available online from various sources.

Whether seeking a basic breath exercise or a progressive muscle relaxation technique‚ a 20-minute script can be a powerful addition to a wellness routine.

What is a Guided Meditation?

Guided meditation is a practice where a trained voice leads you through a meditative experience. Unlike silent meditation‚ a guide provides imagery‚ prompts‚ and suggestions to help focus your mind and deepen relaxation.

Often‚ these sessions are available as audio recordings or‚ conveniently‚ as PDF scripts allowing for self-guided practice. A 20-minute guided meditation script offers a manageable timeframe for beginners and seasoned practitioners alike.

The scripts often incorporate techniques like breath awareness‚ body scans‚ or loving-kindness exercises. Luminosity offers mindfulness sessions led by experienced practitioners. The goal is to cultivate present moment awareness and reduce mental clutter‚ promoting a sense of peace and well-being.

These scripts are a fantastic way to begin or enhance your meditation journey.

Benefits of a 20-Minute Meditation

A 20-minute meditation‚ especially when utilizing a script – often found in PDF format – offers a wealth of benefits within a realistic timeframe. Regular practice can significantly reduce stress and anxiety‚ fostering a calmer mental state.

These sessions improve focus and concentration‚ enhancing productivity and cognitive function. Scripts‚ like those for sleep‚ can promote better sleep quality by quieting racing thoughts.

Progressive muscle relaxation scripts‚ around 20 minutes in length‚ can alleviate physical tension. Mindfulness practices‚ guided by scripts‚ cultivate self-awareness and emotional regulation.

Ultimately‚ incorporating a 20-minute meditation into your routine supports overall well-being and a more balanced life.

Why Use a Script?

Utilizing a script‚ readily available as a PDF download‚ removes the mental burden of creating a meditation on the spot. This is particularly helpful for beginners who may feel unsure of what to say or focus on during a 20-minute session.

Scripts provide structure and pacing‚ guiding you through the practice and preventing wandering thoughts. They ensure a comprehensive experience‚ covering elements like breath awareness or body scans.

Pre-written scripts‚ such as those for sleep or progressive muscle relaxation‚ offer convenience and consistency. They allow you to simply relax and follow the guidance‚ maximizing the benefits of your meditation time.

Types of 20-Minute Guided Meditation Scripts

PDF resources offer diverse scripts‚ including breath awareness‚ body scans‚ loving-kindness (Metta)‚ and sleep meditations‚ each tailored for a 20-minute practice.

Breath Awareness Meditation Scripts

Breath awareness meditation scripts‚ often available as PDF downloads‚ center on focusing attention on the sensation of breathing. These scripts typically guide you to notice the natural rhythm of your breath‚ without attempting to change it.

A common 20-minute format begins with settling into a comfortable position and gently directing awareness to the breath entering and leaving the body. The script may include prompts to observe the rise and fall of the abdomen or the feeling of air passing through the nostrils.

When the mind wanders – as it inevitably will – the script encourages a gentle redirection of focus back to the breath. These scripts are foundational for beginners and can be found on websites offering free PDF resources.

Body Scan Meditation Scripts

Body scan meditation scripts‚ frequently offered in PDF format‚ systematically direct attention to different parts of the body. A typical 20-minute script guides the listener to bring awareness to sensations – warmth‚ tingling‚ pressure – in each body part‚ starting with the toes and moving upwards.

The goal isn’t to change sensations‚ but simply to observe them without judgment. Scripts often encourage noticing areas of tension and gently releasing them with the breath.

These scripts promote body awareness and can be incredibly grounding. Many free PDF versions are available online‚ providing a structured approach to mindful exploration of the physical self‚ fostering relaxation and present moment focus.

Loving-Kindness (Metta) Meditation Scripts

Loving-kindness (Metta) meditation scripts‚ often found as downloadable PDFs‚ cultivate feelings of warmth‚ compassion‚ and goodwill towards oneself and others. A 20-minute script typically begins by directing loving-kindness towards oneself‚ then gradually extends it to loved ones‚ neutral persons‚ difficult individuals‚ and finally‚ all beings.

Phrases like “May I be happy‚ may I be healthy‚ may I be safe‚ may I be at ease” are repeated‚ fostering a sense of interconnectedness.

These scripts‚ readily available online‚ promote emotional wellbeing and reduce negativity. Utilizing a PDF provides a convenient guide for practicing Metta‚ encouraging a more compassionate and empathetic outlook on life.

Sleep Meditation Scripts

Sleep meditation scripts‚ frequently available as PDF downloads‚ are designed to promote relaxation and prepare the mind and body for restful sleep. A typical 20-minute script guides listeners through gentle imagery‚ focusing on releasing tension and calming the nervous system.

These scripts often incorporate techniques like body scans and deep breathing exercises‚ easing the transition into sleep. Many resources offer these scripts for free‚ providing a valuable tool for those struggling with insomnia or racing thoughts.

Utilizing a PDF allows for easy access and consistent practice‚ fostering a peaceful bedtime routine.

Finding and Accessing 20-Minute Guided Meditation Scripts in PDF Format

Numerous websites offer free 20-minute guided meditation scripts in PDF format‚ providing convenient access to mindfulness practices for relaxation and well-being;

Popular Websites Offering Free PDFs

Meditationcoach is a valuable resource‚ providing a 20-minute guided sleep meditation script available for download in PDF and Word formats‚ designed to address nighttime racing thoughts.

Luminosity‚ associated with the Institute for Contemporary Art‚ offers mindfulness resources‚ including guided meditations led by Ashley Williams‚ a yoga therapist and meditation practitioner. While direct PDF access isn’t always stated‚ exploring their offerings can yield suitable scripts.

Various mindfulness and wellness blogs frequently host free guided meditation script bundles‚ often including options around the 20-minute mark‚ downloadable as PDFs. A focused online search will reveal these hidden gems.

Remember to always check the source’s credibility before using any script.

Searching for Scripts Online

To locate a 20-minute guided meditation script in PDF format‚ utilize specific search terms like “20 minute meditation script PDF”‚ “guided sleep meditation PDF”‚ or “breath awareness meditation script PDF”.

Refine searches by adding keywords like “progressive muscle relaxation” or “loving-kindness” to target specific meditation types. Explore platforms like Google‚ Pinterest‚ and dedicated mindfulness websites.

Image searches can also reveal PDF thumbnails linking to downloadable scripts. Don’t overlook online forums and communities focused on meditation‚ where users often share resources.

Remember to preview the script before downloading to ensure it aligns with your preferences and needs.

Ensuring Script Quality and Credibility

When downloading a 20-minute guided meditation script in PDF format‚ prioritize quality and credibility. Look for scripts authored by qualified professionals – yoga therapists‚ meditation practitioners‚ or mindfulness experts.

Check for clear language‚ a logical flow‚ and a calming tone. Avoid scripts with grammatical errors or ambiguous instructions. Consider the source; reputable websites and organizations are preferable.

Read reviews or testimonials if available. A well-crafted script will guide you effectively and safely through the meditation. Trust your intuition; if something feels off‚ choose a different script.

Prioritize scripts that promote relaxation and well-being‚ not anxiety or discomfort.

Key Elements of an Effective 20-Minute Script

Effective scripts utilize clear‚ calming language and strategic pacing with pauses. Background music or soundscapes enhance the experience‚ creating a relaxing atmosphere.

Clear and Calming Language

A crucial aspect of any successful 20-minute guided meditation script‚ readily available in PDF format‚ is the use of exceptionally clear and calming language. The wording should be gentle‚ inviting‚ and free from jargon or complex phrasing that might distract the listener.

Avoid abrupt commands; instead‚ employ soft suggestions and imagery. Phrases like “allow yourself to…” or “notice the sensation of…” are far more effective than direct instructions. The script’s tone should be consistently soothing‚ fostering a sense of safety and relaxation.

Positive affirmations and encouraging words can further enhance the experience‚ guiding the individual towards inner peace and mindfulness. The goal is to create a verbal landscape that supports deep relaxation and focused attention.

Pacing and Pauses

Effective pacing is paramount within a 20-minute guided meditation script‚ often found as a convenient PDF download. The script shouldn’t rush the listener‚ allowing ample time to absorb each suggestion and experience the sensations described. A deliberate‚ unhurried delivery is key.

Strategic pauses are equally vital. These moments of silence provide space for introspection and allow the mind to settle. Pauses after key instructions or imagery give the listener time to connect with their inner experience.

Varying the length of pauses can also be beneficial‚ creating a natural rhythm that enhances the meditative state. A well-paced script respects the listener’s journey and supports a deeper level of relaxation.

Background Music and Soundscapes

Enhancing a 20-minute guided meditation‚ often accessed as a readily available PDF‚ with carefully chosen audio can significantly deepen the experience. Subtle background music‚ like ambient tones or nature sounds‚ can create a more immersive and relaxing atmosphere.

Soundscapes – gentle rain‚ ocean waves‚ or birdsong – can be particularly effective in promoting tranquility. However‚ the music should support‚ not distract from‚ the meditation itself.

Avoid tracks with strong melodies or sudden changes in volume. The goal is to create a soothing auditory backdrop that encourages focus and allows the listener to fully engage with the script’s guidance.

Adapting Scripts to Your Needs

PDF scripts offer flexibility! Modify length‚ personalize the focus‚ and adjust complexity to suit your experience level and preferences for a tailored meditation.

Modifying Script Length

PDF guided meditation scripts aren’t set in stone; they’re adaptable! While a 20-minute format is common‚ feel free to adjust the duration. Some sources suggest body scans can range from 20 to 40+ minutes.

If you’re new to meditation‚ shortening a script can prevent overwhelm. Conversely‚ experienced practitioners might expand it for deeper immersion. Simply remove or add sections – perhaps repeating a calming phrase or extending a visualization.

Consider your schedule and energy levels. A shorter script is ideal for busy days‚ while a longer one suits relaxed moments. Remember‚ consistency is key‚ so choose a length you can realistically maintain.

Experiment to find what resonates best with you!

Personalizing the Script’s Focus

A PDF guided meditation script is a fantastic starting point‚ but tailoring it to your needs amplifies its benefits. Consider your current emotional state or specific goals. Are you seeking stress relief‚ improved sleep‚ or increased self-compassion?

Modify the visualizations and affirmations within the script to align with your intentions. For example‚ a loving-kindness script can be personalized with specific individuals in mind.

Don’t hesitate to add imagery or metaphors that resonate with you personally. A script focusing on nature could incorporate your favorite landscape. The goal is to create a deeply meaningful and relevant experience.

Make it your meditation!

Adjusting for Different Experience Levels

When utilizing a PDF 20-minute guided meditation script‚ remember to adapt it to your experience. Beginners might benefit from simpler language and more detailed instructions‚ focusing on foundational techniques like breath awareness.

Experienced meditators can explore scripts with more complex visualizations or extended periods of silence. Consider removing introductory explanations if you’re already familiar with the concepts.

For those new to meditation‚ shorter pauses and frequent gentle reminders to refocus can be helpful. Advanced practitioners might prefer longer pauses to deepen their concentration.

Ultimately‚ the script should serve you and your current practice.

Progressive Muscle Relaxation Scripts (20-Minute Version)

PDF scripts for progressive muscle relaxation‚ often around 20 minutes‚ guide you through tensing and releasing muscle groups for deep relaxation and stress reduction.

Step-by-Step Guide to Progressive Relaxation

Progressive Muscle Relaxation (PMR)‚ often found in 20-minute guided meditation script PDF formats‚ involves systematically tensing and relaxing different muscle groups. Begin by finding a quiet space and comfortable position;

The script will typically start with feet‚ instructing you to tense them for a few seconds‚ then release‚ noticing the difference. Continue upwards – calves‚ thighs‚ abdomen‚ chest‚ arms‚ hands‚ shoulders‚ neck‚ and face.

Focus on the sensation of tension and then the release. Breathe deeply throughout‚ inhaling during tension and exhaling during relaxation. A PDF script provides a structured sequence‚ ensuring no muscle group is missed.

Dimming lights and minimizing distractions enhances the experience. This technique promotes physical and mental calmness‚ effectively reducing stress and anxiety.

Creating a Relaxing Environment

To maximize the benefits of a 20-minute guided meditation script PDF‚ especially for practices like Progressive Muscle Relaxation‚ a calming environment is crucial. Begin by minimizing distractions – silence your phone and inform others you need uninterrupted time.

Dim the lights or use soft‚ ambient lighting. Consider incorporating aromatherapy with calming scents like lavender or chamomile. A comfortable temperature is also essential; not too warm‚ not too cold.

You might use a comfortable chair or lie down on a yoga mat. Some scripts suggest gentle background music or soundscapes‚ readily available online. Ensure you won’t be disturbed during the session.

Preparing this space signals to your mind and body that it’s time to relax and focus inward‚ enhancing the effectiveness of the guided meditation.

Resources for Further Exploration

Meditation apps offer 20-minute options‚ while online communities provide support. Numerous websites host PDF scripts for continued practice and deeper exploration.

Meditation Apps with 20-Minute Options

Numerous meditation apps provide a convenient way to access 20-minute guided meditations‚ often including downloadable PDF scripts for offline use. Popular choices like Calm and Headspace feature extensive libraries with varying themes‚ from sleep and stress reduction to focus and loving-kindness.

Insight Timer boasts a vast collection of free guided meditations‚ many around the 20-minute mark‚ and allows users to download audio or find accompanying script resources. These apps frequently update their content‚ offering fresh perspectives and techniques.

Ten Percent Happier provides meditations led by renowned teachers‚ with options tailored to different experience levels. Many apps also allow users to create custom playlists‚ incorporating 20-minute sessions as desired.

Online Meditation Communities

Engaging with online meditation communities can unlock access to a wealth of 20-minute guided meditation resources‚ including shared PDF scripts. Platforms like Reddit’s r/Meditation and dedicated Facebook groups foster supportive environments where members exchange scripts and experiences.

Websites such as Insight Timer also host thriving communities‚ offering forums for discussion and script sharing. These groups often feature themed meditations‚ allowing users to find scripts specifically tailored to their needs.

Participating in these communities provides opportunities to receive feedback‚ discover new techniques‚ and connect with fellow practitioners seeking 20-minute meditation guidance.

Potential Challenges and Solutions

Distractions and a wandering mind are common hurdles. Solutions include choosing a quiet space and gently redirecting focus‚ even with a PDF script.

Dealing with a Wandering Mind

A frequently encountered challenge during meditation‚ even when utilizing a structured 20-minute guided meditation script in PDF format‚ is a wandering mind; Thoughts inevitably arise‚ pulling focus away from the present moment and the script’s guidance.

The key isn’t to suppress these thoughts‚ but to acknowledge them without judgment. Gently notice the thought‚ label it if helpful (e.g.‚ “planning‚” “memory”)‚ and then softly redirect your attention back to the script’s instructions – perhaps the breath‚ a body sensation‚ or a loving-kindness phrase.

Consistency is crucial; with practice‚ this redirection becomes easier. Don’t get discouraged by frequent mind-wandering; it’s a natural part of the process.

Finding a Quiet Space

Establishing a conducive environment is vital when working with a 20-minute guided meditation script‚ often accessed as a convenient PDF. Minimizing external distractions enhances the meditation experience and allows for deeper focus.

Ideally‚ select a quiet room where you won’t be interrupted. Turn off notifications on your phone and inform household members of your need for undisturbed time. Dimming the lights can also promote relaxation.

If complete silence isn’t possible‚ consider using noise-canceling headphones or playing calming ambient sounds. The goal is to create a peaceful sanctuary‚ supporting the script’s guidance and fostering inner calm.

manual fluid pump

Manual fluid pumps are devices that use human effort to transfer fluids, relying on mechanisms like pistons, levers, and check valves to create suction and discharge.

1.1 Definition and Purpose

A manual fluid pump is a device that uses human effort to transfer fluids through mechanical motion. It operates by creating suction and discharge actions, often involving pistons, plungers, or screws. The primary purpose of these pumps is to move liquids from one location to another, such as water, oil, or hydraulic fluids. They are designed for simplicity, relying on levers, check valves, and connecting rods to function effectively. Manual pumps are essential for applications where electricity or automation is unavailable, offering a reliable and portable solution for fluid transfer needs.

1.2 Historical Background

Manual fluid pumps have their roots in ancient civilizations, where early humans developed primitive devices to move water for irrigation. The concept evolved over centuries, with the Middle Ages seeing the introduction of piston-based pumps for drainage and water supply. By the Industrial Revolution, manual pumps became more sophisticated, utilizing levers and check valves to enhance efficiency. These early designs laid the foundation for modern manual pumps, which are now essential tools in various industries, offering a reliable method for fluid transfer without the need for electricity.

1.3 Importance in Various Industries

Manual fluid pumps play a crucial role across multiple industries due to their simplicity and reliability. In water supply systems, they provide consistent pressure for distribution. Hydraulic systems rely on them for precise fluid control, enabling machinery operation. Oil extraction and transfer benefit from their portability in remote locations. Additionally, medical and laboratory settings utilize manual pumps for safe handling of fluids. Their versatility and cost-effectiveness make them indispensable in diverse applications, ensuring efficient fluid management without the need for complex infrastructure or electricity.

Working Principle of Manual Fluid Pumps

Manual fluid pumps operate by converting mechanical energy into hydraulic energy, using components like pistons, screws, or levers to create suction and propel fluids through systems efficiently.

2.1 Rotational Motion and Screw Mechanism

The rotational motion in manual fluid pumps is driven by human effort, converting it into mechanical energy. A screw mechanism, often with meshing threads, creates a progressive cavity effect, ensuring efficient fluid transfer. As the handle is turned, the screw rotates, capturing and propelling fluid through the pump. This design minimizes leakage and maintains consistent flow, making it ideal for viscous fluids. The screw’s helical shape ensures smooth operation, while its tight tolerances enhance pressure buildup, enabling reliable performance in various applications.

2.2 Piston and Plunger Operation

In manual fluid pumps, the piston and plunger system is integral to fluid transfer. When the lever is pressed, the piston moves upward, creating suction that draws fluid into the cylinder. As the lever is released, the plunger forces the fluid out through the discharge valve. This reciprocating motion ensures consistent flow. Check valves prevent backflow, maintaining efficiency. The simplicity of this mechanism makes it reliable for low-pressure applications, relying solely on manual effort to drive the piston-plunger assembly. This design is widely used in portable and cost-effective pumping solutions.

2.3 Role of Check Valves in Fluid Transfer

Check valves are crucial in manual fluid pumps, ensuring fluid flows in one direction. During suction, the inlet check valve opens, allowing fluid into the cylinder. As the piston rises, the outlet check valve opens, expelling fluid. Simultaneously, the inlet valve closes to prevent backflow. This unidirectional flow maximizes efficiency and prevents fluid reversal, ensuring smooth operation. The precise functioning of check valves is essential for maintaining consistent pressure and flow rates in manual pumping systems, making them indispensable for reliable fluid transfer.

Types of Manual Fluid Pumps

Manual fluid pumps are categorized into lever-operated, hand-crank, foot-operated, and squeeze-bulb pumps, each designed for specific applications and offering unique advantages in fluid transfer efficiency.

3.1 Lever-Operated Pumps

Lever-operated pumps utilize a lever mechanism to create the necessary motion for fluid transfer. When the lever is pressed downward, it drives a piston or plunger, drawing fluid into a cylinder. Upon release, the fluid is expelled through a discharge valve. These pumps are commonly used in water supply systems and hydraulic applications, offering simplicity and reliability. Their design often includes check valves to ensure one-way fluid flow, making them efficient for low-pressure environments. This mechanism is both durable and easy to maintain, providing consistent performance across various industries.

3.2 Hand-Crank Pumps

Hand-crank pumps operate by converting rotational motion into linear movement, typically driving a piston or plunger to transfer fluids. The crank is connected to a rod, which moves up and down inside a cylinder, creating suction and discharge strokes. Check valves ensure fluid flows in one direction, while the crank’s mechanical advantage reduces effort. These pumps are widely used in water supply systems, small-scale hydraulic applications, and oil transfer. Their durable design and ease of use make them ideal for low-pressure, portable fluid transfer solutions across various industries.

3.3 Foot-Operated Pumps

Foot-operated pumps utilize a foot pedal to drive the pumping mechanism, often employing a piston or diaphragm to transfer fluids. The pedal’s motion creates alternating suction and discharge cycles, with check valves ensuring one-way flow. These pumps are advantageous for hands-free operation, allowing users to manage other tasks simultaneously. Common applications include laboratories, medical settings, and industrial environments where precise fluid control is needed. Their design enhances efficiency and reduces fatigue, making them a practical choice for continuous or intermittent fluid transfer requirements.

3.4 Squeeze-Bulb Pumps

Squeeze-bulb pumps are small, portable devices that use a flexible bulb or diaphragm to create suction for fluid transfer. By manually compressing the bulb, users generate negative pressure, drawing fluid into the pump. A check valve ensures one-way flow, preventing backflow. These pumps are ideal for low-volume applications, such as inflating items or transferring small amounts of liquid. Their simplicity and compact design make them popular in medical, laboratory, and recreational settings, offering a reliable, low-cost solution for precise fluid control and transfer tasks.

Applications of Manual Fluid Pumps

Manual fluid pumps are essential in water supply systems, hydraulic machinery, and oil extraction, providing reliable fluid transfer in various industrial and domestic settings efficiently.

4.1 Water Supply Systems

Manual fluid pumps play a crucial role in water supply systems, especially in rural or emergency settings where electricity is unavailable. These pumps operate by creating suction to draw water from wells or reservoirs into cylinders. As the piston moves upward, water is expelled through a discharge valve, ensuring a steady supply. Their simplicity and reliability make them ideal for communities needing consistent access to clean water. This method is both cost-effective and sustainable for small-scale applications.

4.2 Hydraulic Systems

Manual fluid pumps are essential in hydraulic systems, where they generate pressure to perform tasks like lifting or clamping. By applying Pascal’s Law, these pumps transfer force through fluids, enabling precise control. They often feature pressure gauges to monitor output, ensuring safe operation. Ideal for low-pressure applications, manual pumps are reliable and portable, making them suitable for various hydraulic machinery. Their simplicity and effectiveness make them a preferred choice in industries requiring consistent fluid pressure without the need for complex automation.

4.3 Oil Extraction and Transfer

Manual fluid pumps play a crucial role in oil extraction and transfer processes, offering a reliable method to handle viscous fluids. These pumps use pistons or plungers to create suction, drawing oil from reservoirs or wells. Equipped with pressure gauges, they monitor output pressure, ensuring efficient transfer. Their portability and simplicity make them ideal for remote or low-infrastructure environments. Whether in small-scale extraction or industrial settings, manual pumps provide consistent performance, making them a vital tool in the oil industry for precise and controlled fluid management.

4.4 Medical and Laboratory Use

Manual fluid pumps are essential in medical and laboratory settings for precise fluid control. They are used to power surgical tools, handle sterile solutions, and operate medical devices requiring consistent pressure. Their compact design and reliability make them ideal for clinical environments. In laboratories, these pumps assist in transferring chemicals and maintaining controlled pressures during experiments. Safety and portability are key advantages, ensuring they meet stringent medical standards while providing efficient fluid management in critical healthcare applications.

Design and Components

Manual fluid pumps feature a piston and cylinder assembly, check valves, and seals to ensure efficient fluid transfer. The lever and connecting rod provide mechanical advantage, while pressure gauges monitor output.

5.1 Piston and Cylinder Assembly

The piston and cylinder assembly is the heart of manual fluid pumps, enabling fluid displacement. As the piston moves up and down within the cylinder, it creates suction and pressure, drawing fluid in and forcing it out. This mechanism is crucial for transferring liquids efficiently. The assembly is typically constructed from durable materials to withstand repeated use and maintain sealing integrity, ensuring reliable operation across various applications. Proper alignment and lubrication are essential for optimal performance.

5.2 Valves and Seals

Valves and seals are critical components in manual fluid pumps, ensuring efficient fluid transfer. Check valves control the flow direction, allowing fluid to enter and exit without backflow. Seals prevent leakage between moving parts, maintaining pressure and efficiency. Durable materials like rubber or metal are used for longevity. Proper valve operation and sealing are essential for consistent performance, minimizing maintenance and ensuring reliable fluid handling in various applications. These components work together to optimize pump functionality and prevent fluid loss.

5.3 Lever and Connecting Rod Mechanism

The lever and connecting rod mechanism in manual fluid pumps converts manual effort into mechanical motion. As the lever is moved, it actuates the connecting rod, which transfers this motion to the piston or plunger. This motion creates suction and discharge strokes, enabling fluid transfer. The lever amplifies the applied force, making it easier to operate the pump. The connecting rod ensures precise transmission of motion, maintaining efficiency and consistency in fluid flow. This mechanism is essential for the pump’s functionality, providing a reliable means of manual fluid displacement.

5.4 Pressure Gauges and Monitoring

Pressure gauges in manual fluid pumps play a crucial role in monitoring the output pressure during operation. These gauges provide real-time feedback, ensuring the pump operates within safe limits. By displaying the pressure levels, users can adjust their effort to maintain optimal performance. Monitoring pressure helps prevent over-pressurization, which could lead to equipment damage or failure. This feature is particularly important in hydraulic and oil transfer applications, where precise pressure control is essential for efficiency and safety. Regular checking of pressure gauges ensures reliable and consistent fluid transfer.

Operation and Maintenance

Proper operation involves following step-by-step guides to ensure efficient fluid transfer, while regular maintenance, like cleaning and lubricating parts, extends the pump’s lifespan and reliability.

6.1 Step-by-Step Operating Guide

To operate a manual fluid pump, start by ensuring all connections are secure. Prime the pump by slowly moving the lever or handle to create suction. Once fluid flows steadily, maintain a consistent pumping rhythm to avoid airlocks. Monitor pressure gauges to prevent over-pressurization. Regularly inspect for leaks and wear. After use, drain the system and clean the pump to prevent contamination. Always follow the manufacturer’s guidelines for optimal performance and safety. Proper technique ensures efficiency and longevity of the pump.

6.2 Troubleshooting Common Issues

Common issues with manual fluid pumps include airlocks, leaks, and slow operation. Airlocks can be resolved by priming the pump or bleeding the system. Leaks often stem from worn seals or loose connections, which should be tightened or replaced. Slow operation may indicate worn piston rings or clogged valves, requiring disassembly and cleaning. Regular inspection of moving parts and lubrication can prevent such problems. Always refer to the manufacturer’s manual for specific troubleshooting steps to ensure effective resolution and maintain pump efficiency. Prompt action prevents further damage and extends the pump’s lifespan.

6.3 Regular Maintenance Tips

Regular maintenance is crucial for optimal performance of manual fluid pumps. Clean the pump and its components regularly to prevent dirt buildup. Lubricate moving parts to reduce friction and wear. Inspect seals and valves for damage or leaks and replace them if necessary. Check the piston and cylinder for alignment and wear. Store the pump in a dry, protected area when not in use. Follow the manufacturer’s guidelines for maintenance schedules to ensure longevity and reliability. Proper care extends the pump’s lifespan and maintains its efficiency.

Advantages of Manual Fluid Pumps

Manual fluid pumps offer simplicity, reliability, and portability, making them ideal for various applications. They are cost-effective, require minimal setup, and provide consistent performance without electricity.

7.1 Simplicity and Reliability

Manual fluid pumps are known for their straightforward design and dependable operation. With fewer moving parts compared to electric pumps, they minimize the risk of mechanical failure. Their simplicity ensures easy maintenance and repair, making them a reliable choice for various applications. The absence of complex electronics or motors reduces the likelihood of breakdowns, ensuring consistent performance in both routine and emergency situations. This reliability makes manual pumps a preferred option for scenarios where simplicity and durability are essential.

7.2 Portability and Versatility

Manual fluid pumps are highly portable, making them ideal for use in remote or mobile applications. Their compact design and lightweight materials allow easy transportation, ensuring versatility across various settings. These pumps can handle different types of fluids, from water to oils, and are adaptable to diverse operational needs. Whether in emergency situations, fieldwork, or everyday use, their portability and versatility make them a practical solution for fluid transfer. This adaptability enhances their utility in both industrial and domestic environments.

7.3 Cost-Effectiveness

Manual fluid pumps are a cost-effective solution for fluid transfer needs. They require minimal initial investment and have low maintenance costs compared to electric or hydraulic pumps. Their simple design reduces the need for complex repairs, making them a budget-friendly option. Additionally, they eliminate the expense of electricity, further lowering operational costs. This makes them an economical choice for small-scale or temporary applications, providing reliable performance without financial strain. Their affordability and durability ensure long-term savings, making them a practical investment.

Limitations of Manual Fluid Pumps

Manual fluid pumps have limitations, including low flow rates, requiring physical effort, and suitability only for low-pressure applications, making them less efficient for large-scale operations.

8.1 Limited Flow Rate

Manual fluid pumps often struggle with limited flow rates due to their reliance on human effort, making them less efficient for large-scale fluid transfer. Their design, which typically involves pistons, plungers, and check valves, allows for precise control but restricts the volume of fluid that can be moved in a given time. This makes them more suitable for small-scale applications, such as water supply systems or oil transfer in low-pressure environments, rather than industrial processes requiring high-volume output.

8.2 Physical Effort Required

Manual fluid pumps require significant physical effort, as they depend on human power to operate. The repetitive motion of levers, handles, or pedals demands consistent energy input, which can be tiring over time. This makes them less practical for applications requiring continuous operation or high volumes of fluid transfer. Despite their portability and simplicity, the physical strain limits their use to small-scale or intermittent tasks, where human intervention is feasible and manageable. This limitation underscores their suitability for specific, low-demand scenarios rather than heavy-duty operations.

8.3 Restricted to Low-Pressure Applications

Manual fluid pumps are typically designed for low-pressure environments, making them unsuitable for high-pressure industrial tasks. Their mechanical limits, such as piston strength and valve durability, restrict their use to applications where pressure demands are minimal. This constraint ensures they perform efficiently in scenarios like water supply systems or small-scale fluid transfer, but they are not ideal for heavy-duty operations requiring high pressure. Their simplicity and cost-effectiveness make them a practical choice only where pressure requirements are modest and manageable within their design capabilities.

Safety Considerations

Proper handling and usage of manual fluid pumps are crucial to prevent accidents. Always follow manufacturer guidelines and ensure the system is pressure-tested before operation.

9.1 Proper Handling and Usage

Proper handling and usage of manual fluid pumps are essential to ensure safe and efficient operation. Always follow the manufacturer’s guidelines and inspect the pump for any damage before use. Ensure all components, such as check valves and pistons, are functioning correctly. Use the correct technique to operate the pump, avoiding excessive force that could lead to mechanical failure. Monitor the pressure gauge to prevent over-pressurization, and wear protective gear like gloves and safety glasses. Regular maintenance and proper storage are also critical to extend the pump’s lifespan and reliability.

9.2 Pressure Management

Proper pressure management is crucial when operating manual fluid pumps to prevent over-pressurization and potential damage. Always monitor the pressure gauge to ensure it stays within the recommended range. Excessive pressure can lead to mechanical failure or fluid leakage. Use the pump’s built-in relief mechanisms to safely release pressure when necessary. Understanding principles like Pascal’s Law, which relates pressure distribution, can help optimize pump performance. Regularly check for worn or damaged seals and valves, as they can compromise pressure control. Maintain a steady, controlled motion when operating the pump to avoid pressure spikes.

9.3 Environmental and Safety Precautions

When using manual fluid pumps, adhere to environmental and safety guidelines to minimize risks. Always wear protective gear, including gloves and goggles, to prevent exposure to harmful fluids. Ensure the pump is used in a well-ventilated area to avoid inhaling fumes. Properly dispose of any spilled fluids to prevent environmental contamination. Follow manufacturer instructions for handling hazardous materials. Regularly inspect the pump for leaks or damage to maintain safe operation. Keep the pump away from open flames or sparks to reduce fire hazards.

Conclusion

Manual fluid pumps are essential tools offering simplicity, reliability, and cost-effectiveness across various industries. Their versatility in applications, from water supply to hydraulic systems, makes them indispensable. While they require physical effort and have limitations in flow rate and pressure, proper maintenance and safety precautions ensure efficient operation. As technology advances, manual pumps remain a practical solution for low-pressure and portable fluid transfer needs, providing a sustainable option for both industrial and everyday use.